We may receive a commission when you use our affiliate links. However, this does not impact our recommendations.
Learn a straightforward approach to creating stunning details.
I come to the field of woodworking with an unfair advantage. I grew up in a family jewelry business and did a lot of detail work from an early age. So it’s no surprise that when I started making furniture I was drawn to the detailed work of marquetry and inlay. Even a simple inlay can make an otherwise plain piece of furniture more appealing. It can also serve as the perfect final touch on a near-masterpiece.
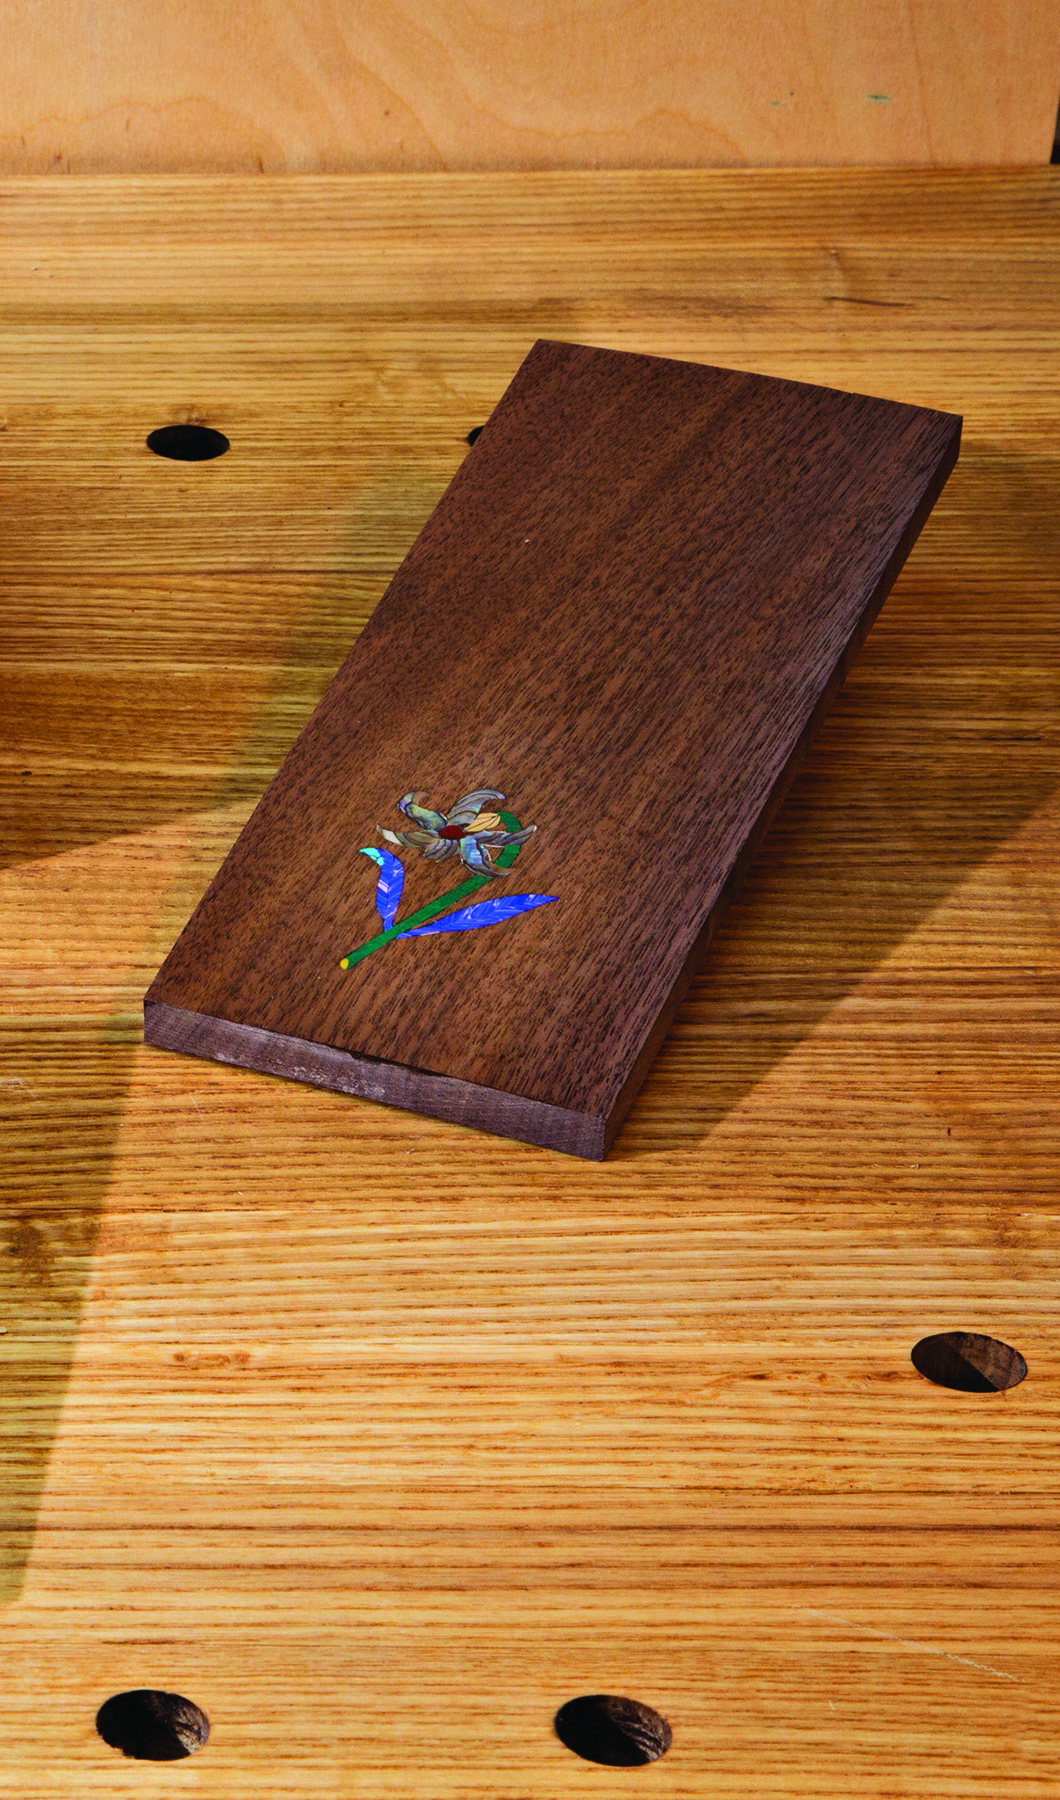
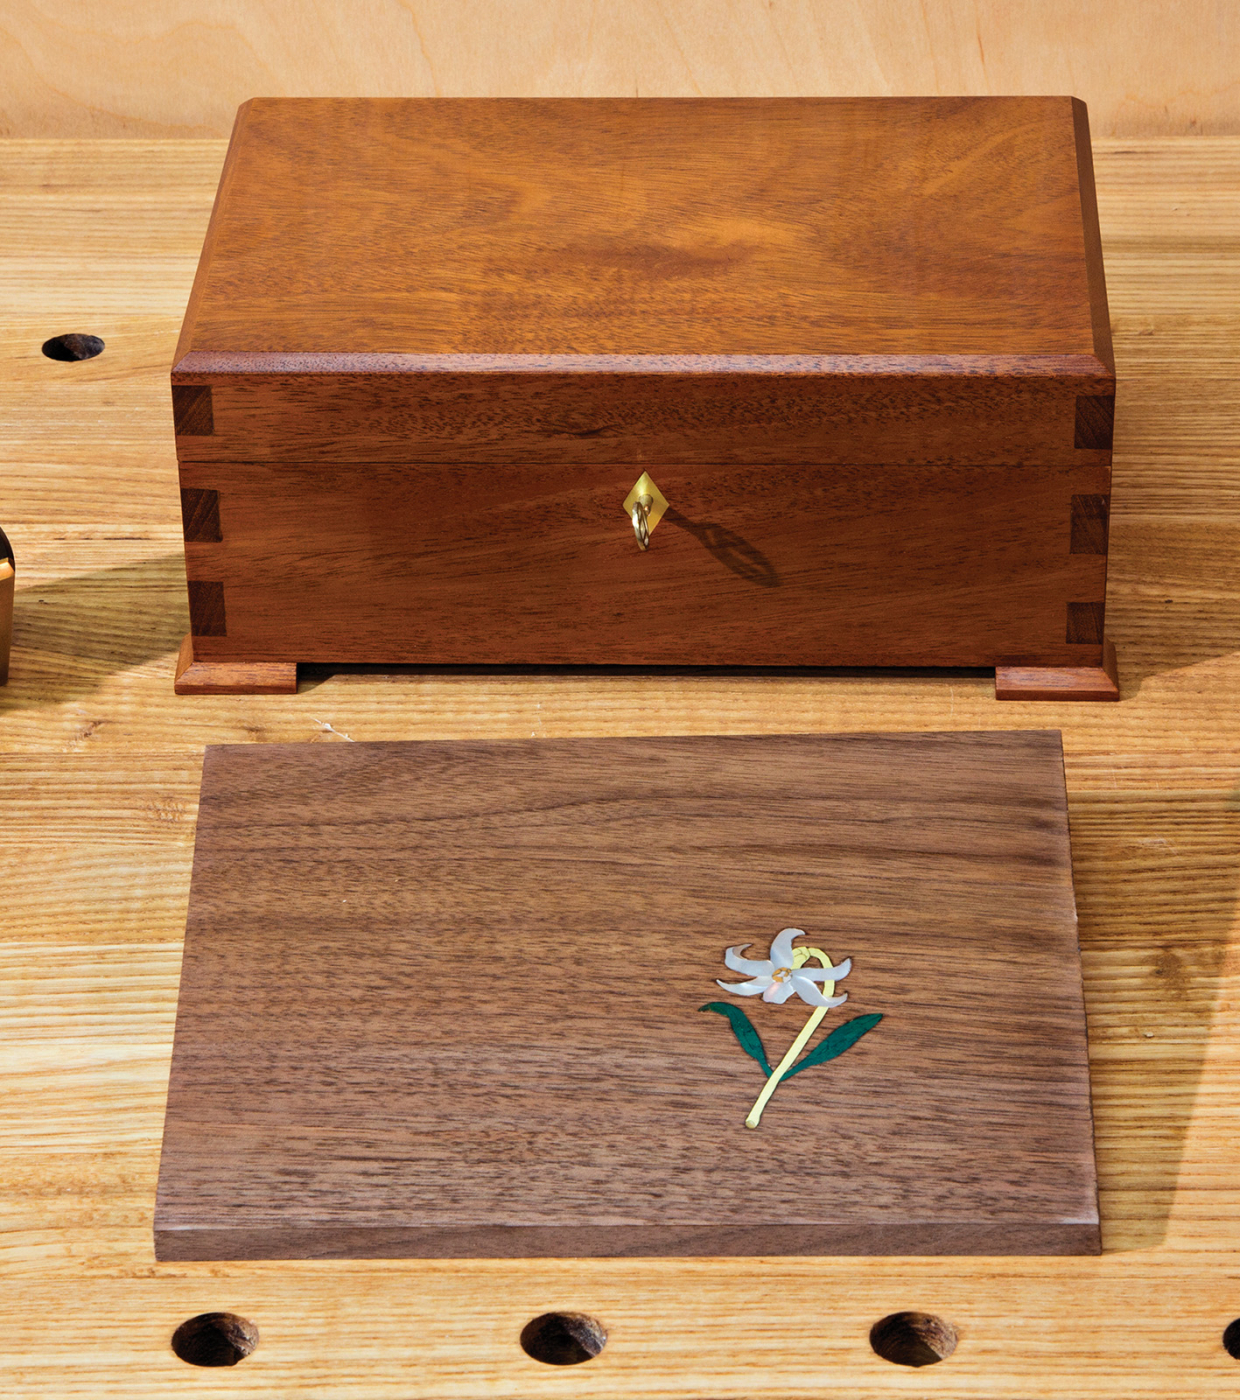
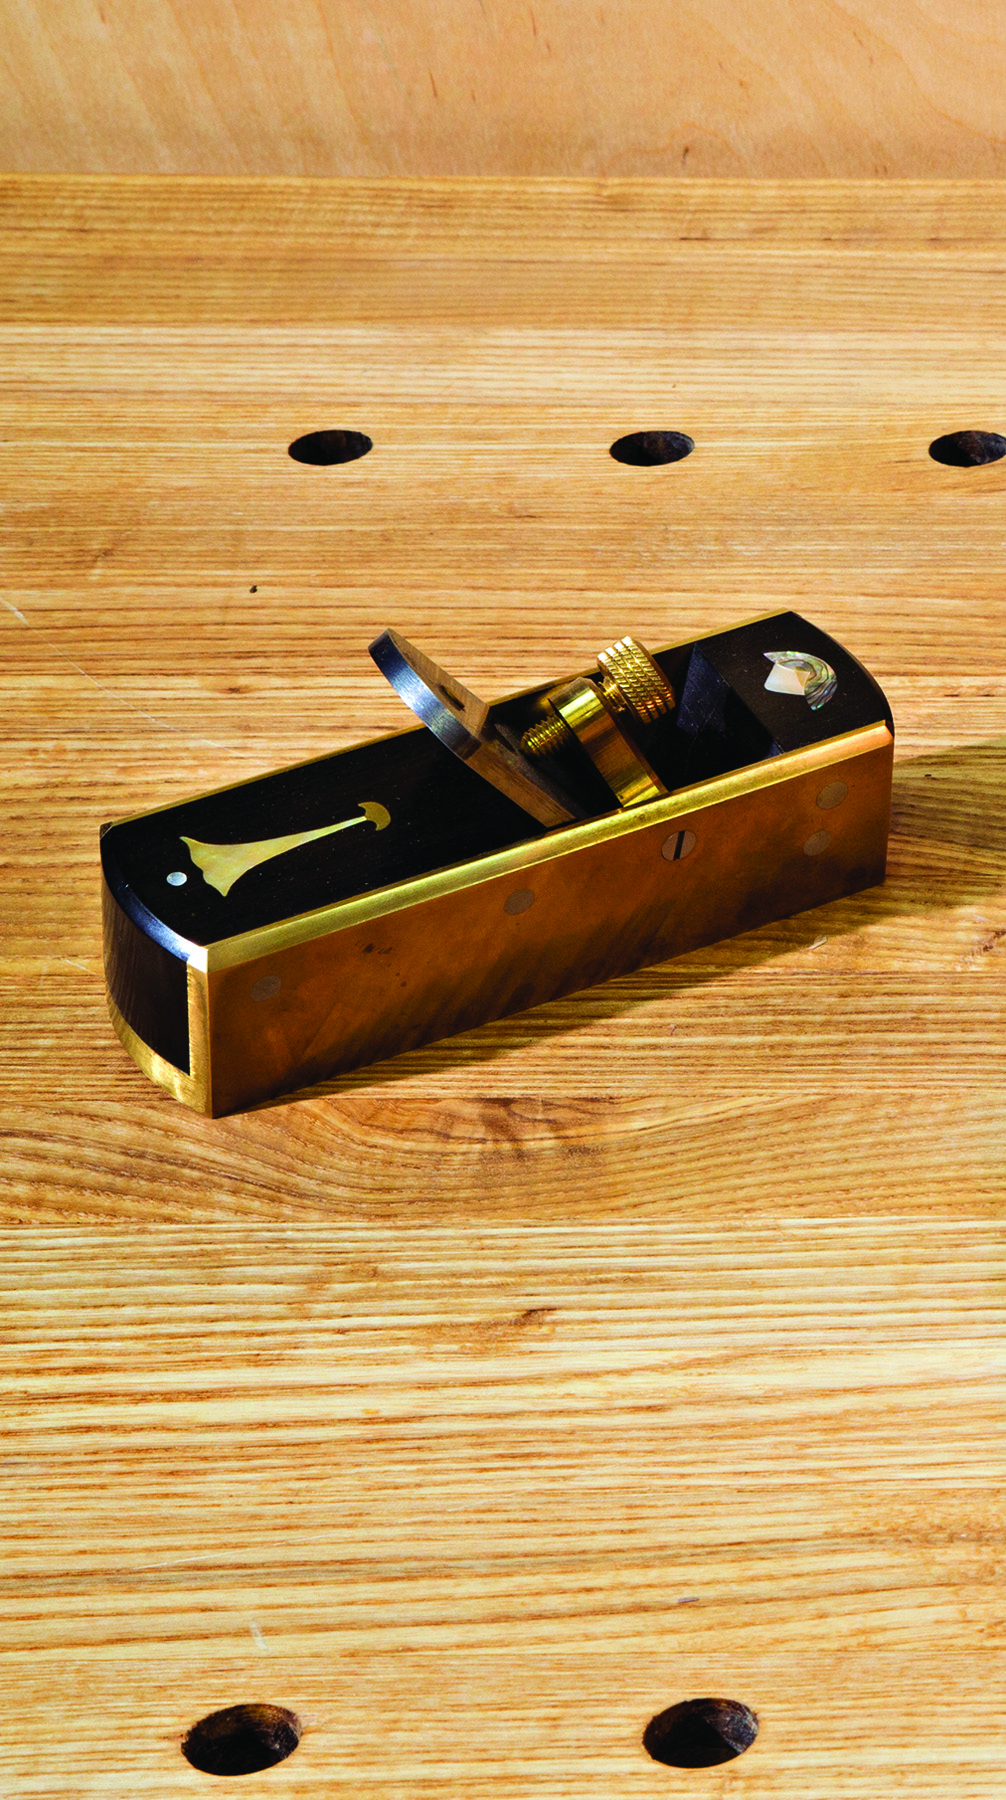
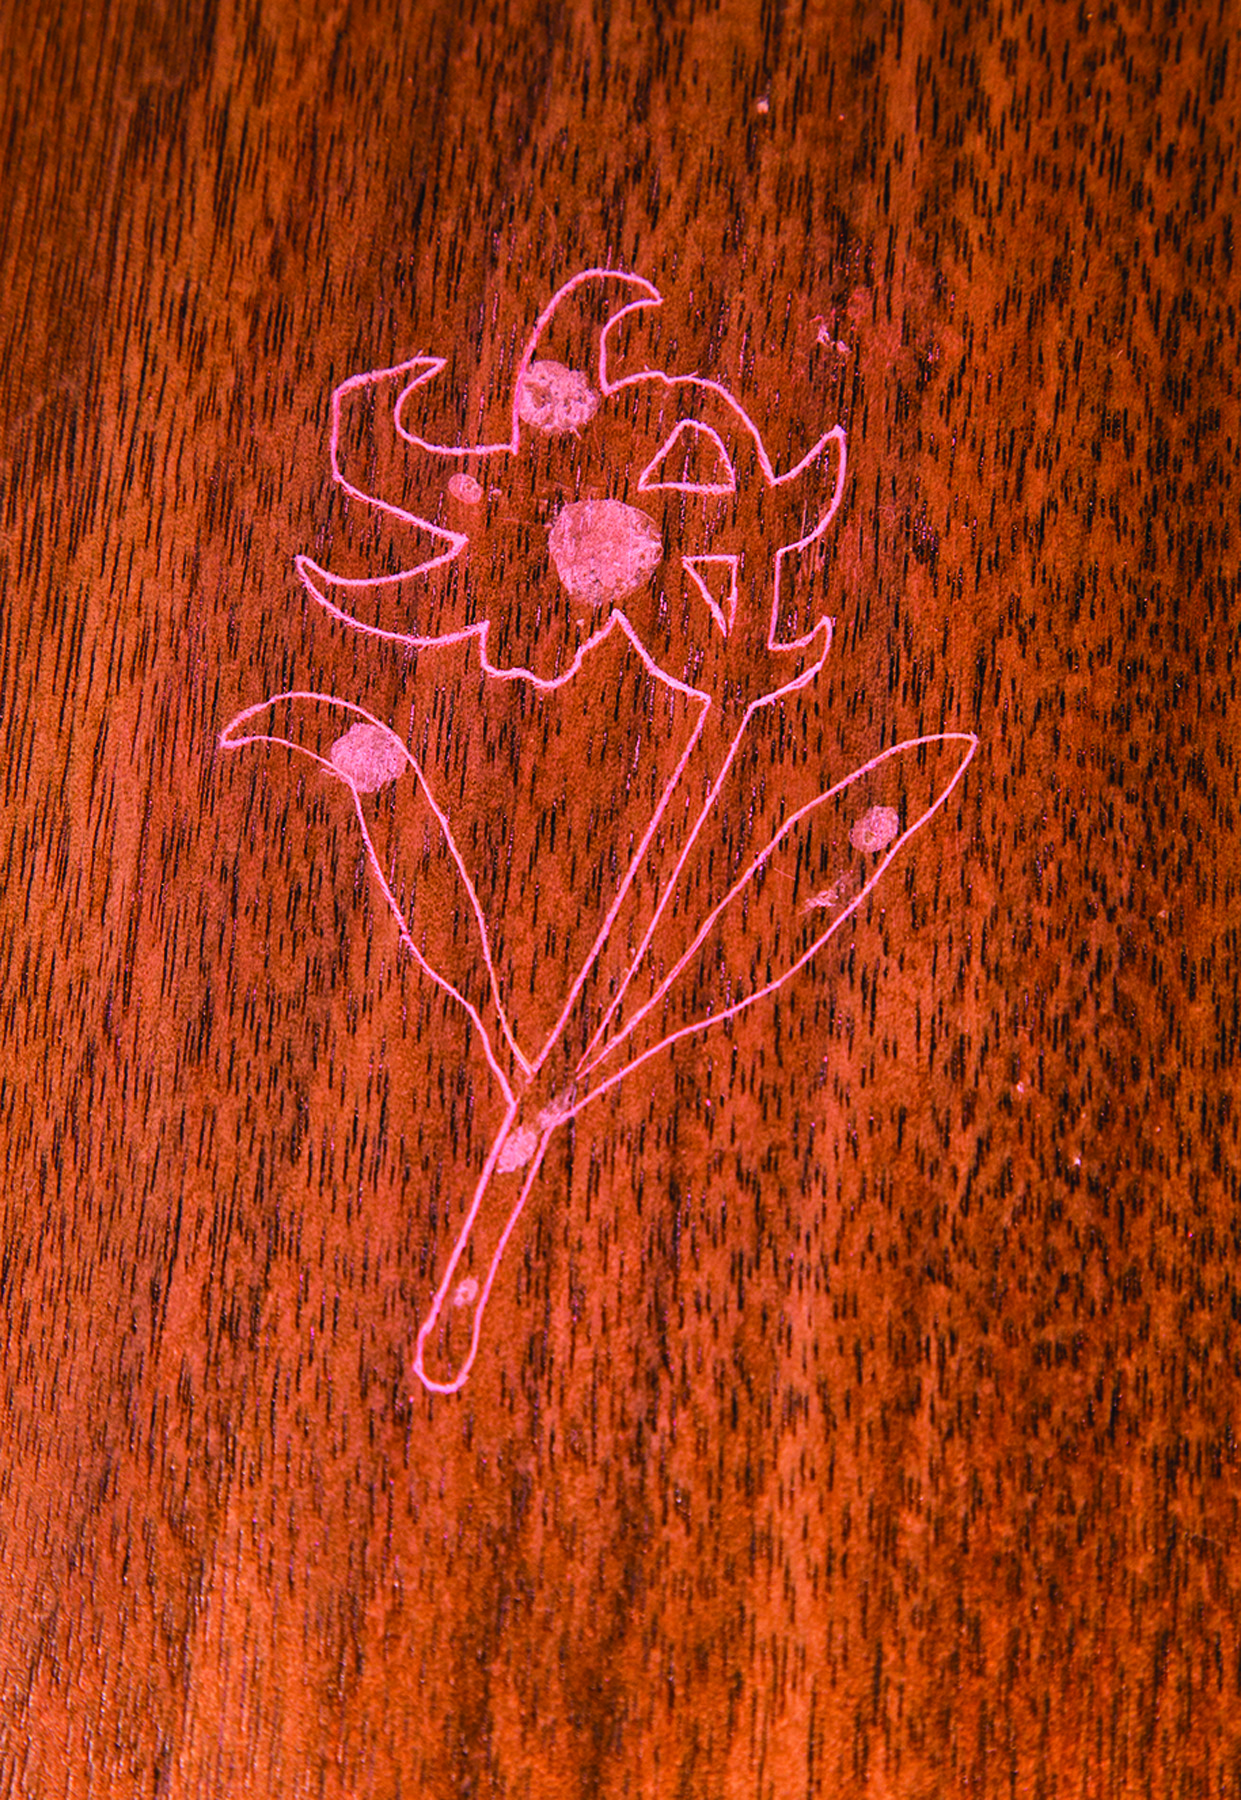
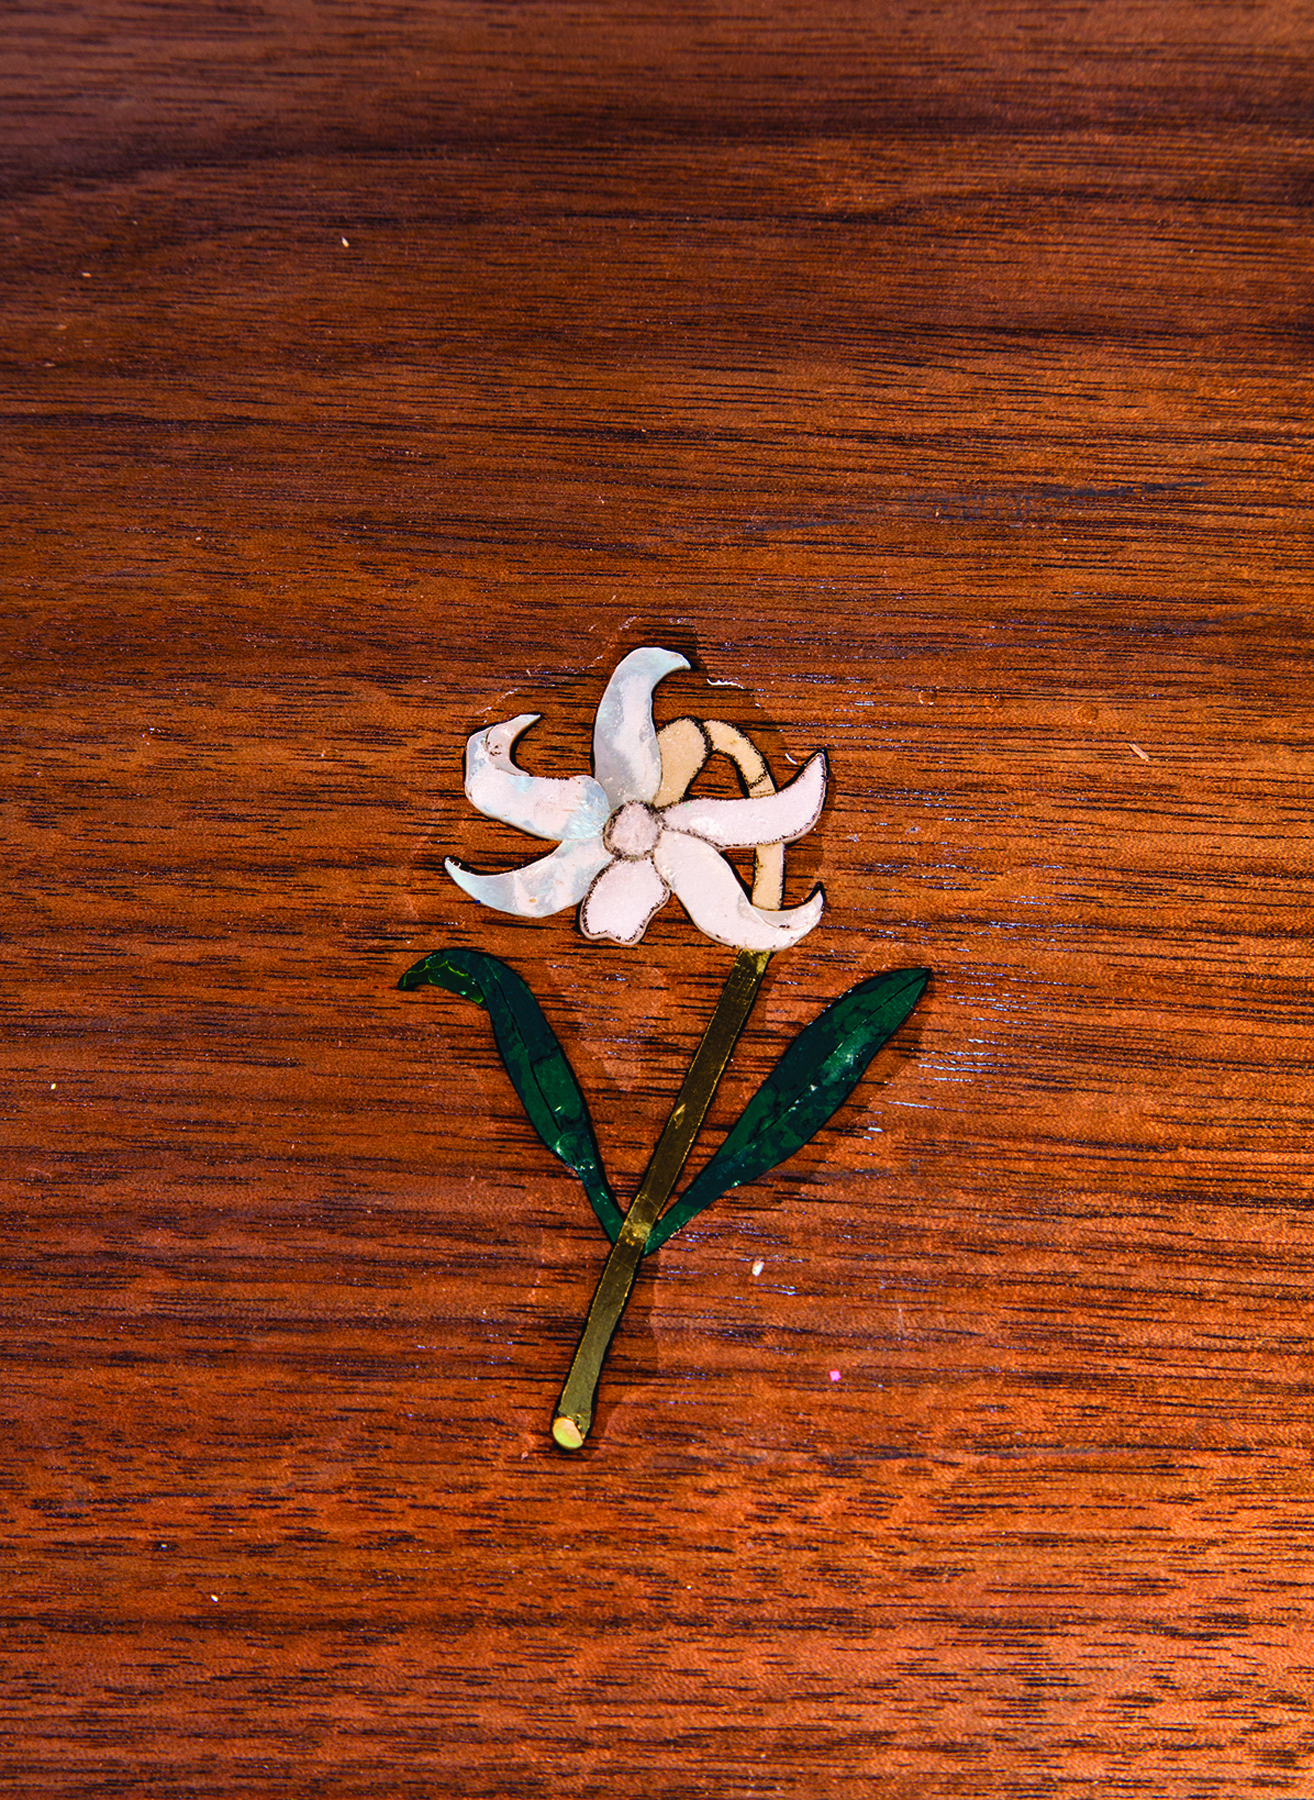
A pair of flower inlays – one in abalone and reconstituted stone, the other (below) in mother-of-pearl, brass and reconstituted stone – and a smoothing plane with white, pink and gold mother-of-pearl and brass inlays.
Using a combination of materials – from wood to more exotic materials such as shell, stone and metal – endless effects can be obtained. The work can be done with tools found in most shops and the results are beautiful.
I’ll guide you through the straightforward process of installing a shell inlay. I’ll break down the steps required to achieve great results, even if you’ve never tried your hand at inlay before. For the most part, metal and stone are applied using the same methods; I’ll explain the few differences as we go. You will be surprised by how much effect you get with the addition of inlay to your projects.
Design Made Easy
There is no need to be a great artist to produce pleasing inlays. Books and web resources will give you plenty of design ideas. While you are learning you should choose a design with crisp lines and pieces that are not too small; simple is better.
The inlay should also be sized to fit the scale of the piece. If it is placed high or low on a larger piece, it can be positioned in order to be more easily seen. Start by drawing your design on tracing paper. Make a copy and trace it one or two more times to refine the design.
As you will learn, there are several opportunities throughout the process to improve the look of an inlay or save a piece that chips or breaks. Until the cavity is routed in the wood, the design of the inlay can be changed.
Start with the Design
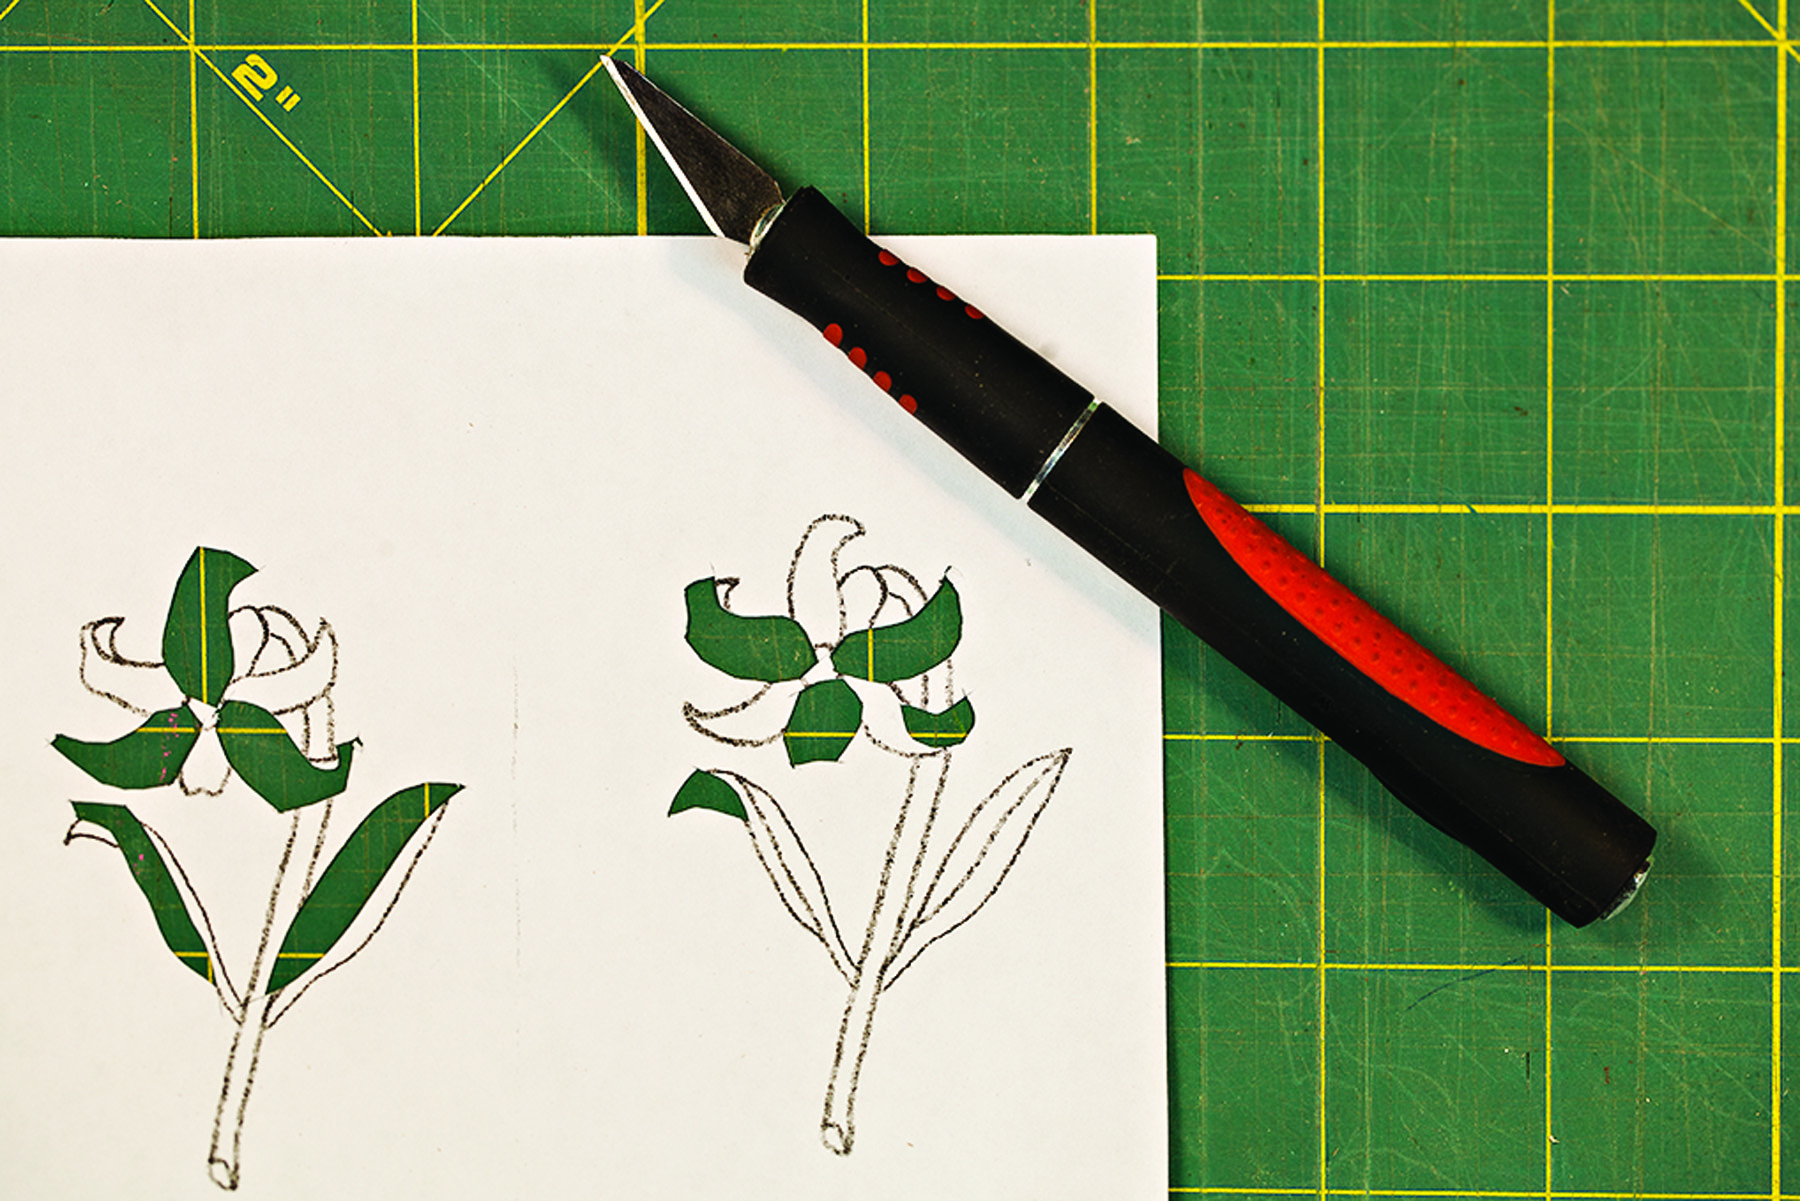
Make multiples. Whether your own or a borrowed design, having multiple copies makes it easier to cut out the smaller inlay sections.
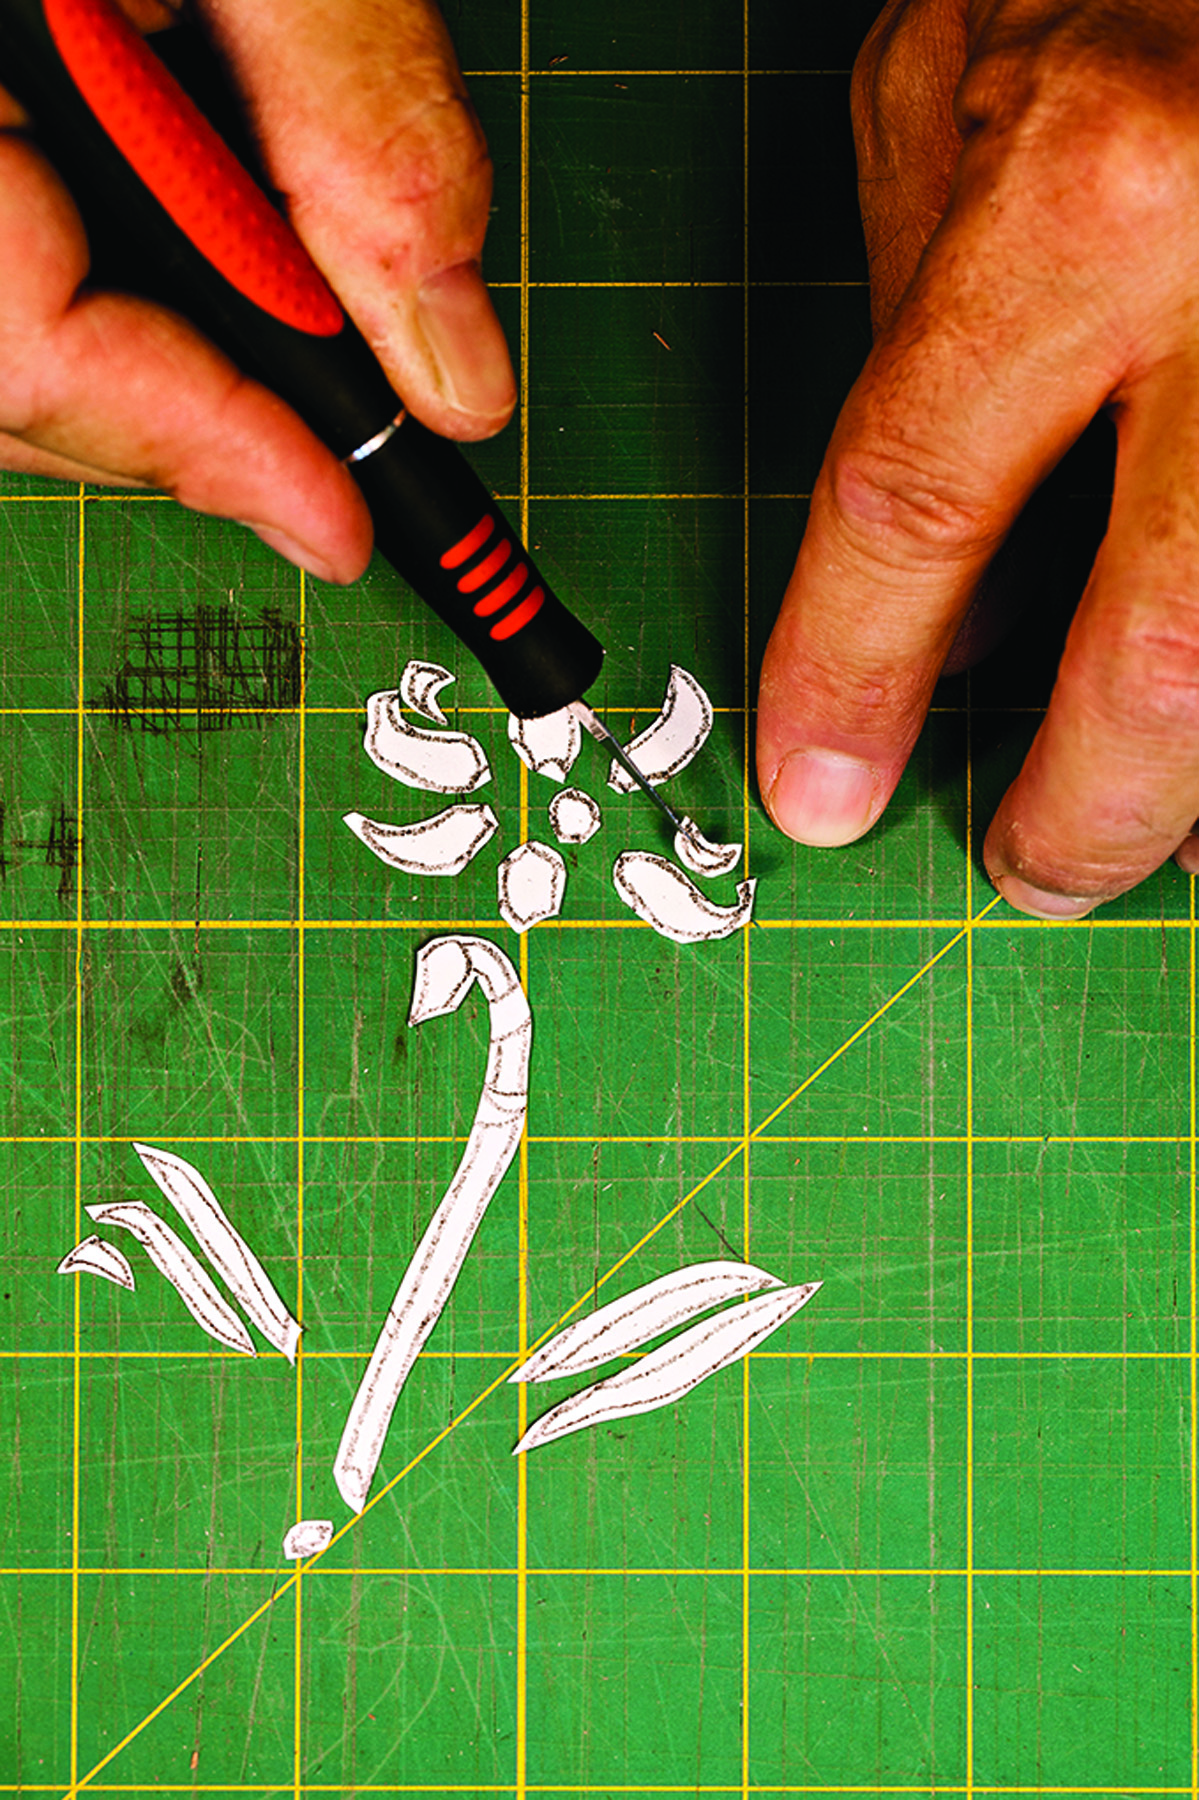
Take inventory. Arrange the pieces loosely to verify that you have them all and that they appear as you envisioned.
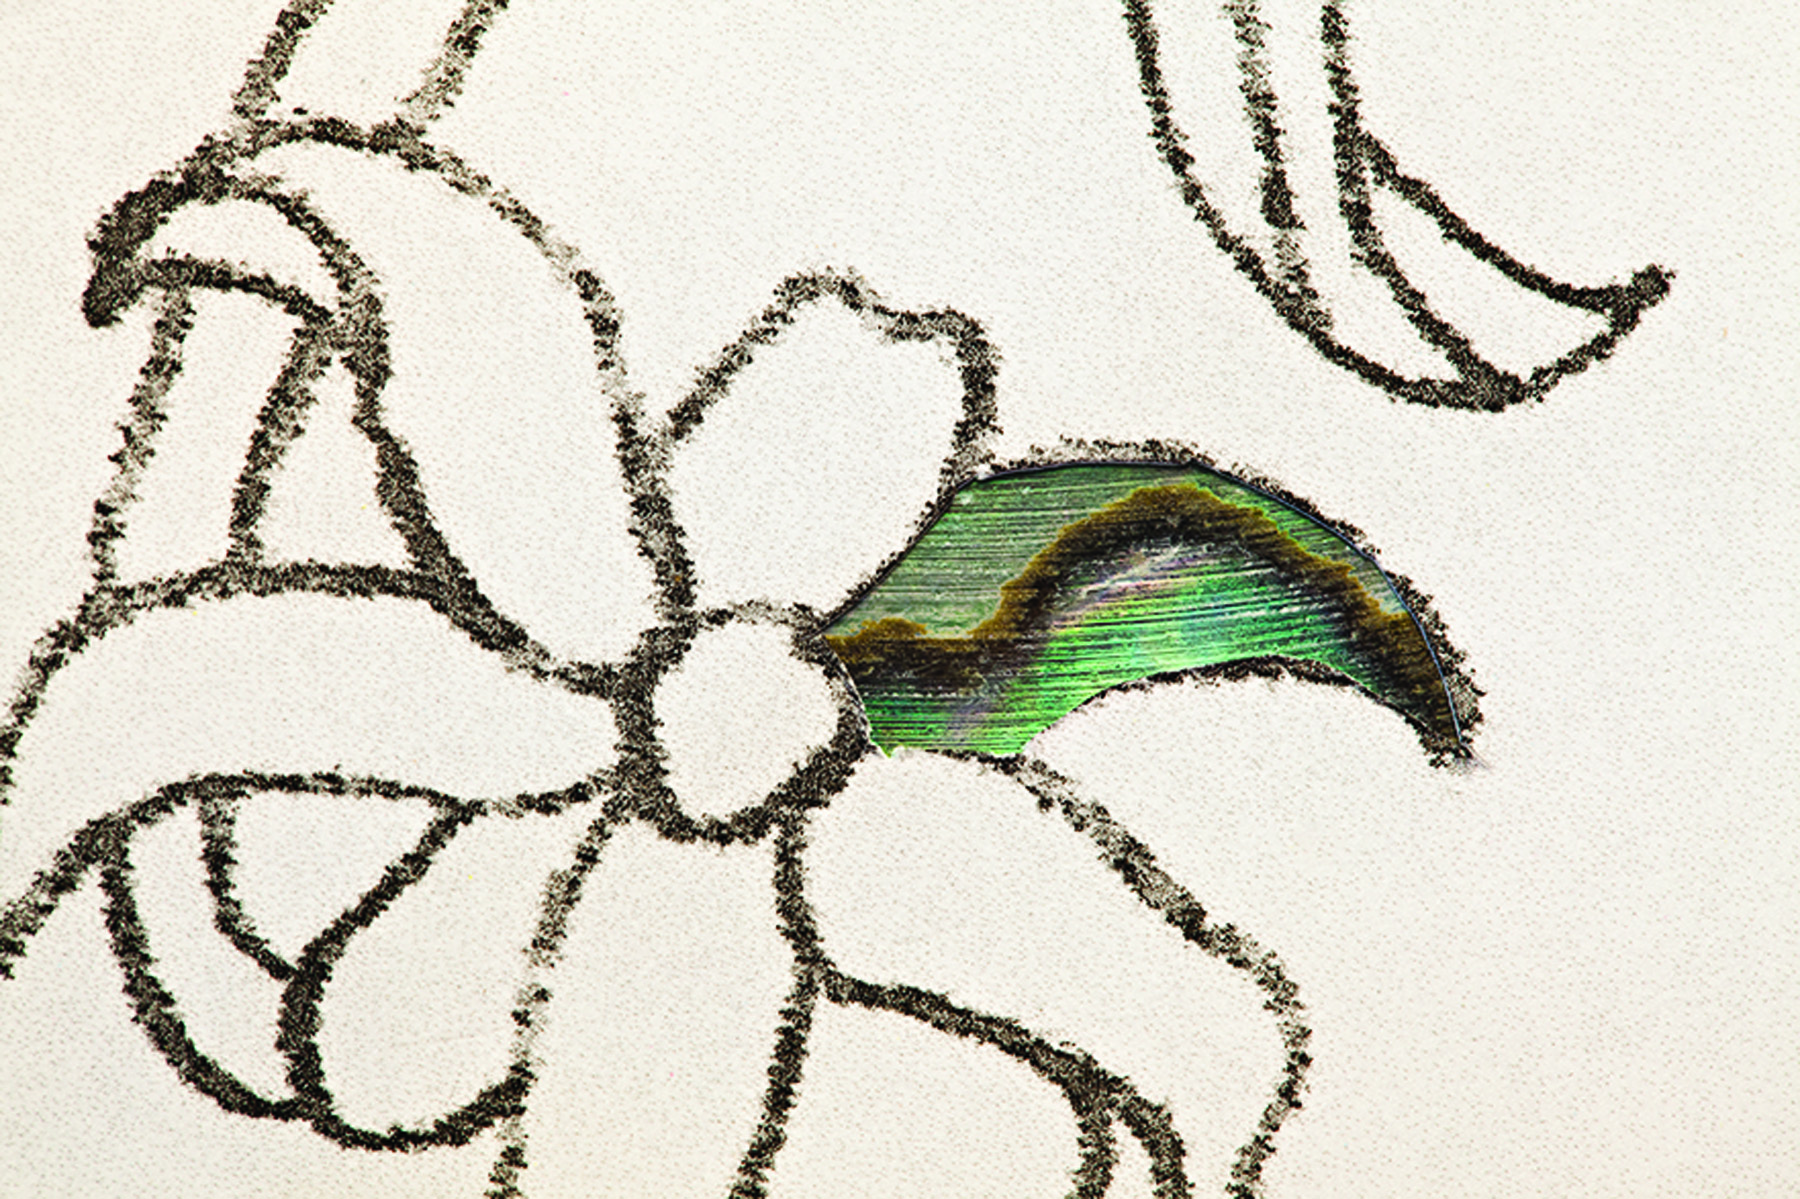
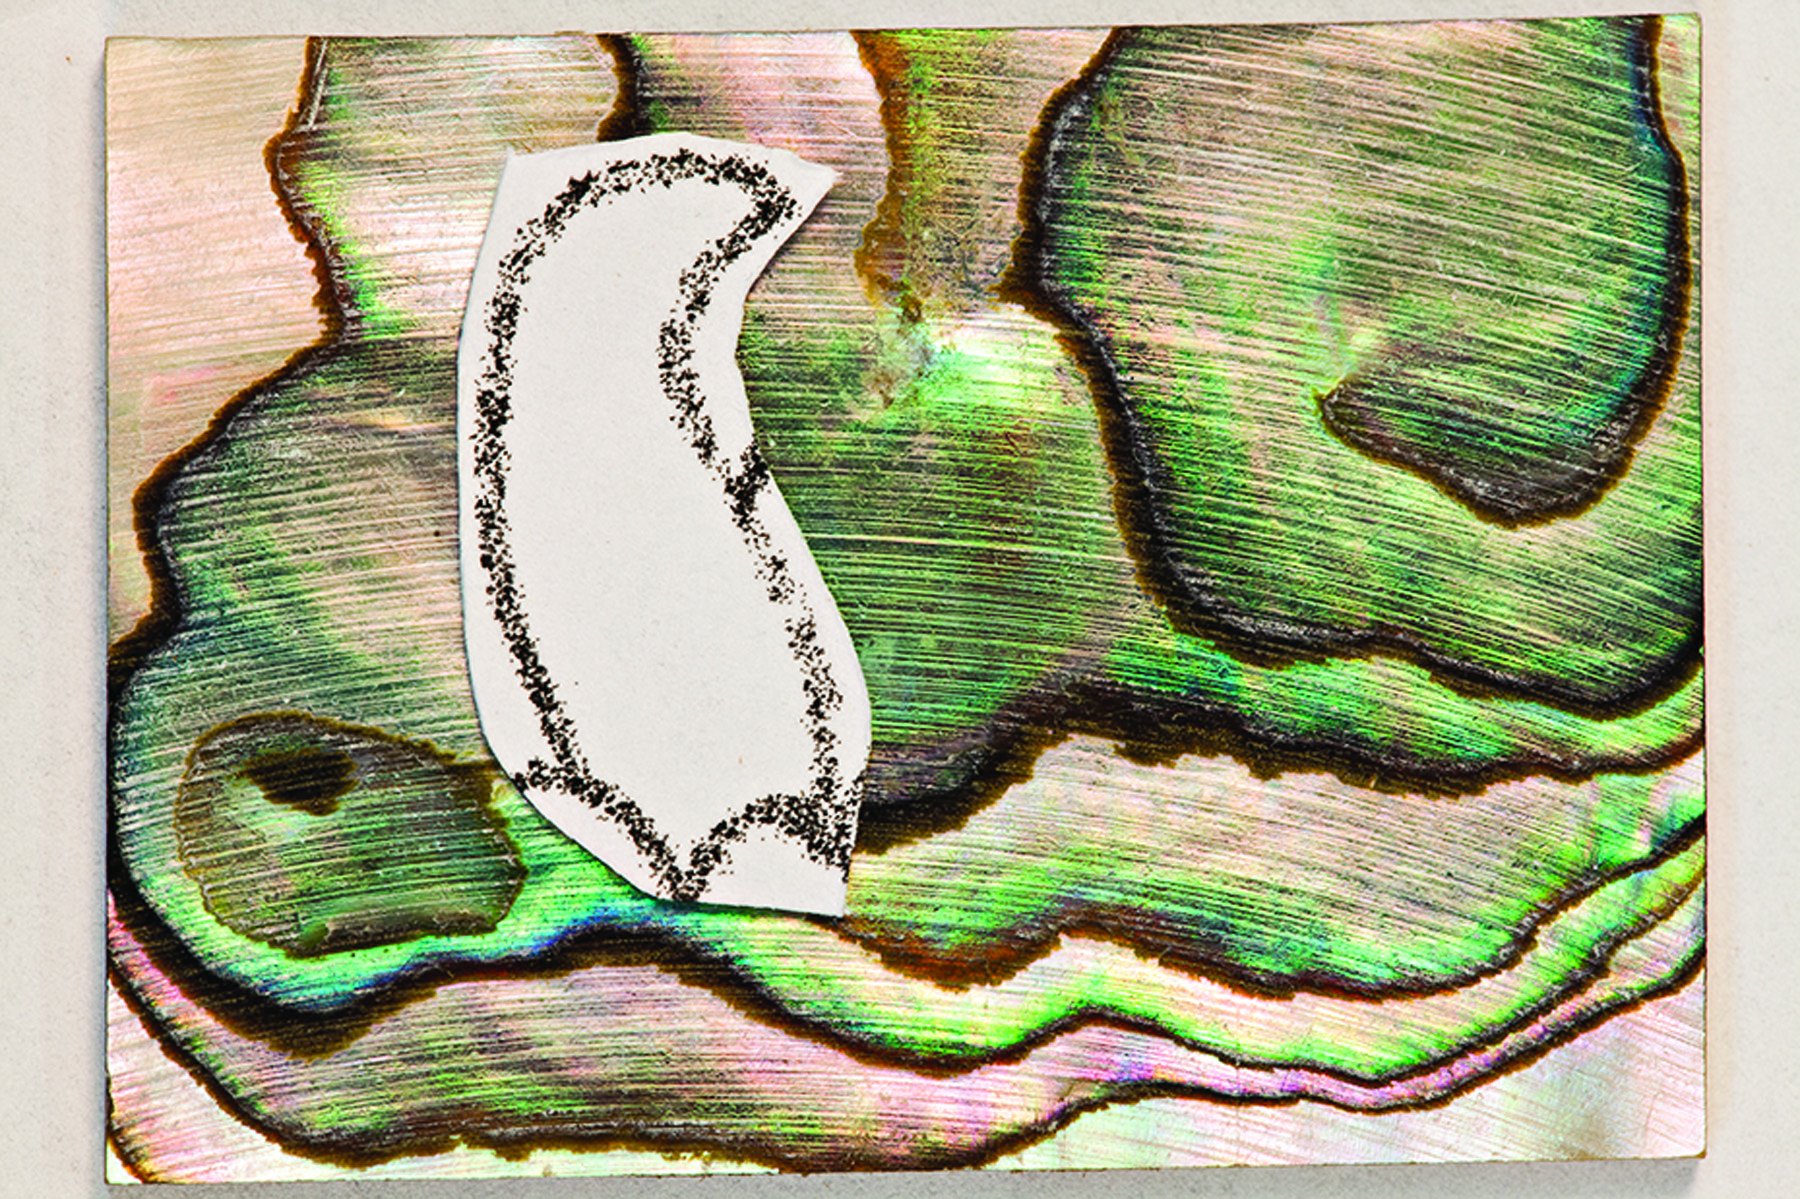
Cut a window. Cut right on the line to create a viewing window. Then lay the window over the shell and adjust the position to your liking. Here, choosing the right section of stone creates an instant vein for the leaf.
Glue it down. Take the actual pattern removed from the design (shown above) and attach it to the shell using CA glue.
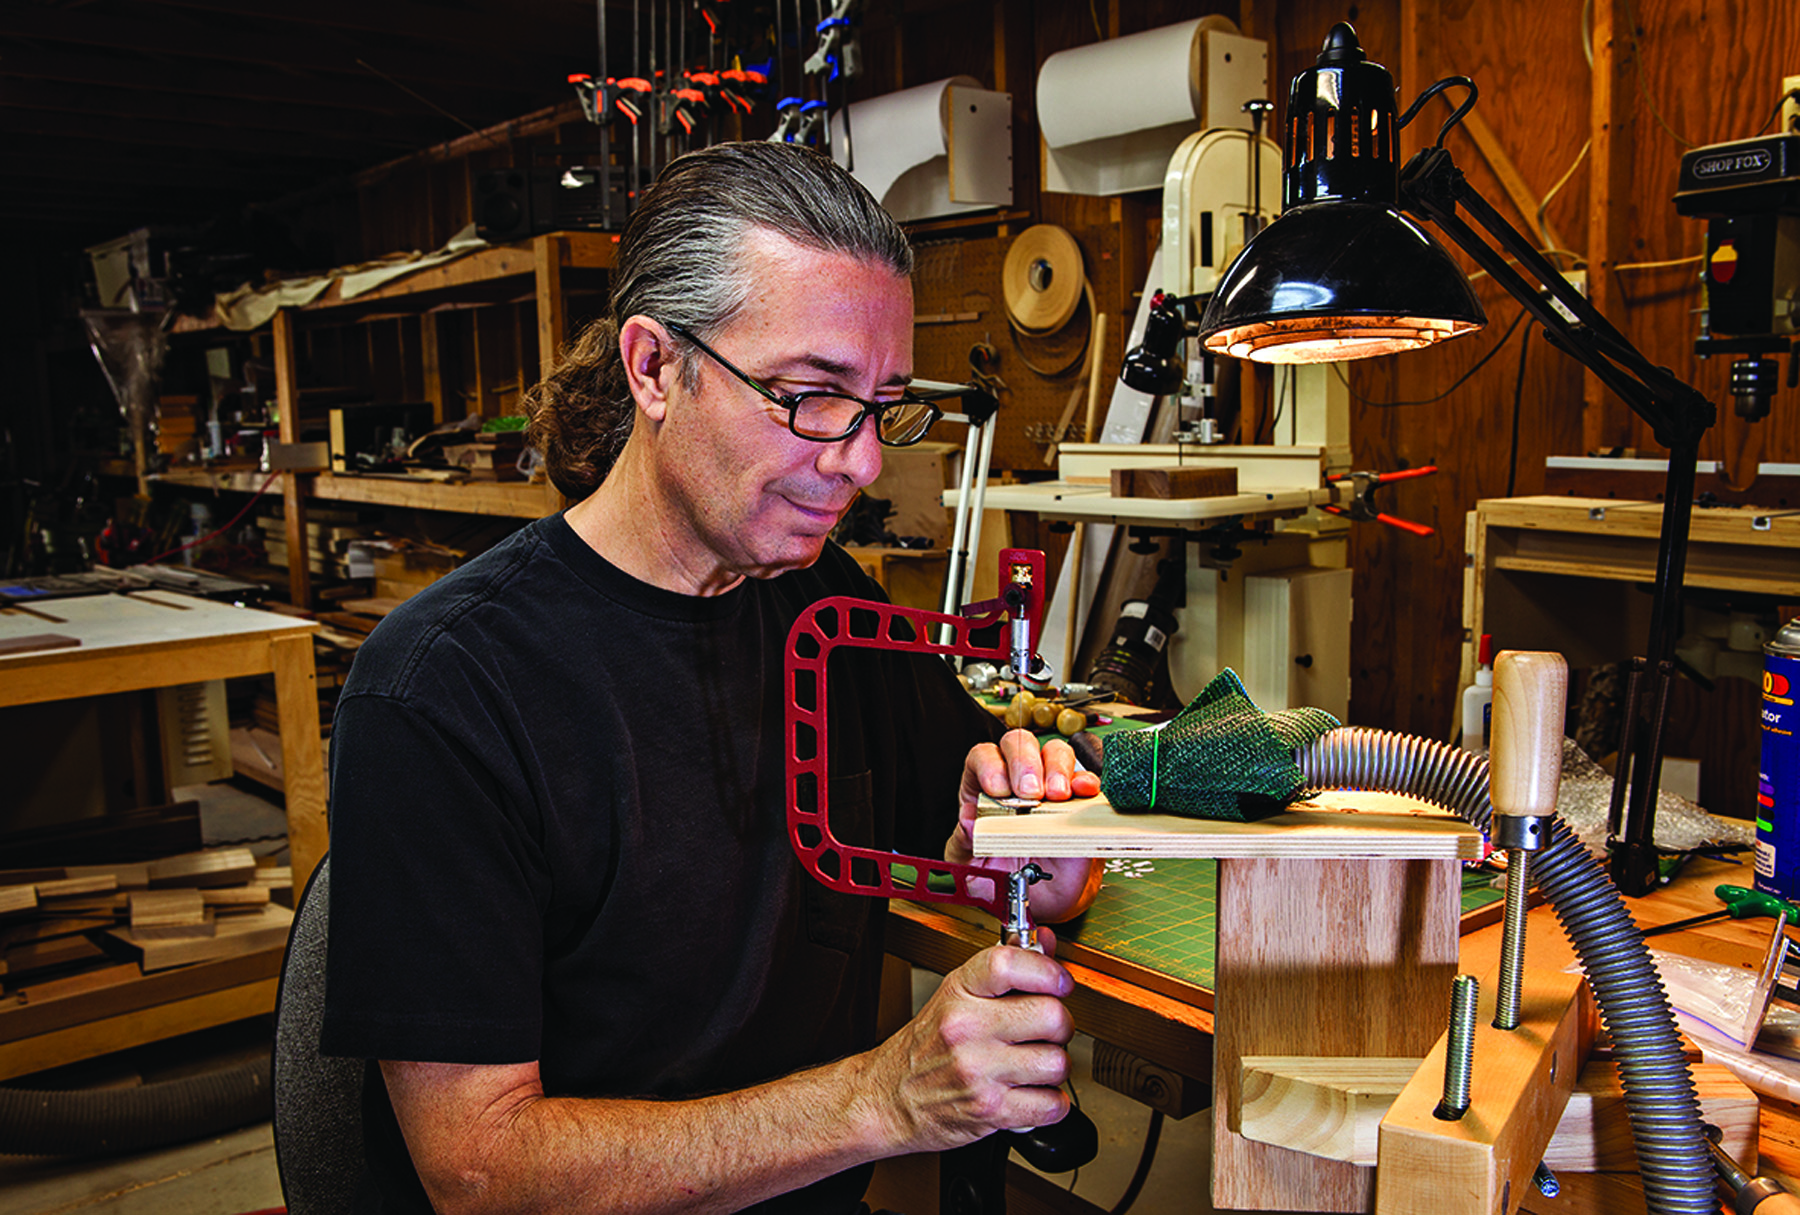
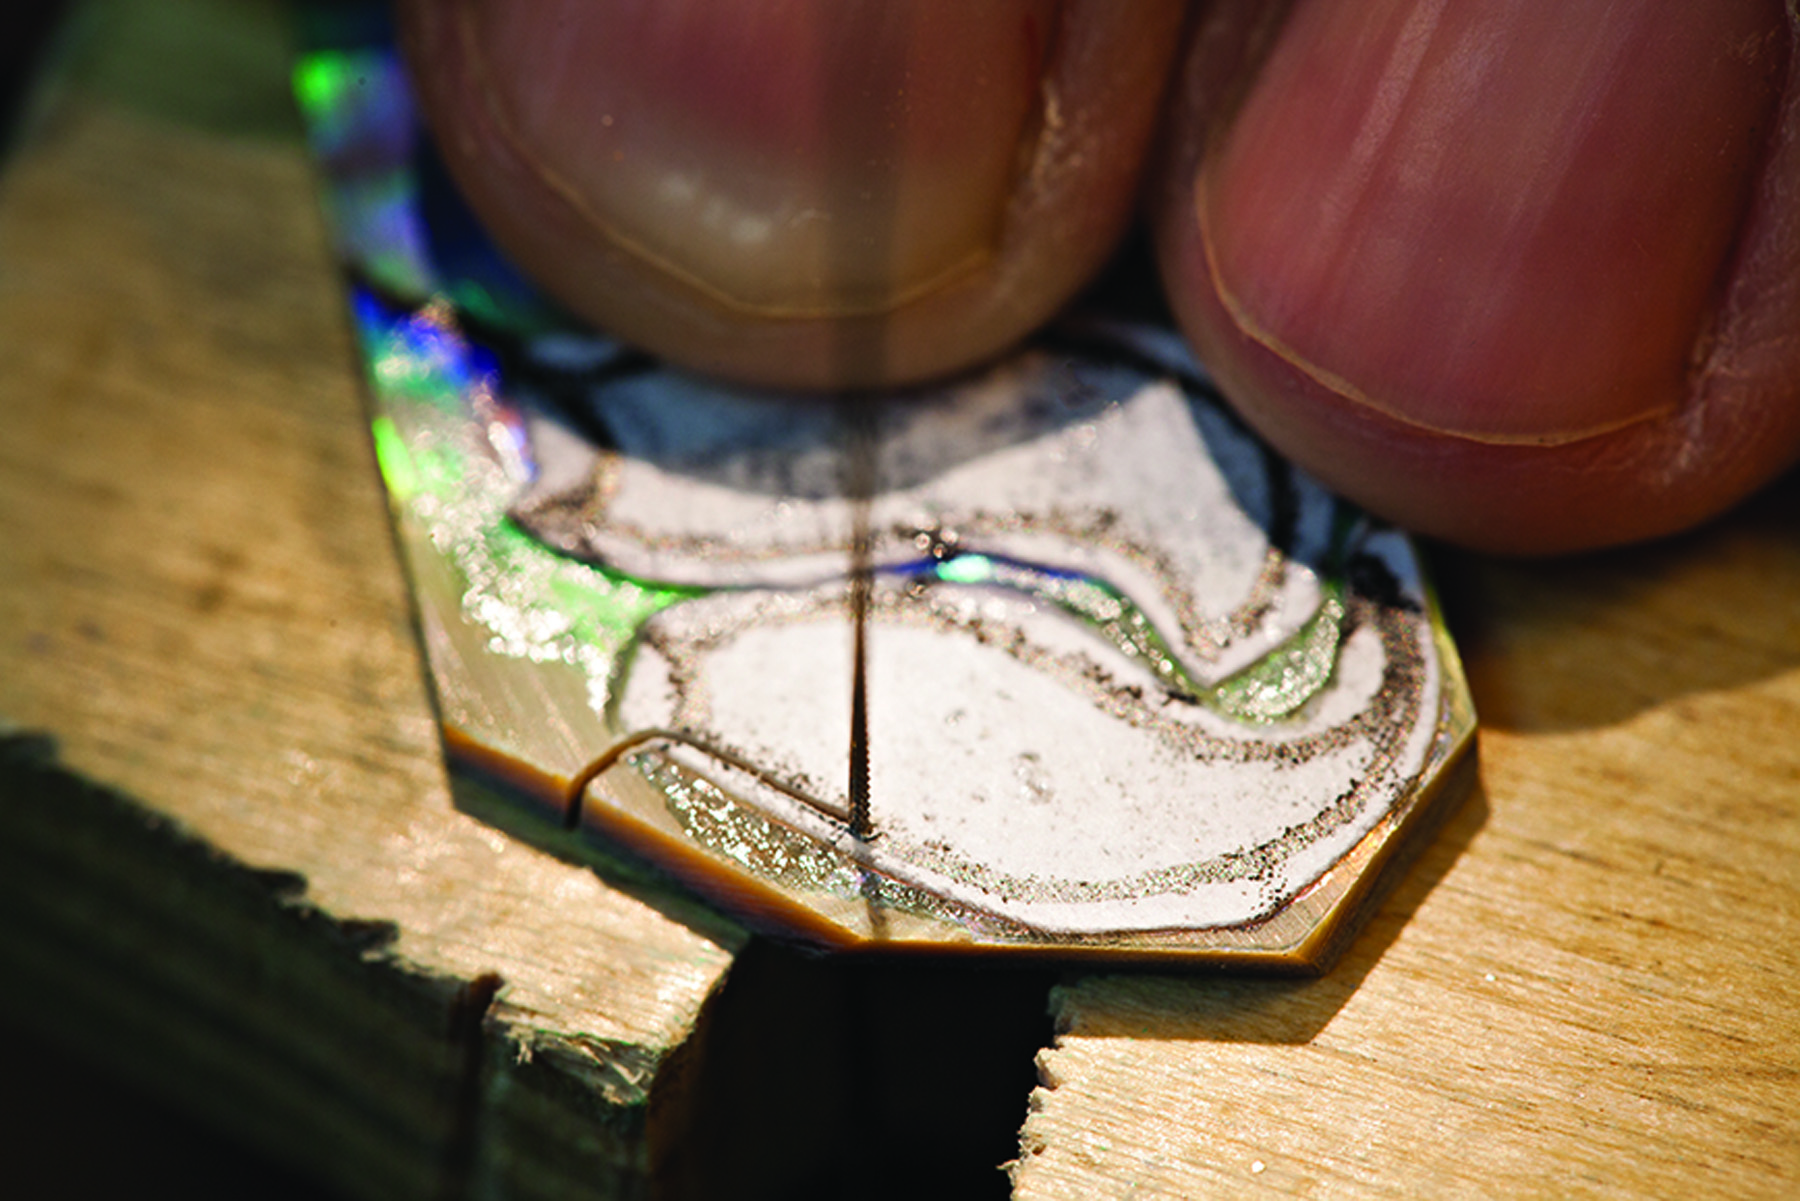
Posture is everything. Cut out the stone using a fretsaw held at about shoulder height. Use a light grip and work to keep the blade vertical. While most patterns are forgiving, aim for splitting the line as you cut.
Pattern
Once you’re happy with the design, make at least four copies of it. Cut the individual pieces outside the lines so you can see the entire piece. I cut on a self-healing cutting mat available at fabric stores. To attach the pieces of paper to shell or stone, use medium-viscosity cyanoacrylate (CA) glue. For metals, use epoxy. The heat from sawing will loosen the paper from metal if you use CA glue. For more on glues, see “Choosing Adhesives for Inlay Work” further down.
There is no need to try to plan a design around material. When you have finished the drawing, suspend your notion of what things should look like and survey the available materials.
To visualize how shell patterns will look after cutting, you can take a copy of the pattern and cut out a window of the finished piece in the design and move it around on the material. This can help you decide which section of a piece of patterned material to use.
Choose Your Materials
As long as you can shape, flatten and polish it, you can make any material part of an inlay design. Wood is the easiest to work with, and it can be combined with other materials or used alone.
The most popular inlay material is shell. The wide range of types and colors of shell allow the artist to use it for an entire design.
The art of inlaying stone, called pietra dure, it is both difficult and time-consuming. I find it much easier to use reconstituted stone, and many types are available.
Metals can be used for inlay as well. Gold and silver work, but for furniture there are less expensive alternatives. Brass and aluminum polish well.
The average thickness for inlay material is 1⁄16” (0.0625″). Shell and reconstituted stone suppliers sell this and other thicknesses. Just be sure you are ordering the correct material.
Choosing Adhesives for Inlay Work
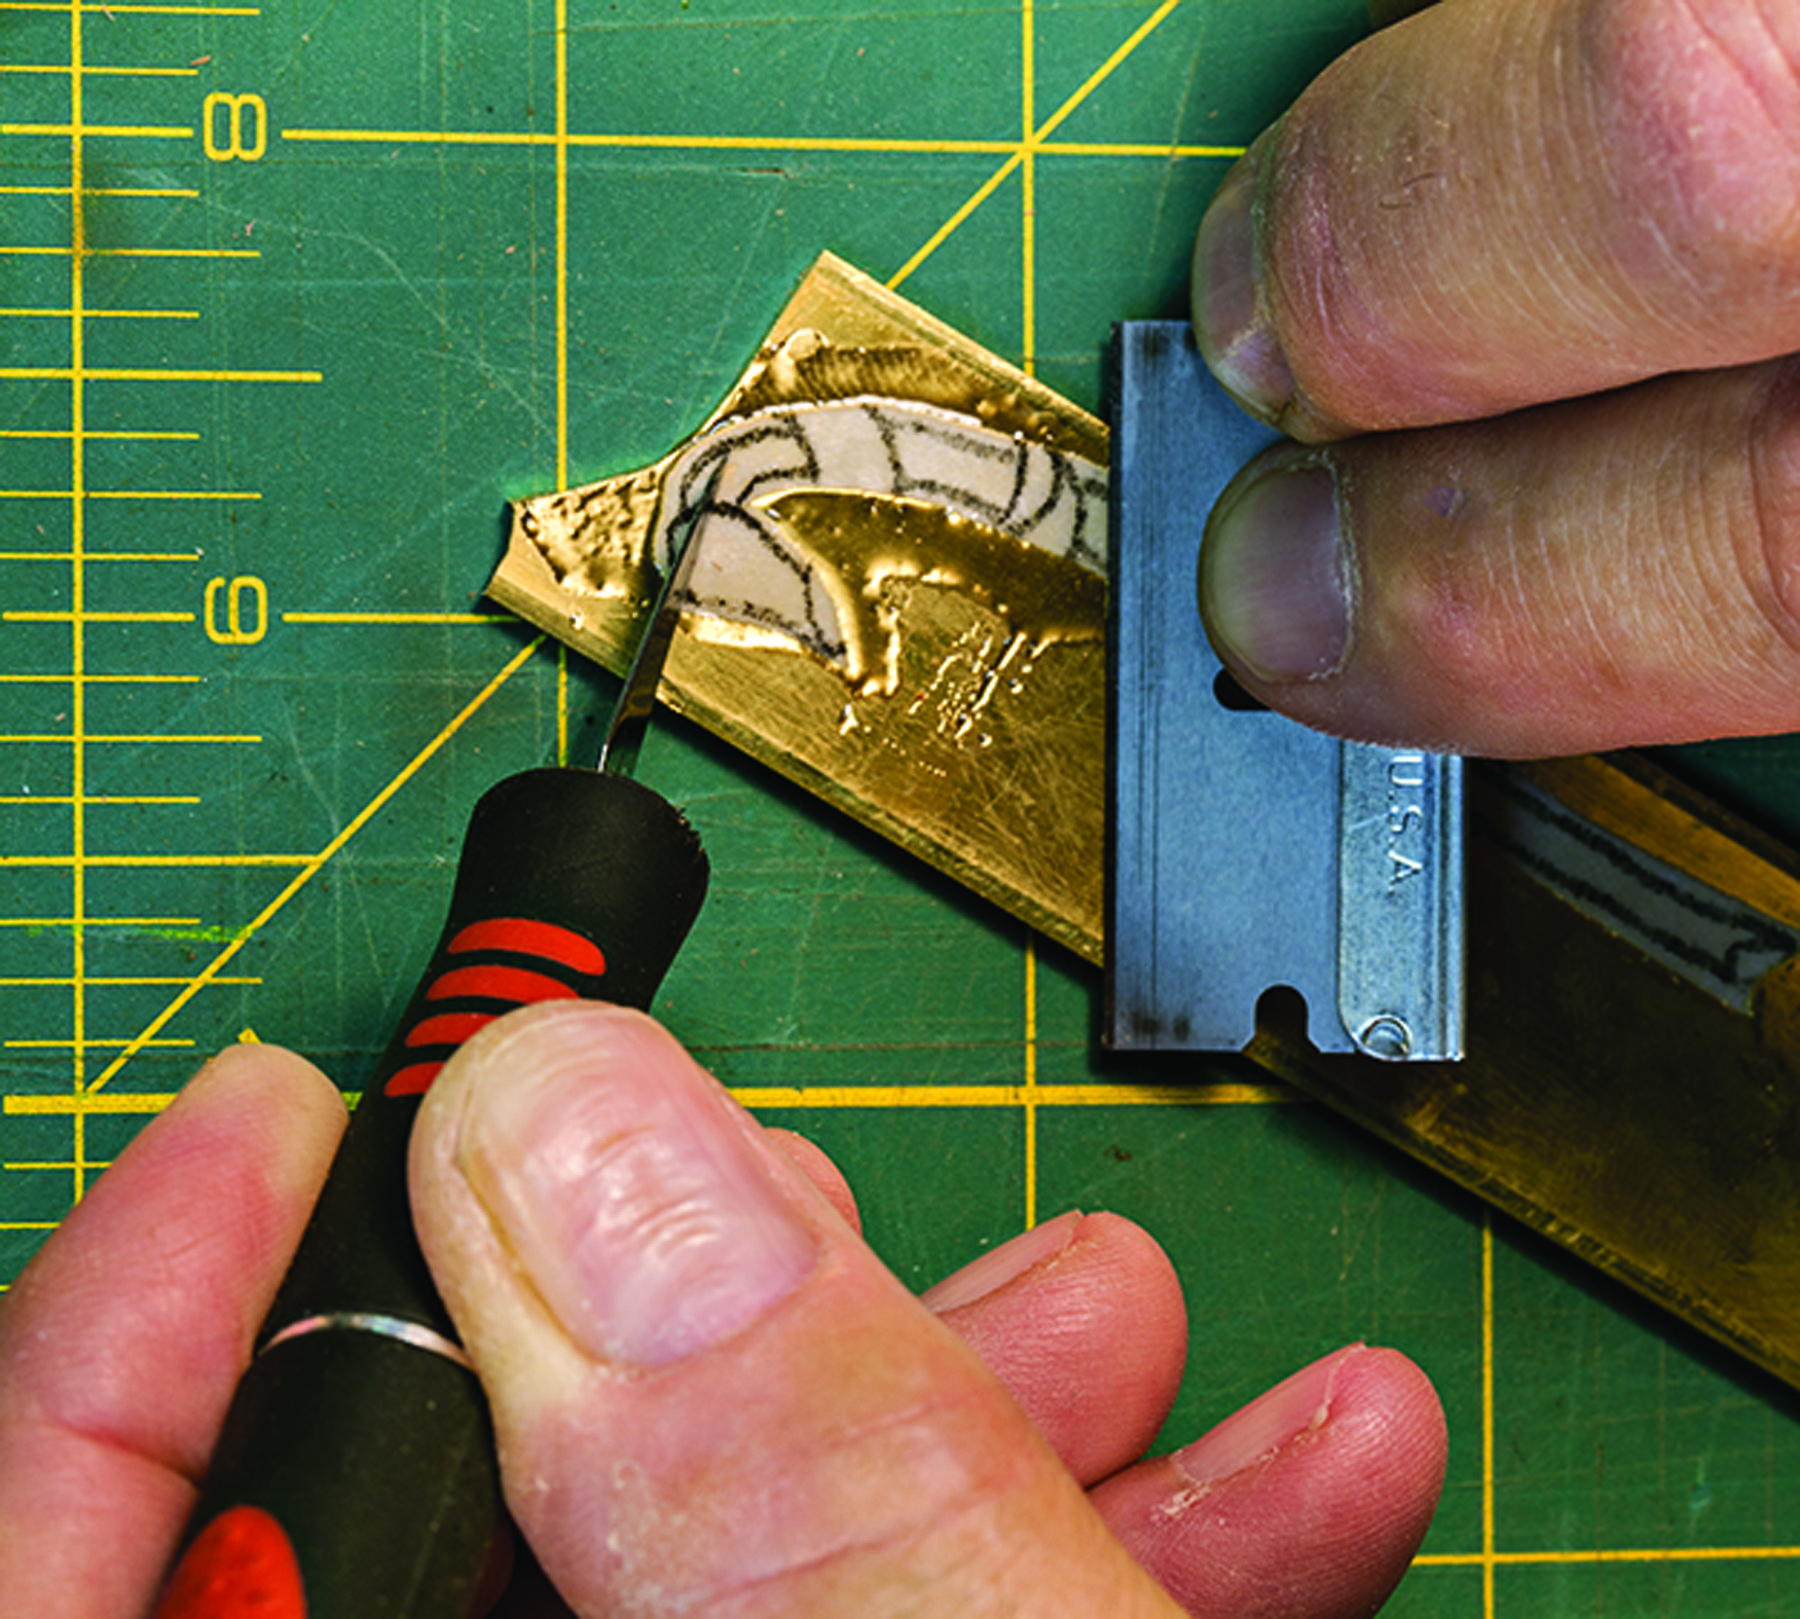
Use epoxy for metal inlays. Once the pattern is set in place, use a razor blade to squeeze out the epoxy underneath and keep the pattern flat.
For most inlay work, use cyanoacrylate (CA) glue. You will want low- and medium-viscosity glue to use for various tasks. Make sure the glue is high quality, fresh and kept in a cool place. I have not found a need for spray accelerator when the glue is fresh. Woodworking and jewelry suppliers have good quality products available.
Medium-viscosity CA glue is good for gluing the paper patterns to shell blanks (low-viscosity glue soaks through the paper and makes it look gray, and makes the line you are trying to follow appear lighter). It is also good for assembling inlay on a waxed paper barrier. The thicker consistency allows you to guide the glue to as much of a seam as needed.
Unfortunately, CA glue isn’t a good choice for working with metals because metal heats up and causes the CA glue and paper patterns to delaminate. Epoxy, which has better heat resistance, is best for metal inlay work. Epoxy also works well when a cavity is routed too deep and needs to be filled. I use Epoxy 330. It is fast-setting, water clear and high quality.
Cut Out the Inlay
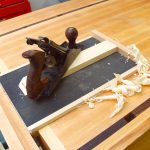
The two special tools you need to cut inlay materials are a bird’s mouth and a jeweler’s fretsaw. The bird’s mouth is a simple V-notch cut into a piece of 1⁄2“-thick Baltic birch plywood.
The saw frame should be solid. As small as a 3″ throat will work, but I use a saw with a 5″ throat because it allows me to cut larger pieces. Jeweler’s supply houses will help with the saw frame and blades. Get #3/0 blades for fine cutting and #2 for rough cutting larger blanks.
When cutting shell, it’s important to remove the dust as you cut it. One of the three layers in the material is calcium carbonate, which produces a highly abrasive dust that can cause lung damage. I attach a hose from my vacuum to the top of the bird’s mouth; a piece of fabric screen prevents small pieces from being lost. You need to see well, so use a headband magnifier and a lot of light. Light the work from multiple angles to avoid blade shadows, which can look like pencil lines.
Cutting is the hardest part to learn in doing inlay work. The blades are small and the material is tough. Be aware of your grip on the saw; keep it light and pay attention to staying vertical. As the saw comes down to engage the teeth, don’t put too much forward pressure on the blade. When going around a curve, use very little turning force and keep the blade moving up and down. The most common reasons for a broken blade are pushing too hard and trying to turn corners too quickly.
Position the bird’s mouth at chest level. Keep the saw vertical and let the tool do the work. If you split the pencil line with the saw blade, the fit will be correct, eliminating the need to file the pieces. This takes practice. Don’t worry; a bit of filing will correct any wayward cutting.
Straight lines are harder than you might think. Look ahead of the blade to where you are cutting, not behind it. To follow a curve, you can turn the saw for sweeping curves. For tight curves, turn the piece as well as the saw. And don’t be surprised: Blades break often and are usually only good for three or four small shell pieces. You’ll go through a lot of them while learning.
To create a sharp point (which will require reversing the cut direction), saw beyond the point then use the sawblade as a file, keeping it in one location as you “file” a small circle (the diameter should be the same as the width of the blade with which you’re cutting). The blade can be turned around and back to the pencil line for the cut beyond the point.
Make sure the workpiece is supported throughout the cutting process. Back up the blade to the edge of the small V closest to you and make the cut. The work will be supported by your finger and both sides of the kerf will be more secure. If a fine tip of your inlay piece breaks off, don’t throw it away. Try fitting it to its mate; chances are that a bit of filing can make a new point that works just fine. CA glue can also be used to reattach the broken piece. Finish the cut on the broken part and glue it together from the backside on a piece of waxed paper.
Assemble & Scribe the Inlay
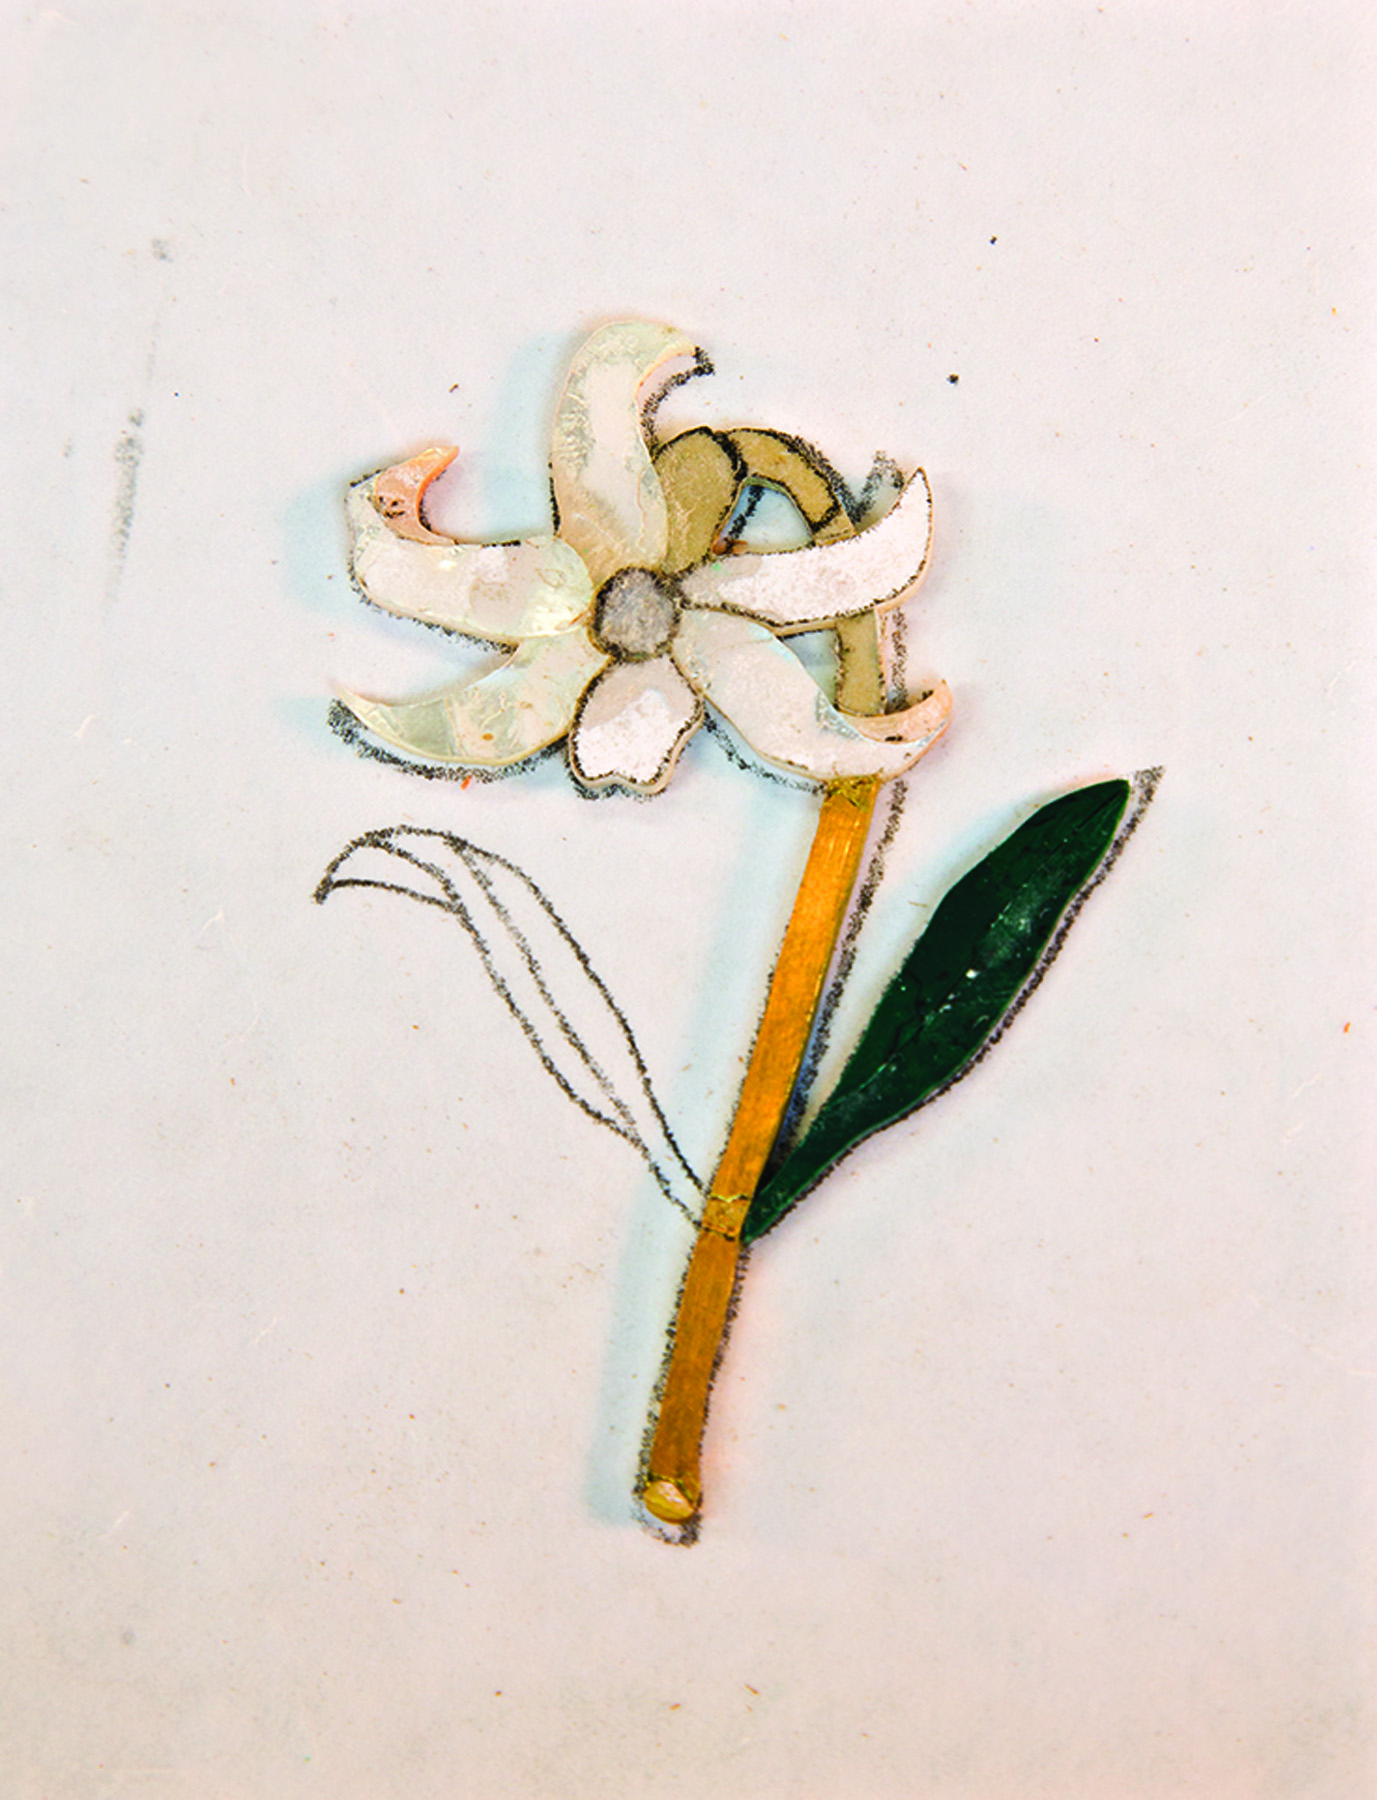
Build the inlay. With pieces cut and filed, it doesn’t matter if they follow the lines exactly as long as they look good together.
Glue it together. Once you’re satisfied with the appearance and fit of the pieces, glue them together over a piece of waxed paper.
Shoot the seams. Use a pin to chase glue down the seam where mating parts come together.
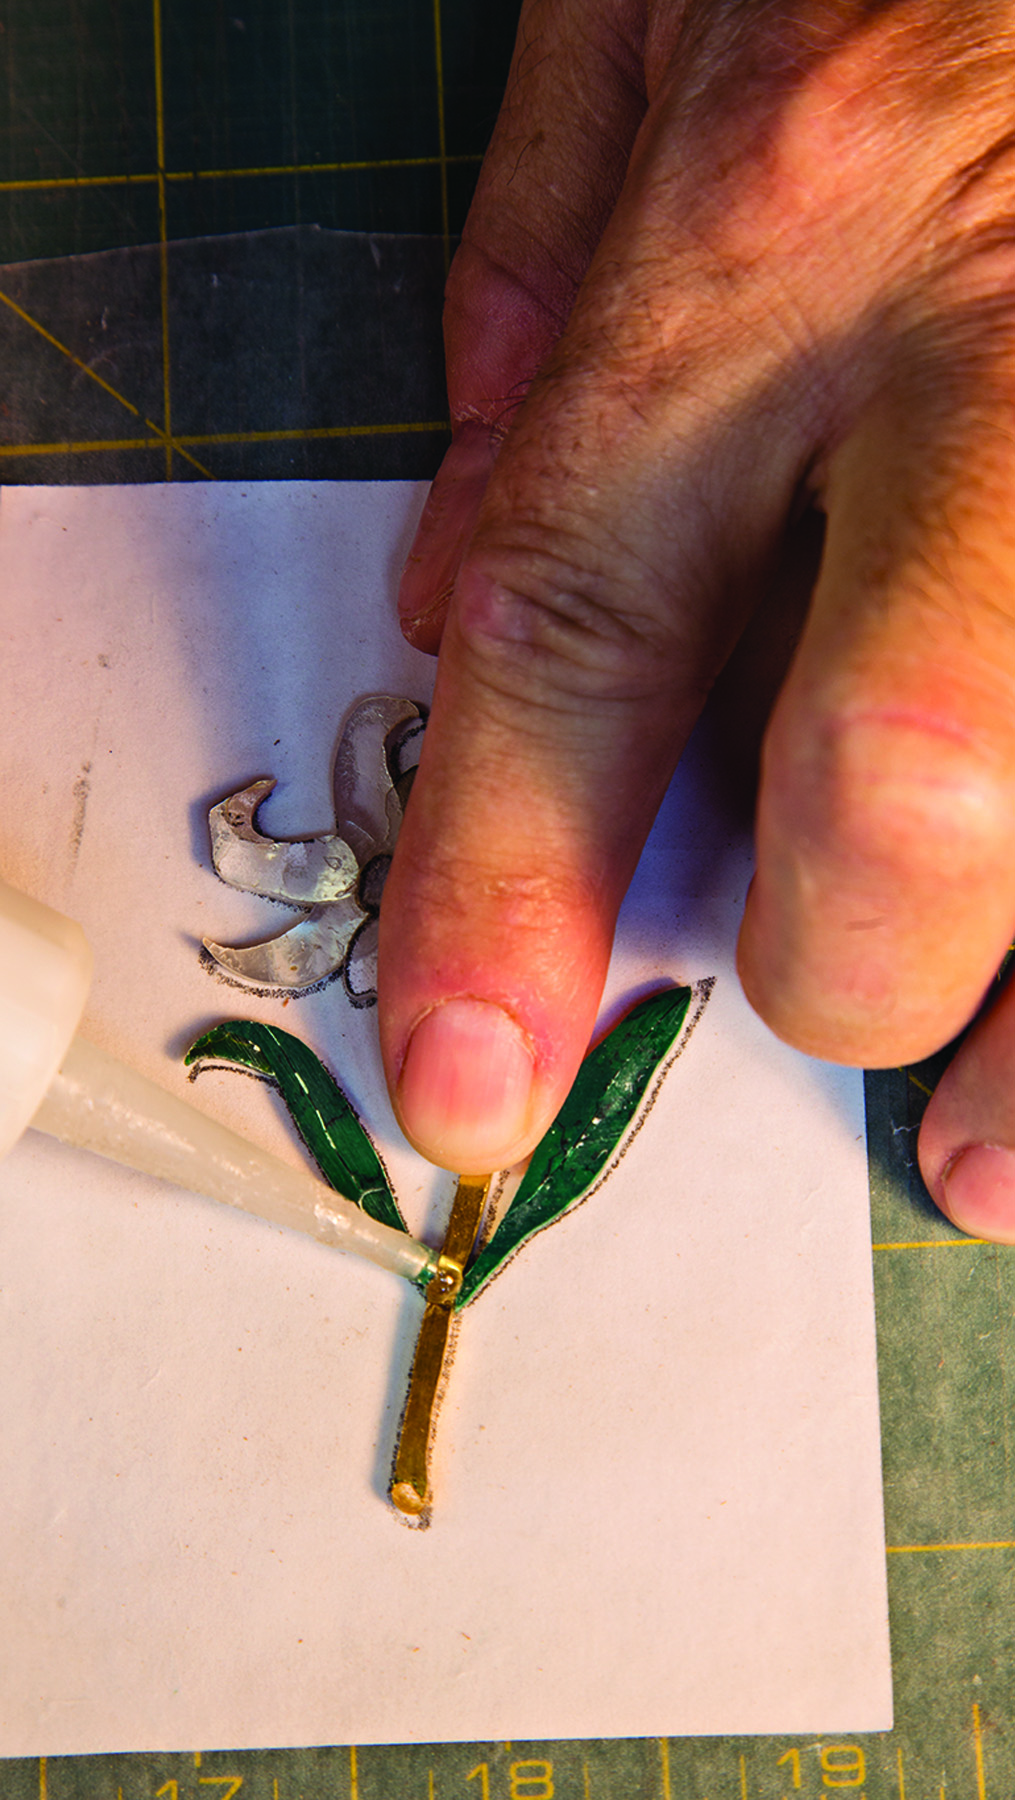
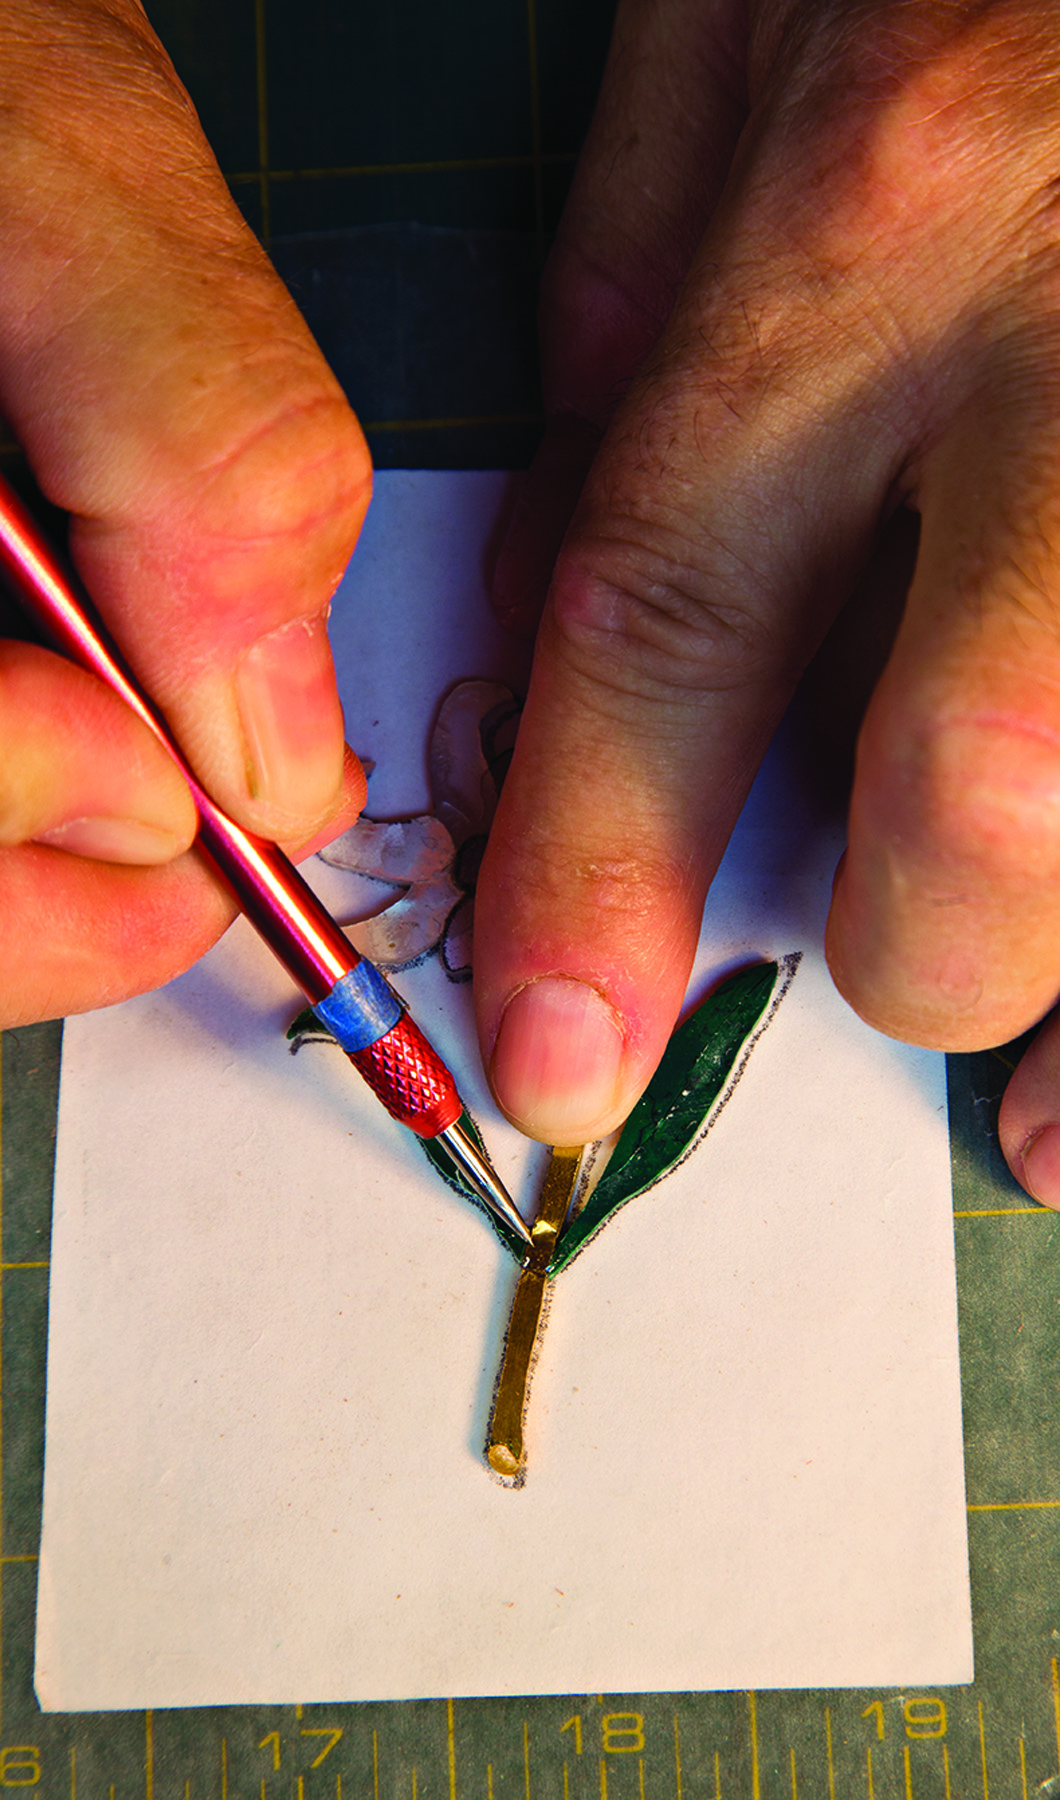
Mark it out. Align the inlay on the workpiece and glue it down using Duco Cement. Then scribe around the outside of the pattern.
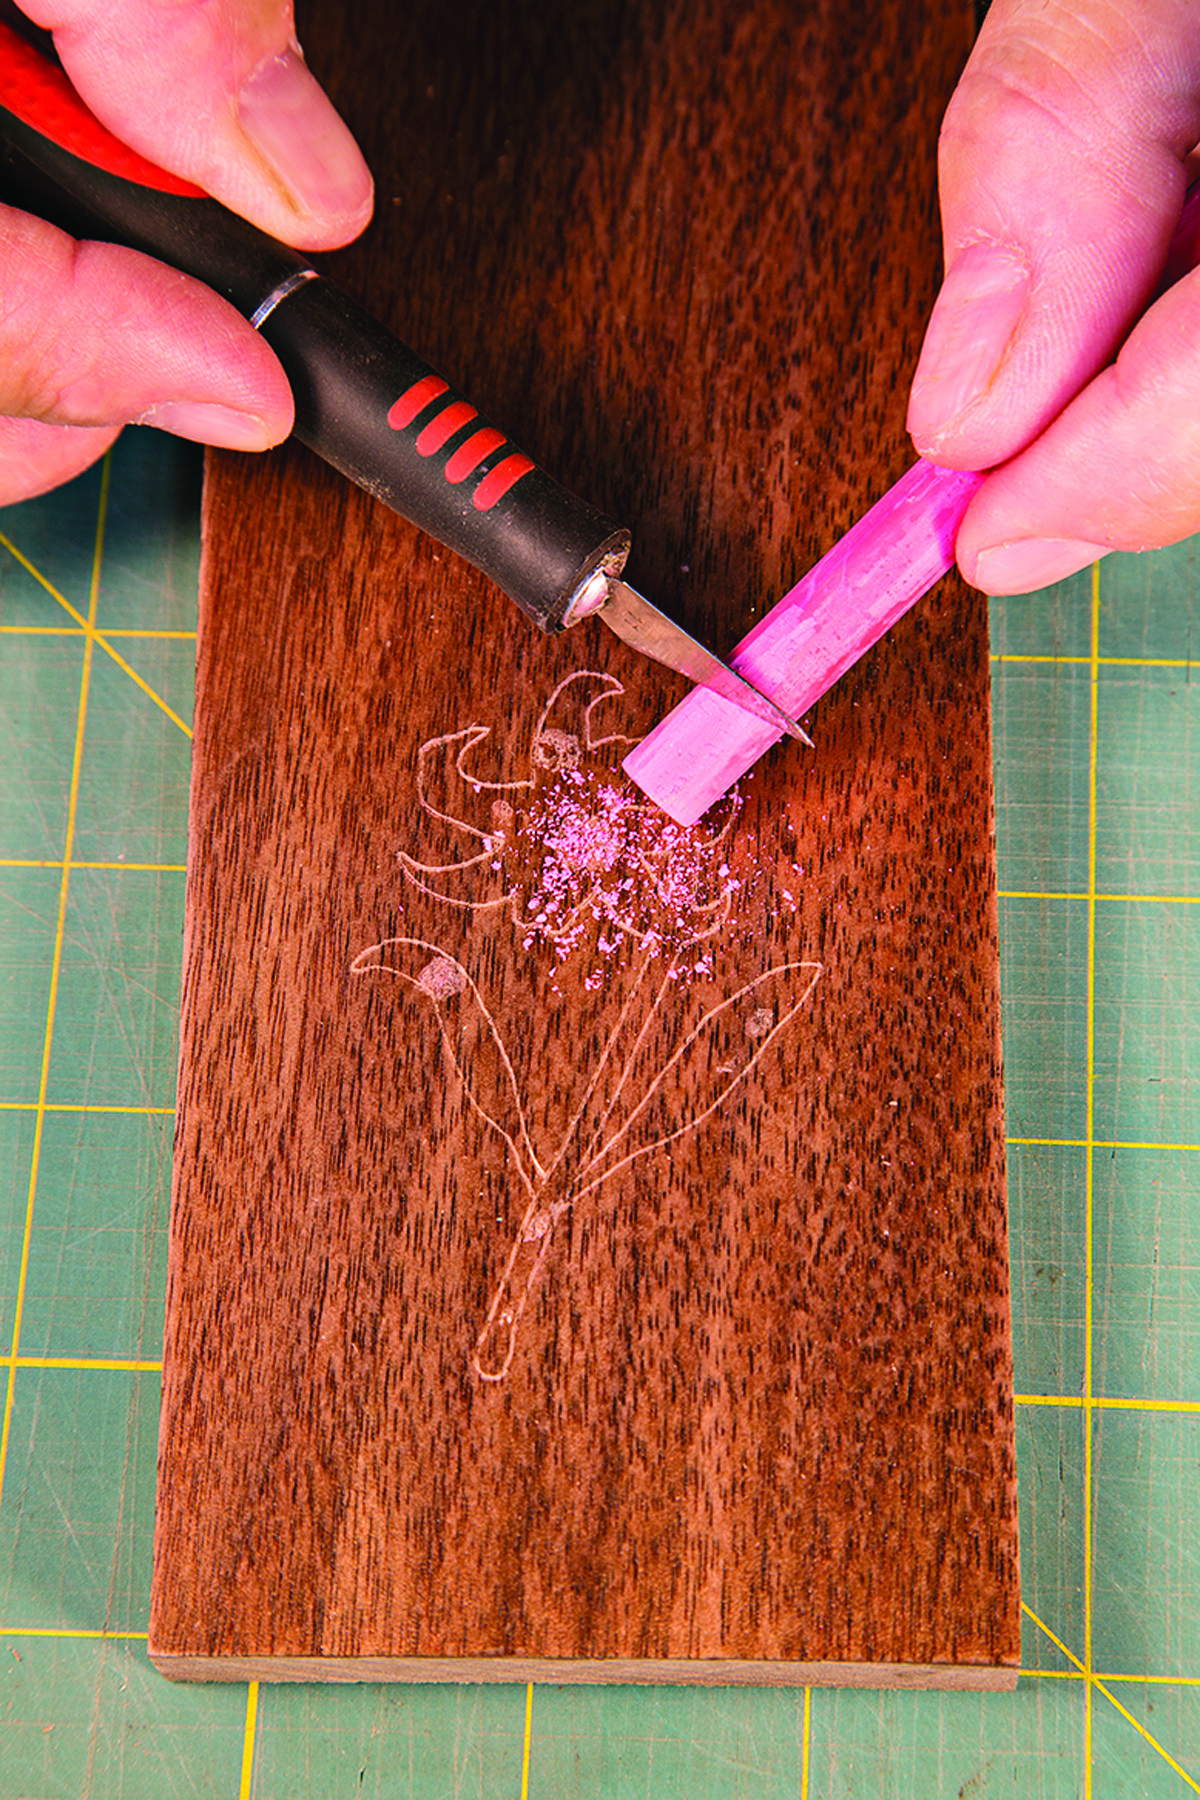
Chalk it up. Remove the inlay and sprinkle chalk dust across the scribed guidelines. Using chalk of a contrasting color makes it easy to spot your lines.
 Cleanup & Assembly
It is good to get into the habit of completing each operation fully before moving on to the next step. Starting out, make designs with just a few pieces; it will keep your frustration level down.
To assemble the pieces, tape a piece of waxed paper to a flat surface over a copy of the design. Line up the cut pieces with the design lines. Here is yet another chance to modify the design for fit and appearance. During filing and fitting, don’t be concerned if the pieces don’t match the lines exactly; as long as they fit together and look good they’ll work fine.
Leave the paper with the design on the material during initial filing – though you may want to remove it to verify a seam. To remove the paper, slide a single-edged razor blade between the paper and material and push the blade to separate the two.
File the pieces that do not fit together well or are not square. As each piece is fitted, it can be glued in place by applying CA glue along the seams, as shown above. When working with materials of different thicknesses, just turn the piece over so the finished side of the inlay is flush.
Prep the Background Material
The best material to receive inlay is a tight-grained dark wood. Ebony guitar fingerboards are a good example – they are often inlayed for exactly this reason. Walnut and mahogany also work well as a background material; their grain and color are suitable to the task.
To prepare the wood, handplane the surface with a smoother then seal the wood by padding on shellac (two-pound cut). The color of the shellac does not matter because it will be removed later. You just want to make sure you end up with a light coat of finish on the piece. Spray shellac or lacquer can also be used – just make sure the surface is smooth and without any orange peel. If you are using an open-grained wood, do your grain filling first to make the wood smooth. Then pad on the shellac as described above. The pieces I am working on here are not completely sized and shaped as they will be before they become part of a furniture piece. Even with drawer fronts, it is possible to inlay before dovetailing. Remember that any stock removal on the inlay surface needs to be done with sandpaper, not a handplane. After gluing and smoothing the inlay, the rest of the wood can be worked without fear of damaging your work.
Scribe Around the Inlay
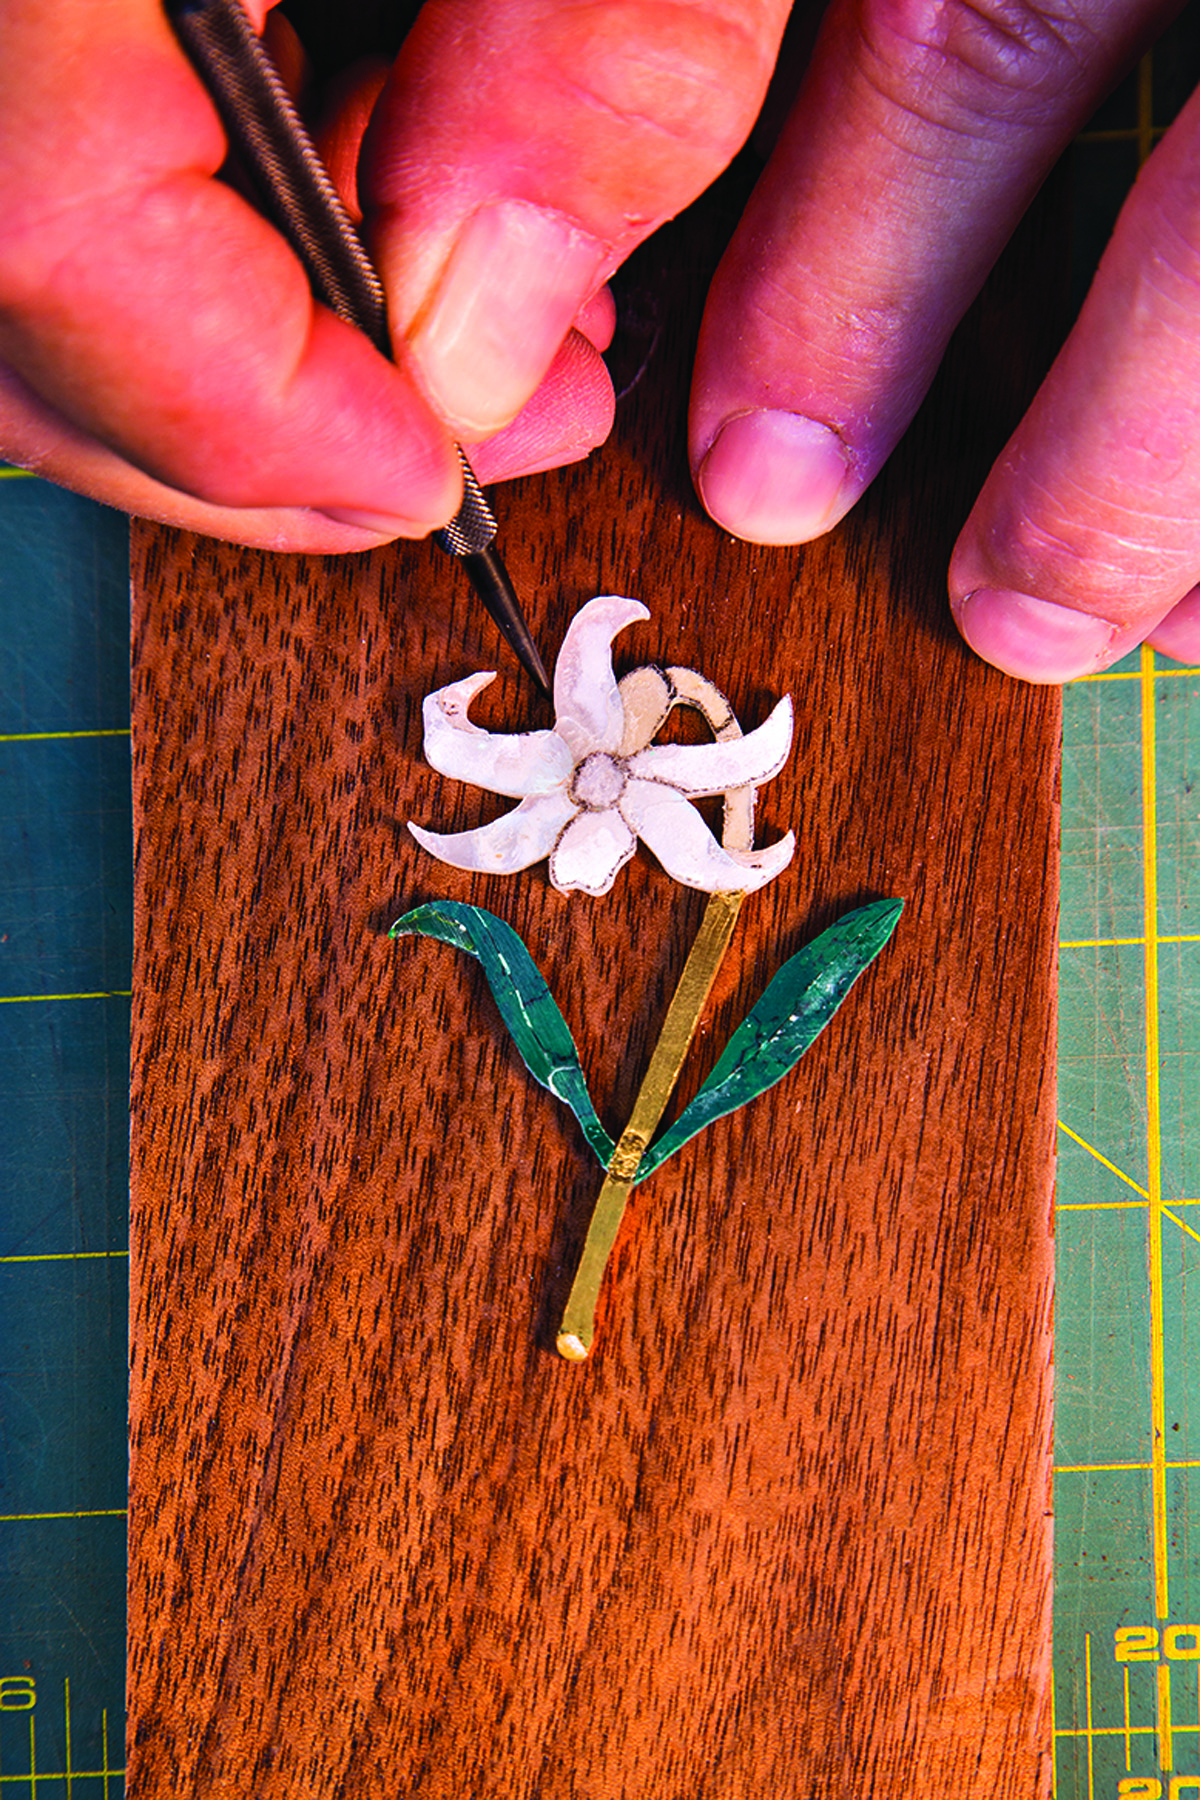
Once the piece is assembled it can be scribed to the background. Clean up excess glue on the edges of the inlay with a small knife. In the example inlay shown, the stem and leaves break apart easily. Don’t be concerned if they come apart. Mark where they join and place them on the background wood separately.
Attach the inlay to the surface of the wood using small dots of a fast-drying adhesive such as Duco Cement. CA glue will bond too well and pieces may break when it comes time to release them from the background. After the glue has had time to set, remove any squeeze-out by cutting with a small knife and scraping with a toothpick sharpened to a chisel tip.
Scribing can be done by one of two methods: knife or point. You are cutting through the thin layer of shellac and then into the wood fibers. The shellac prevents your cut from following the grain. For scribing, the sharpened shank of a 1⁄16” drill bit works well. When using a knife, X-Acto No. 11 blades work best.
A scribe is easier to use because it is difficult to navigate a knife around a tight curve. With a scribe you’ll use the same movement used to trace the inlay. No matter what method you use, the process is the same. Make several light passes. You want to end up with a crisp line, but it does not need to be very deep.
Remove the inlay by placing a single-edged razor blade flat to the background and sliding it against the dots of glue. Check for any areas that did not get scored well. Place the inlay over them, hold them down with a finger and scribe them again.
Take a piece of colored chalk that contrasts well with the wood you are using – the brighter the better. Using a knife, scrape chalk dust on the surface and rub it into the scored lines to define the pattern. Verify that all areas have been scribed and filled with chalk before you cut the cavities to house the inlay.
Rout the Cavity
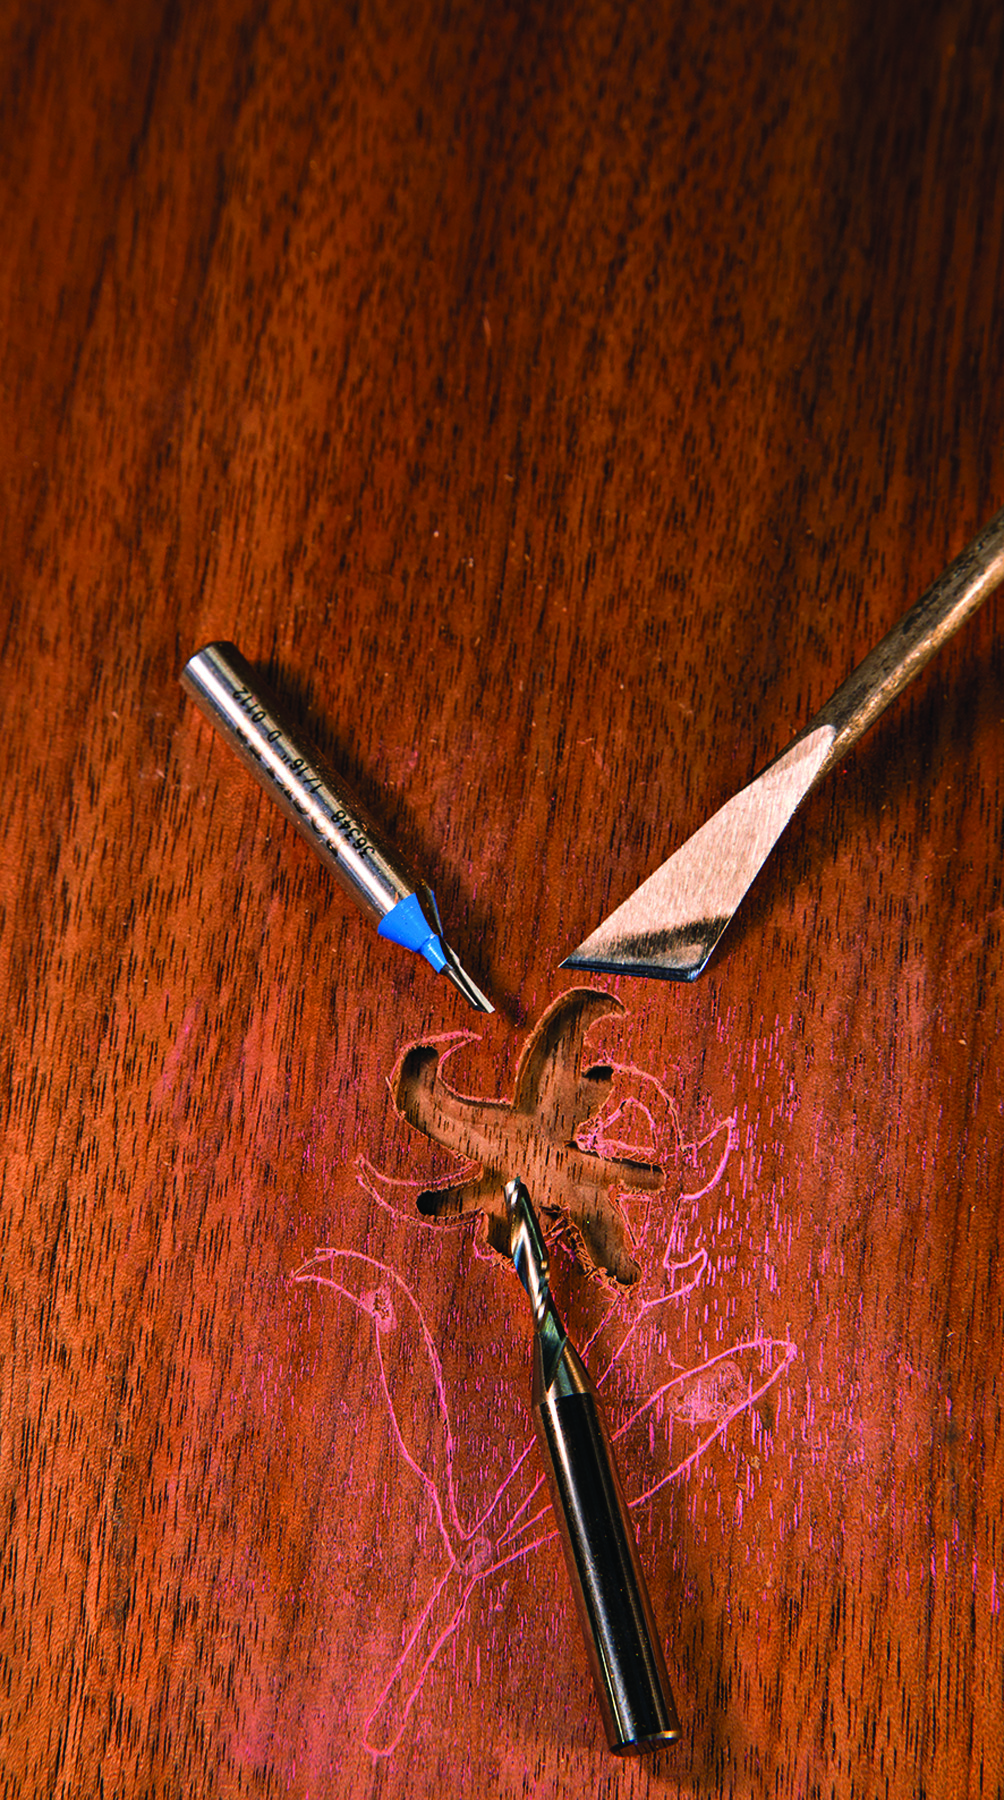
Choose your tools. To cut the cavity for the inlay, use a succession of tools. At bottom is a 1⁄8″ bit used to clear the field. At top left is a 1⁄16″ bit that can get into tighter spots. Finish off with small chisels and knives (top, right). Cut right up to the scribe lines and keep the recess a consistent depth.
Make sure you have good light and a way to keep the wood chips away from your work. A plastic hose directing compressed air works well. The stream of air blowing the chips away makes your work quicker and more accurate.
Removing the wood for the cavity is a three-step process. First, hog out large areas with a 1⁄8” bit. Set the depth of the router for the thickest material being used. Glue will fill the voids and secure thinner pieces in place. Stay about 1⁄32” away from the chalk line and clear out all of the large areas you can safely reach.
Rout out the waste. A trim router, Dremel or carving tool attached to a plunge base routs out the bulk of the waste in the cavity.
Then change to a 1⁄16” bit and rout to the chalk lines. As you get close you will see the chalk in the scribe line turning to dust. That’s the indicator that you have gone far enough. At this point, all that is left are the areas where the small bit could not go.
Finally, use any tool you feel comfortable with to get the last bit of wood removed. I have good luck with palm chisels and a No. 11 X-Acto blade. Pay attention to these areas. They need to be full depth with enough room for the small parts to drop in without force. If you have to push the piece in the wood you risk breaking part of the inlay.
The inlay should fit in place easily as you will be removing it several times during the fitting process. A piece of non-waxed dental floss can be placed under a piece during fitting. Just wrap the floss around a couple fingers and gently lift the piece straight up.
Materials & Pre-cut Inlays
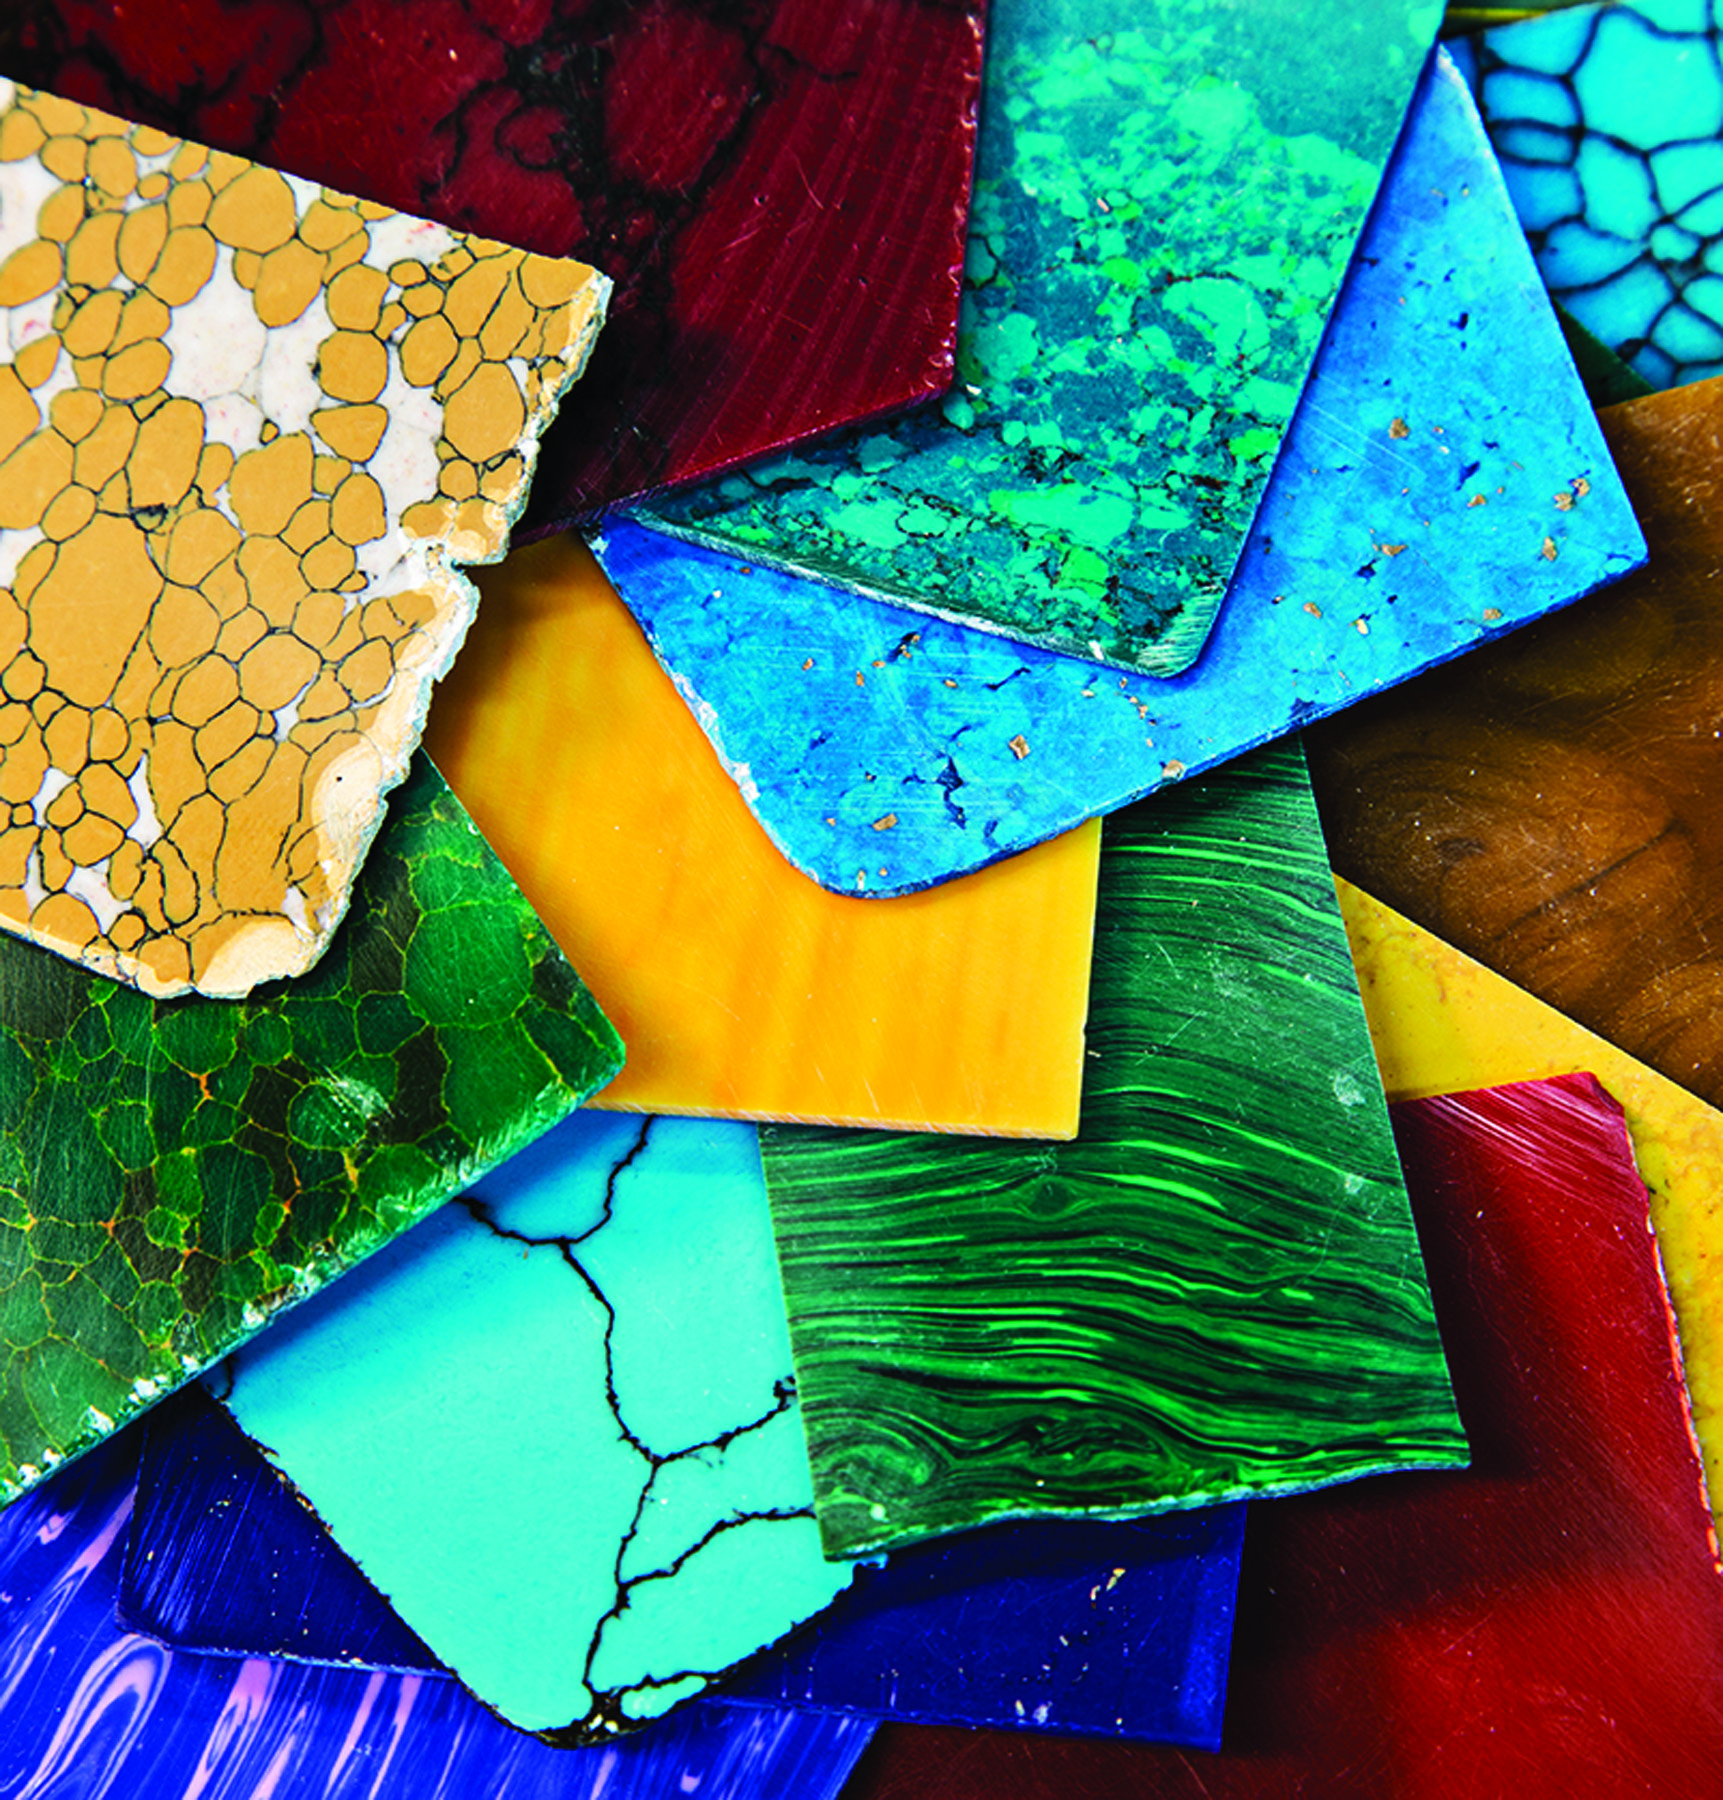
Exotic & unique. Cultured stone blanks like those shown here are available in patterns and colors that wood simply can’t replicate. They’re also perfect materials for inlay work.
DePaule Supply has shell blanks as well as an extensive selection of pre-cut inlays. Don’t think using pre-made shapes is cheating. They look great and save a lot of time. The inlays are made for stringed instruments and adapt well to other projects. A fret inlay kit has various sizes of the same pattern to fit your needs. Pre-cut shapes such as strips, leaves and dots are great accents.
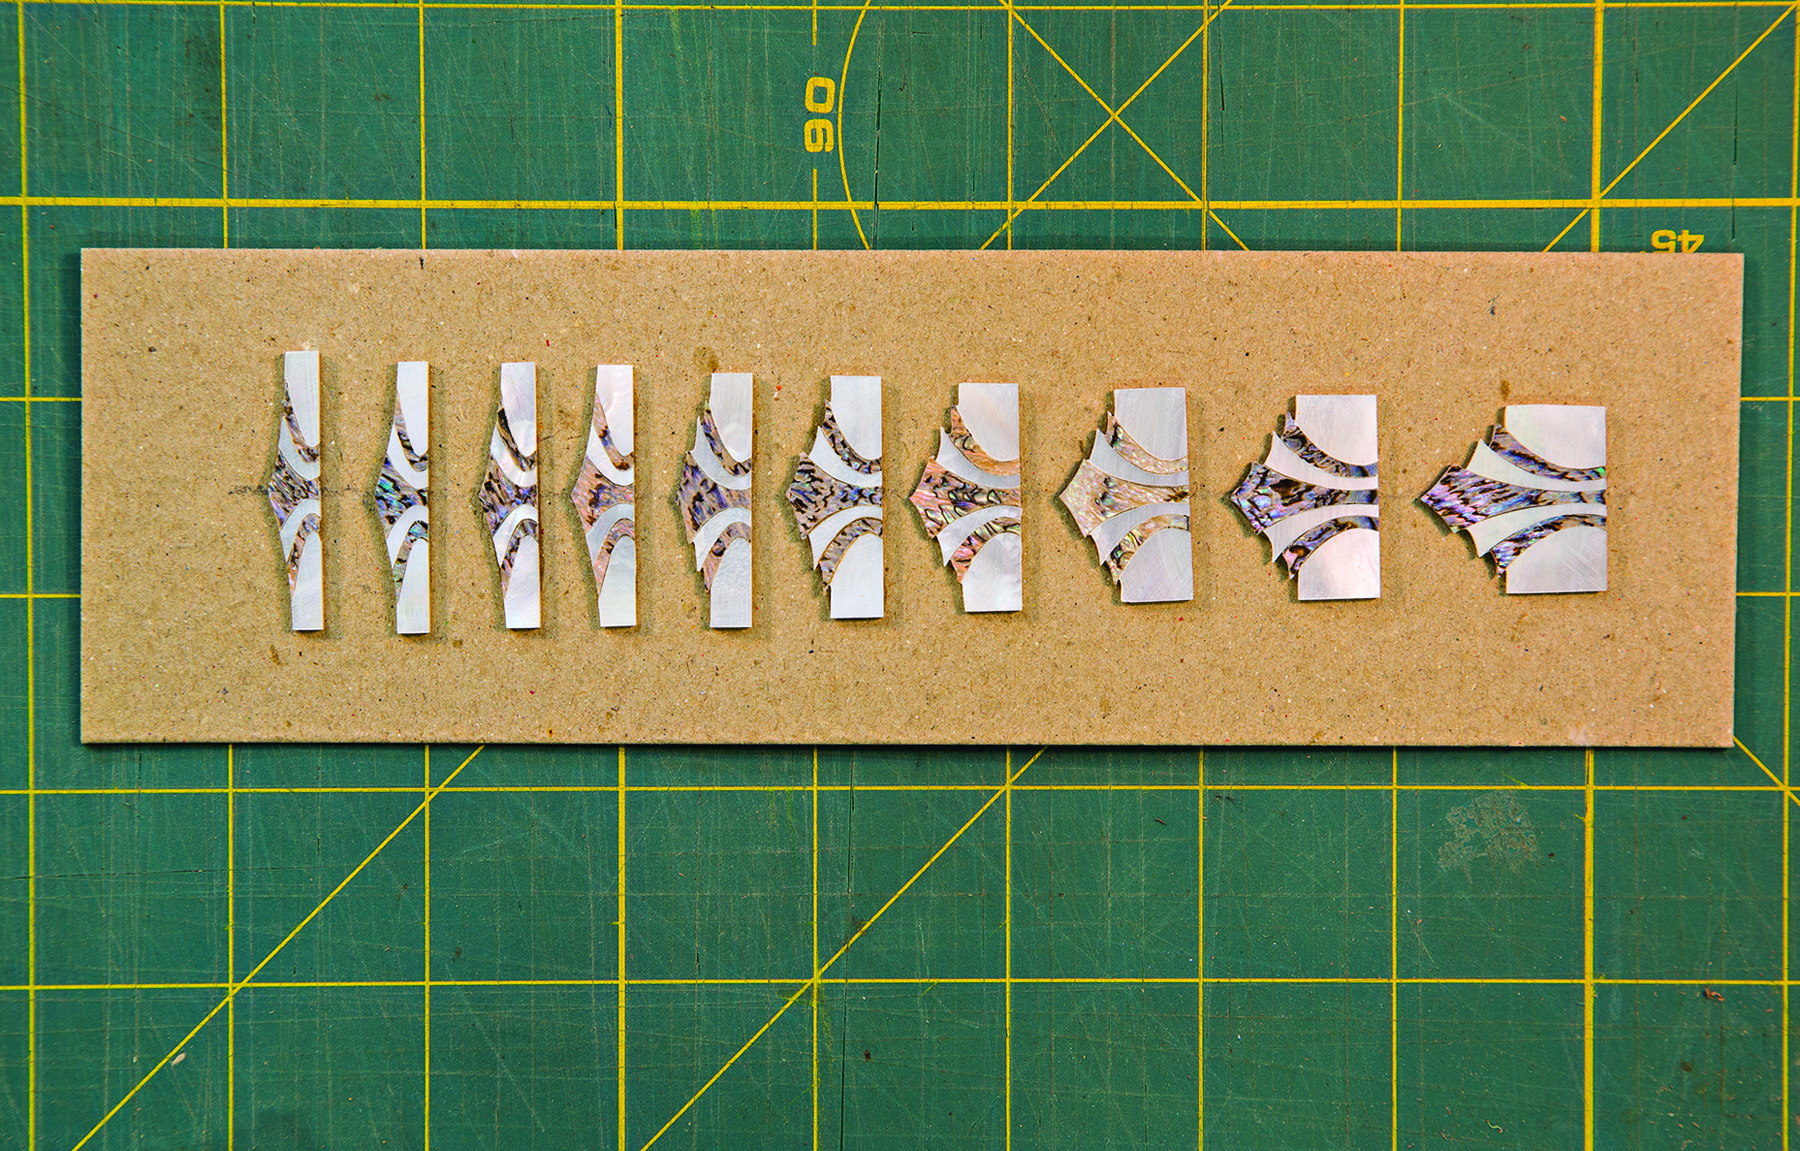
Off the shelf. Pre-made inlays are available from a variety of sources. Shown here are fret board inlays for a guitar, which is why they progress in size.
Rescue Pearl has a great selection of shell blanks and pre-cut designs. They are also the go-to supplier for reconstituted stone, which cuts and polishes easily. A wide array of colors and patterns are available.
A Few Specialty Tools
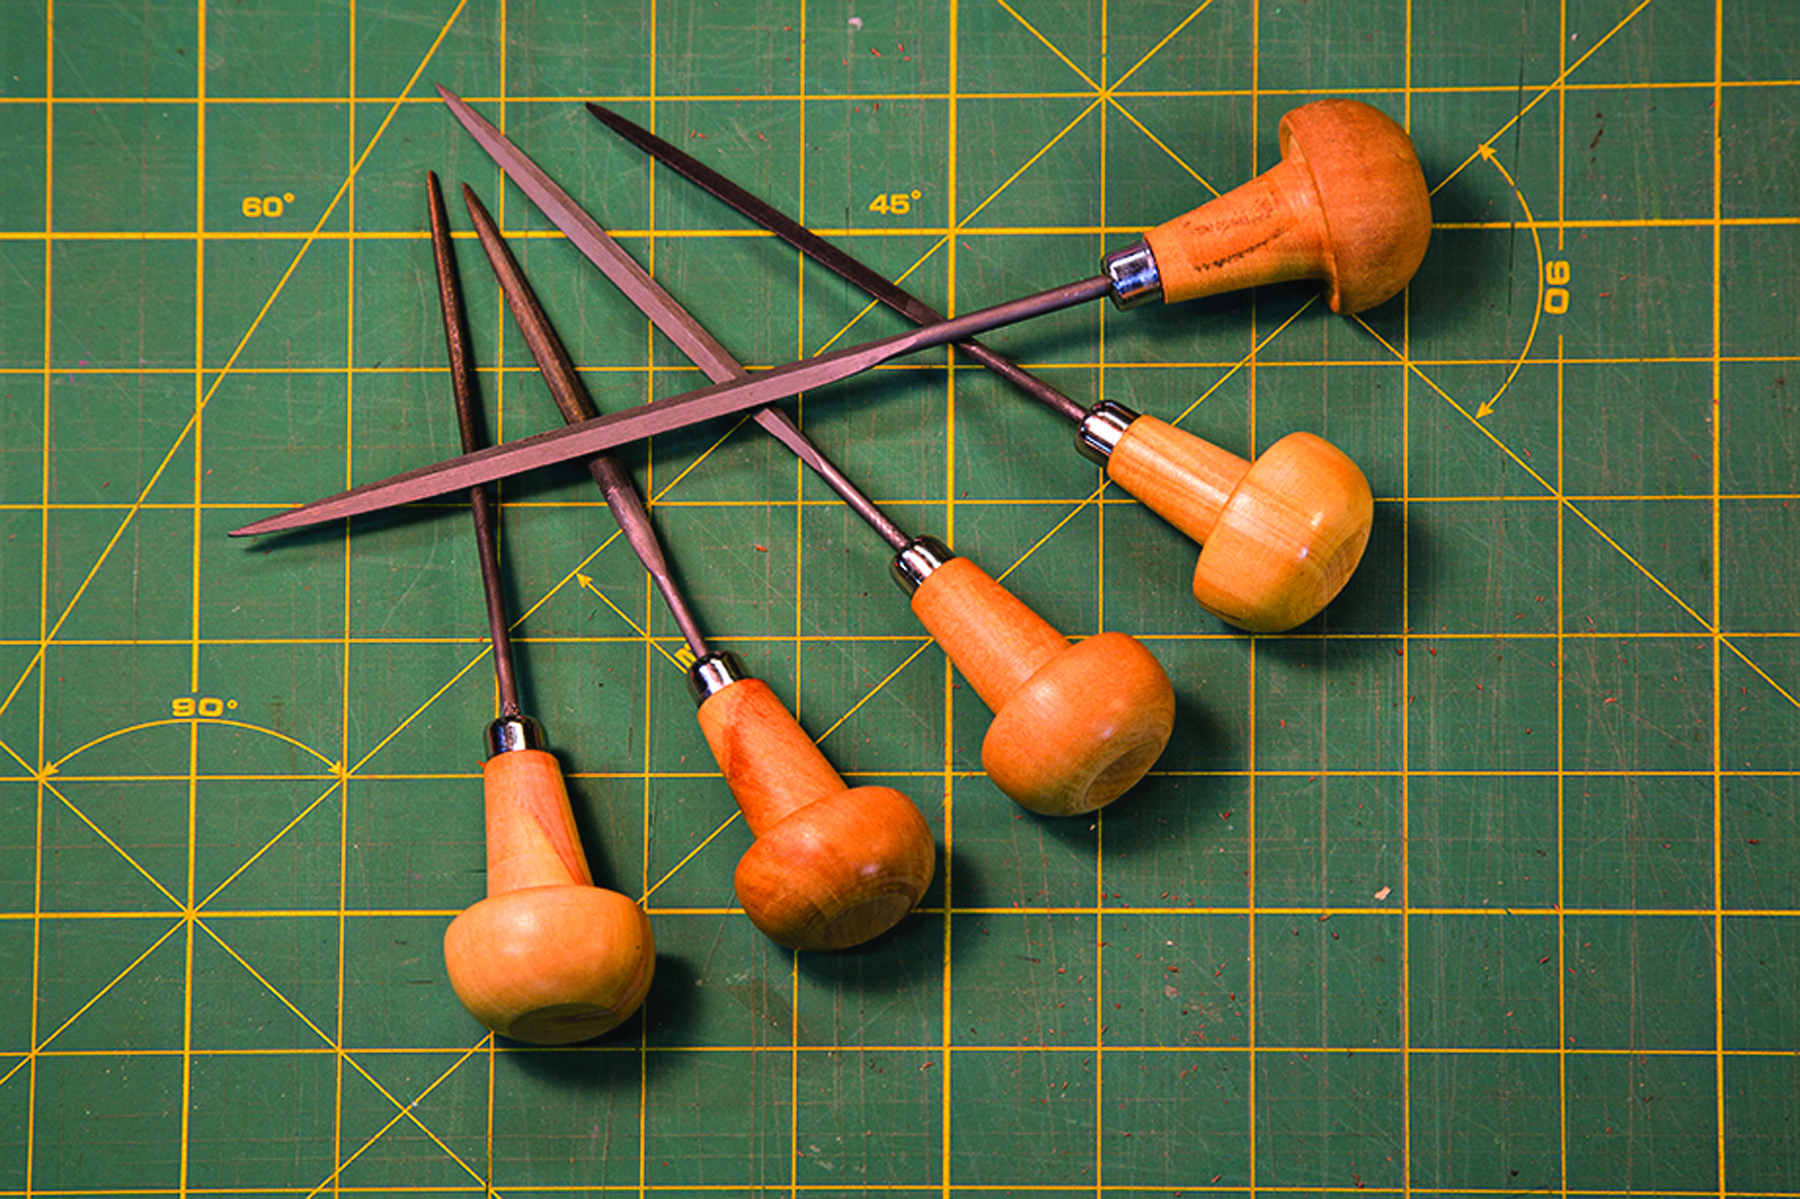
A souped-up file. To make needle files easier to control and more comfortable to use, attach them to graver handles (used for engraving metal).
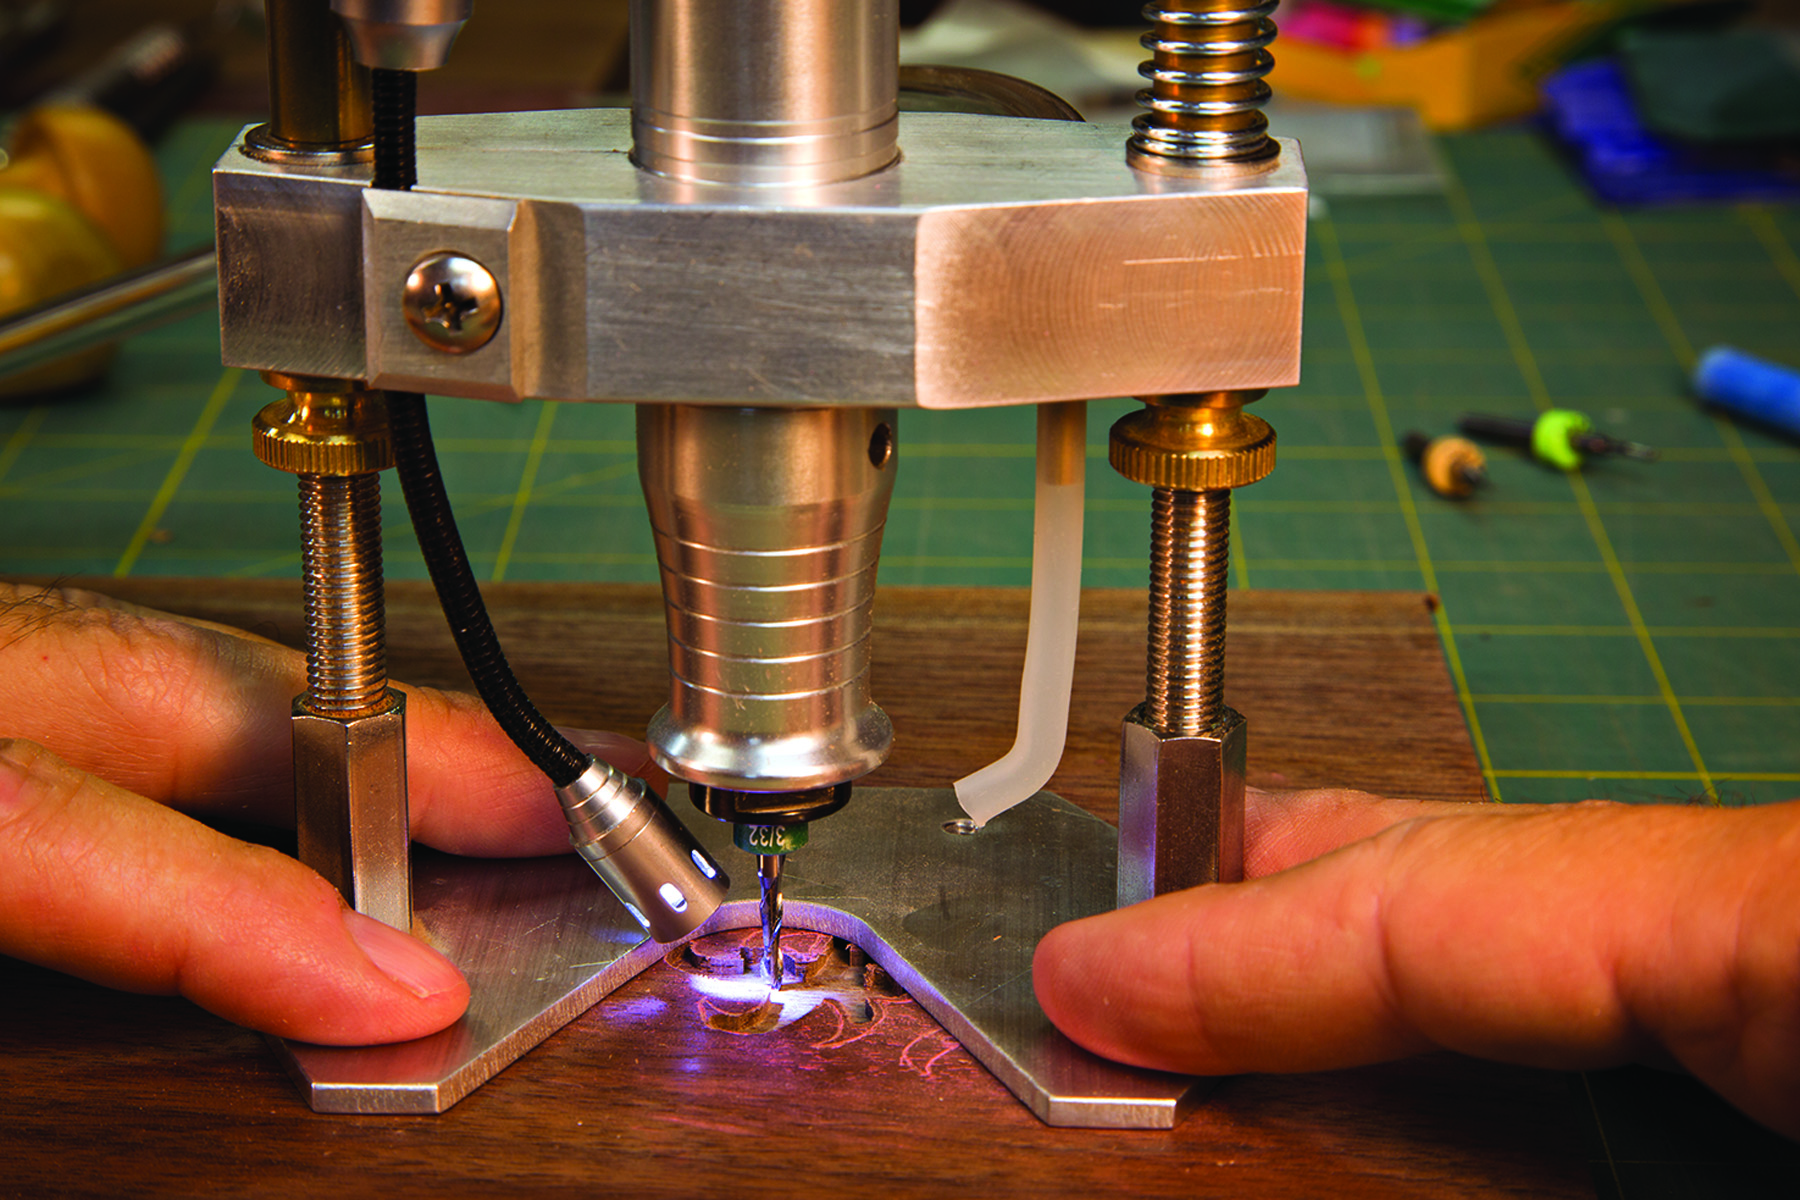
If you do a lot of inlay work, a flex-shaft rotary tool with a foot-pedal speed control (like those used in jewelry making and power carving) is indispensable. The advantage of using a flex-shaft hand piece instead of a traditional router is that the hand piece is smaller and easier to control, and the bits are available down to 1⁄32“.
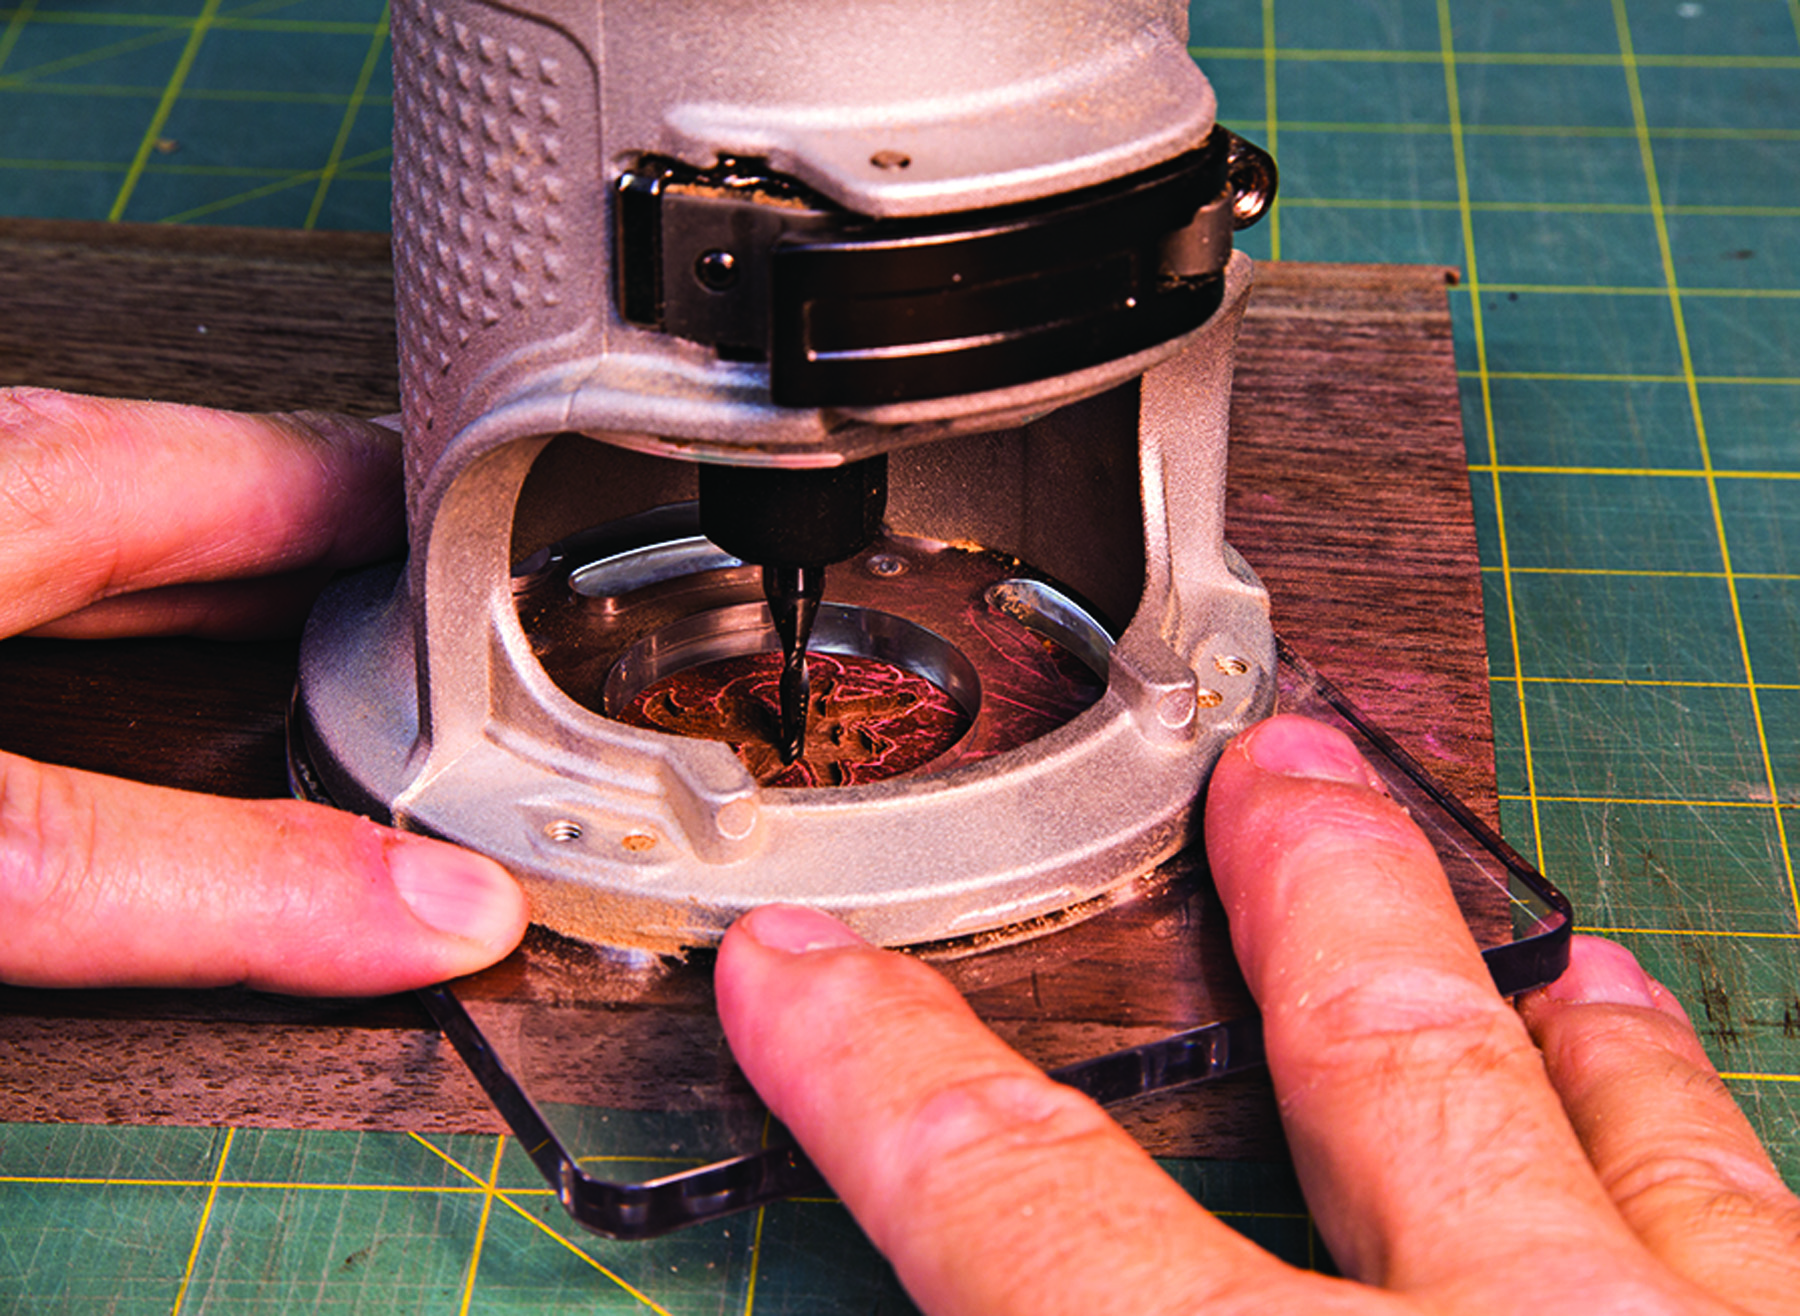
A familiar approach. A trim router outfitted with a 1⁄16″ straight bit does a fine job creating recesses for inlay work.
For inlay work, bases are available to turn the Foredom flex-shaft hand piece into a router. Stewart MacDonald has bases for Foredom hand pieces as well as a traditional Dremel. William Ng Woodworking has a base I really like; it comes with a light and air fitting to keep the work area free of debris. Both of these suppliers also have bits for routing the cavity.
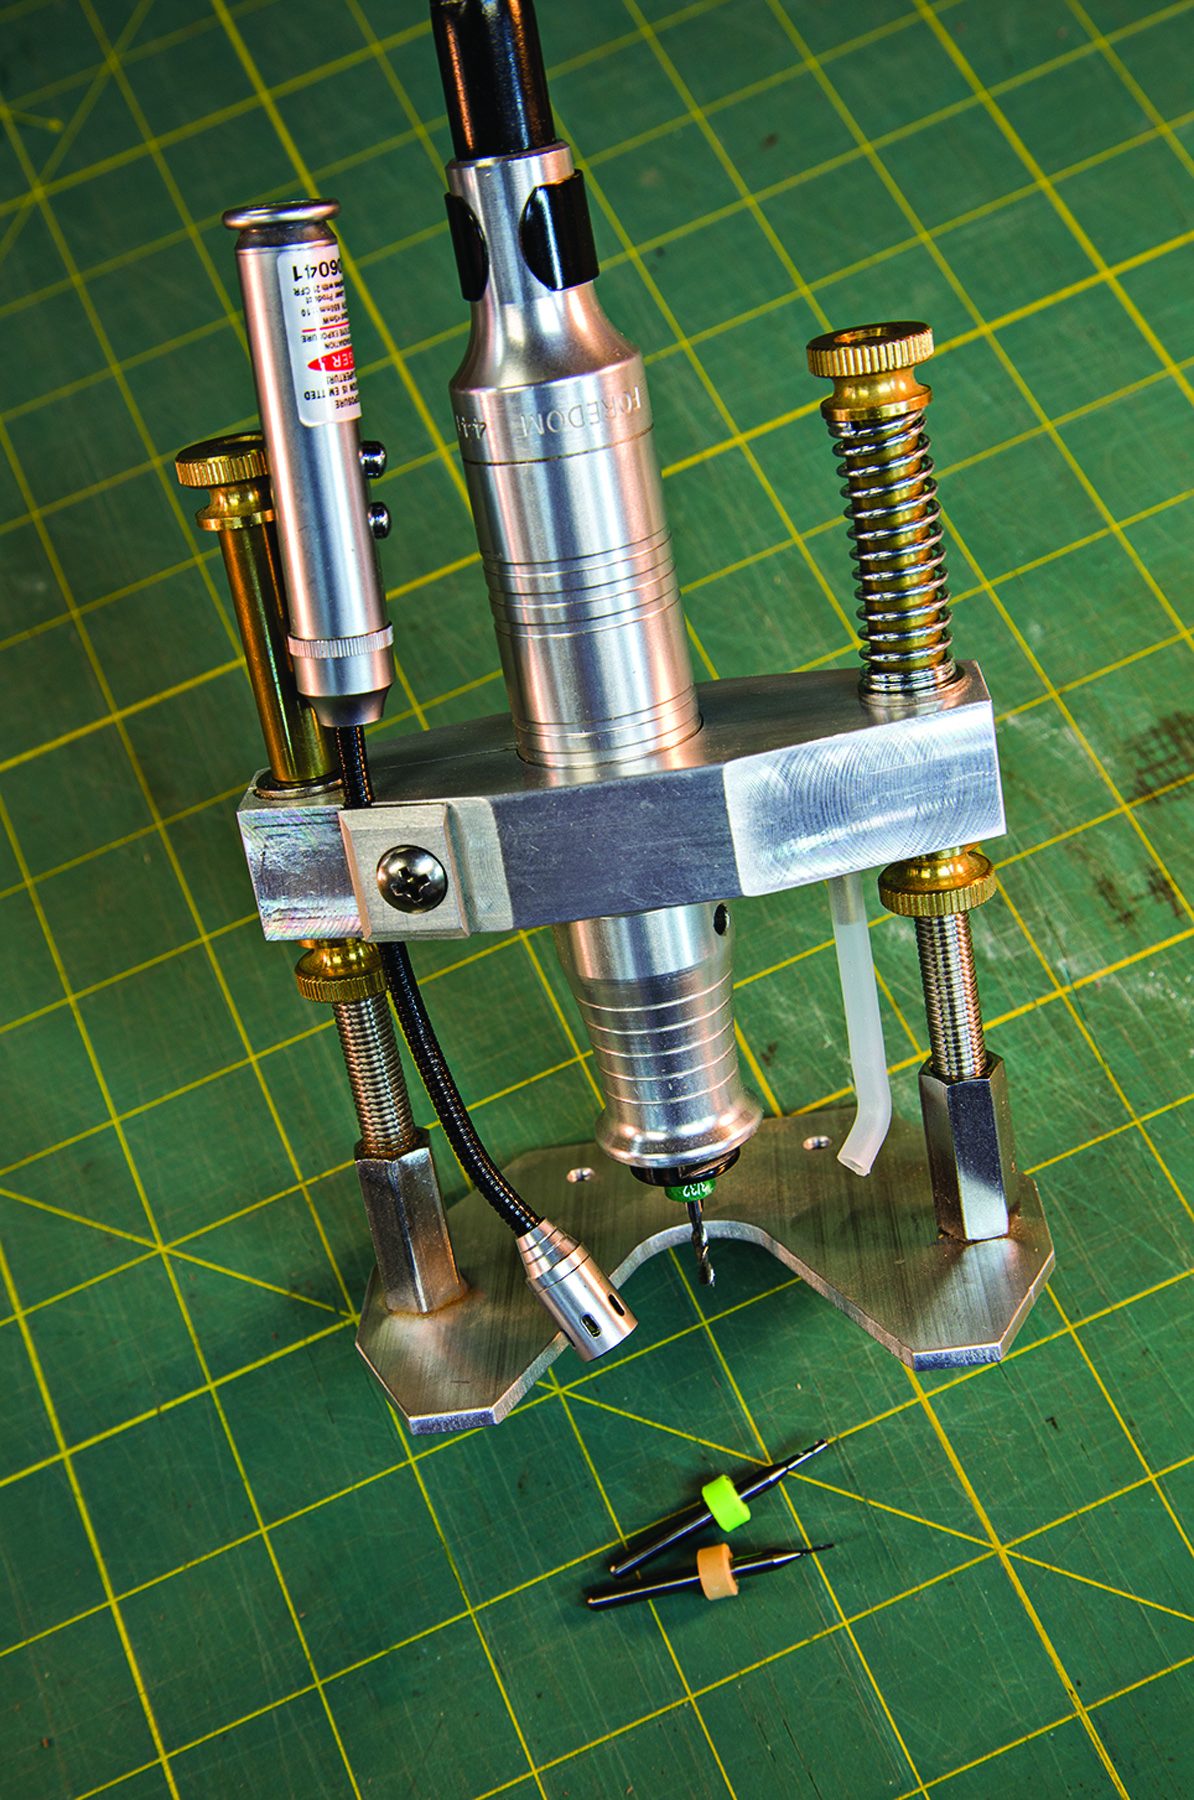
A better base. This small base (available from William Ng) fits a Dremel tool or Foredom flex-shaft kit and works well for inlay work.
In order to make filing easier, glue a graver handle to a high-quality barrette needle file. A #2 cut will work well. Also get a set of needle files of various shapes. You will use the half-round, rattail and triangle the most. I like half-head graver handles. They are flat on one side so they won’t roll off the bench. Rio Grande is also a good source for saw frames and blades.
Gluing & Finishing

Attach the inlay. Put CA glue in the recess, set the inlay in place and fill in any areas that still have gaps with more CA glue.
Once the inlay fits smoothly in the cavity, it’s time to glue it in place. Make sure the top of the inlay is flat before you proceed. Fill the cavity with low viscosity CA glue and place the inlay. (If the cavity has been routed too deep, fill the cavity with epoxy instead, which will span the gap, and then place the inlay.) Put a piece of waxed paper on top of the inlay. Attach a flat clamping block with a spring clamp and turn the whole assembly upside down. This allows the inlay to sit flush with the surface and reduces clean up.
Inspect your work. Once the inlay is installed, make sure that all the voids are filled with CA glue and don’t worry if there is a little extra above the surface.
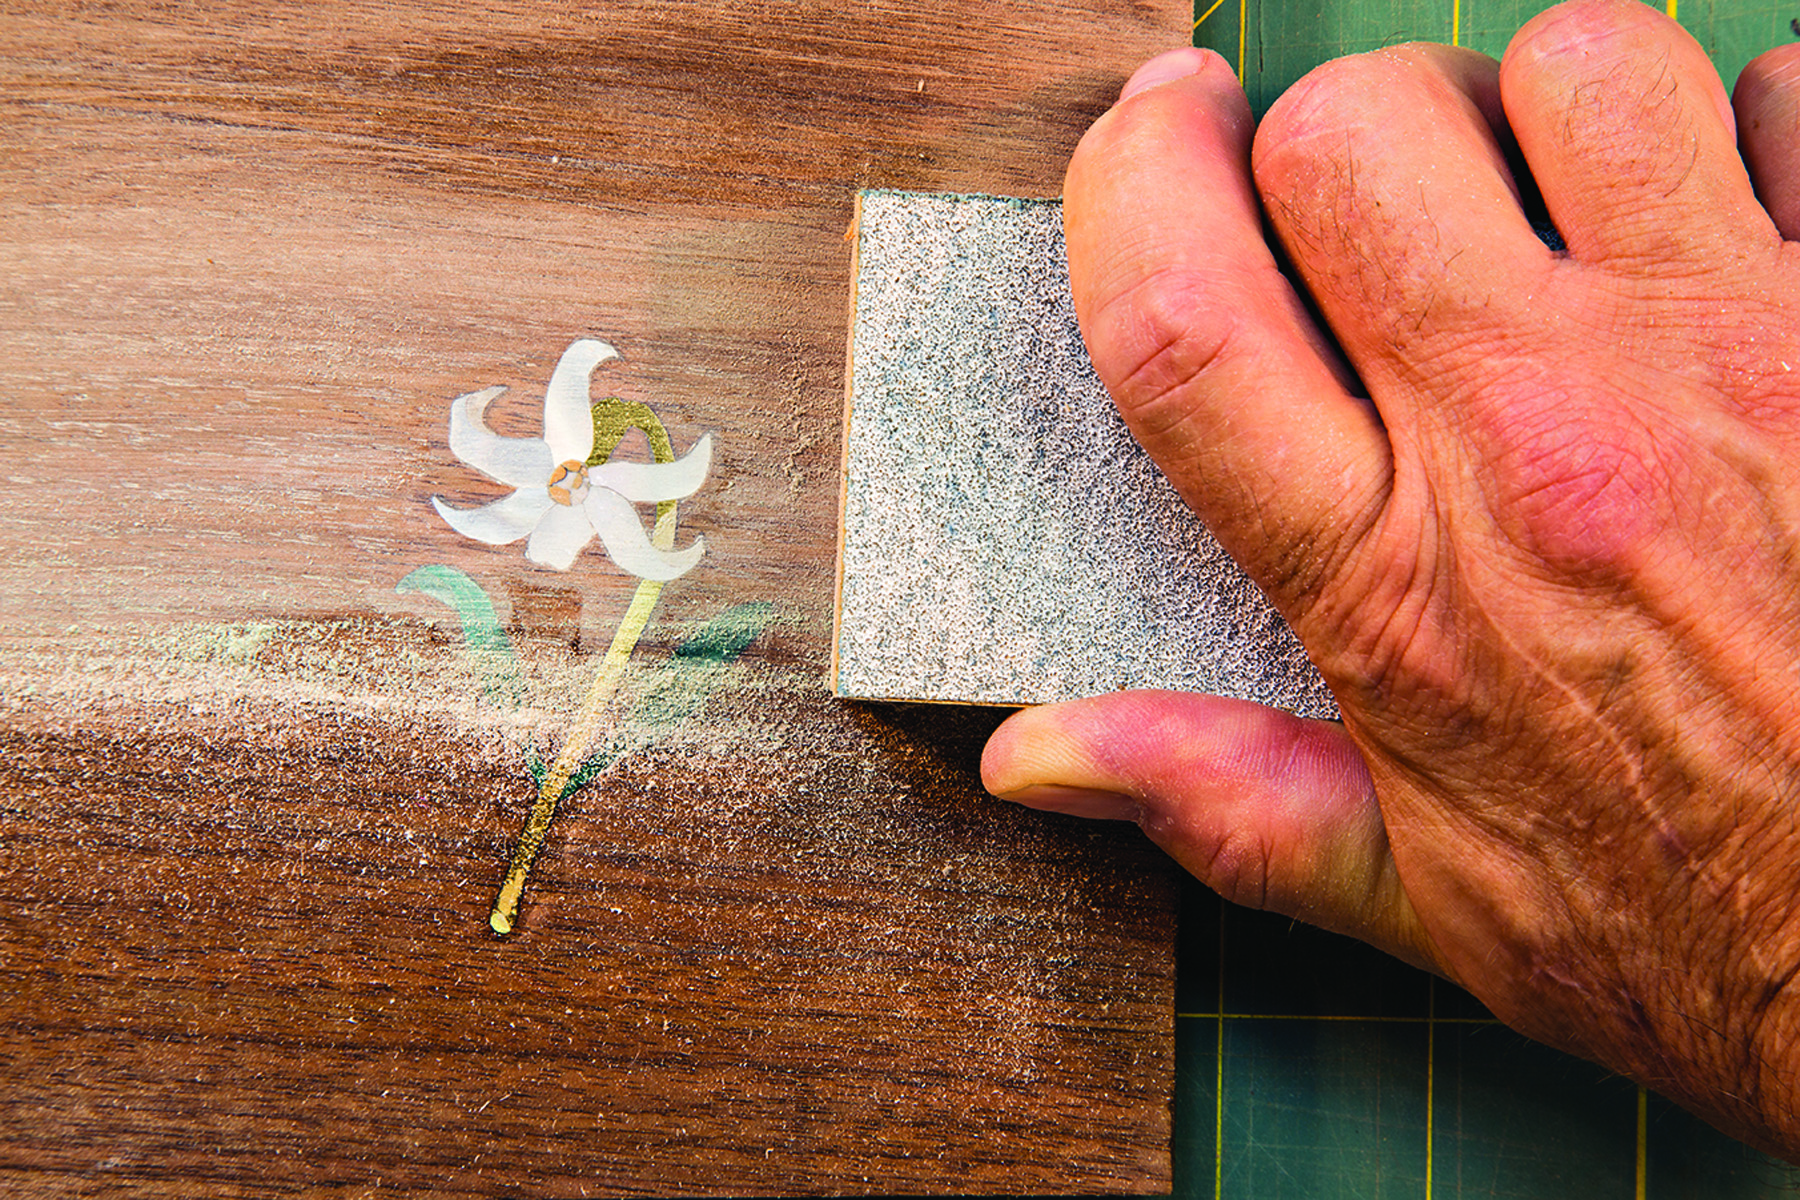
Sand it flush. Attach #80-grit sandpaper to a flat block and level the inlay until it is flush with the wood.
Give the glue 24 hours to dry. When the glue tests hard with pressure from a fingernail, it’s ready.
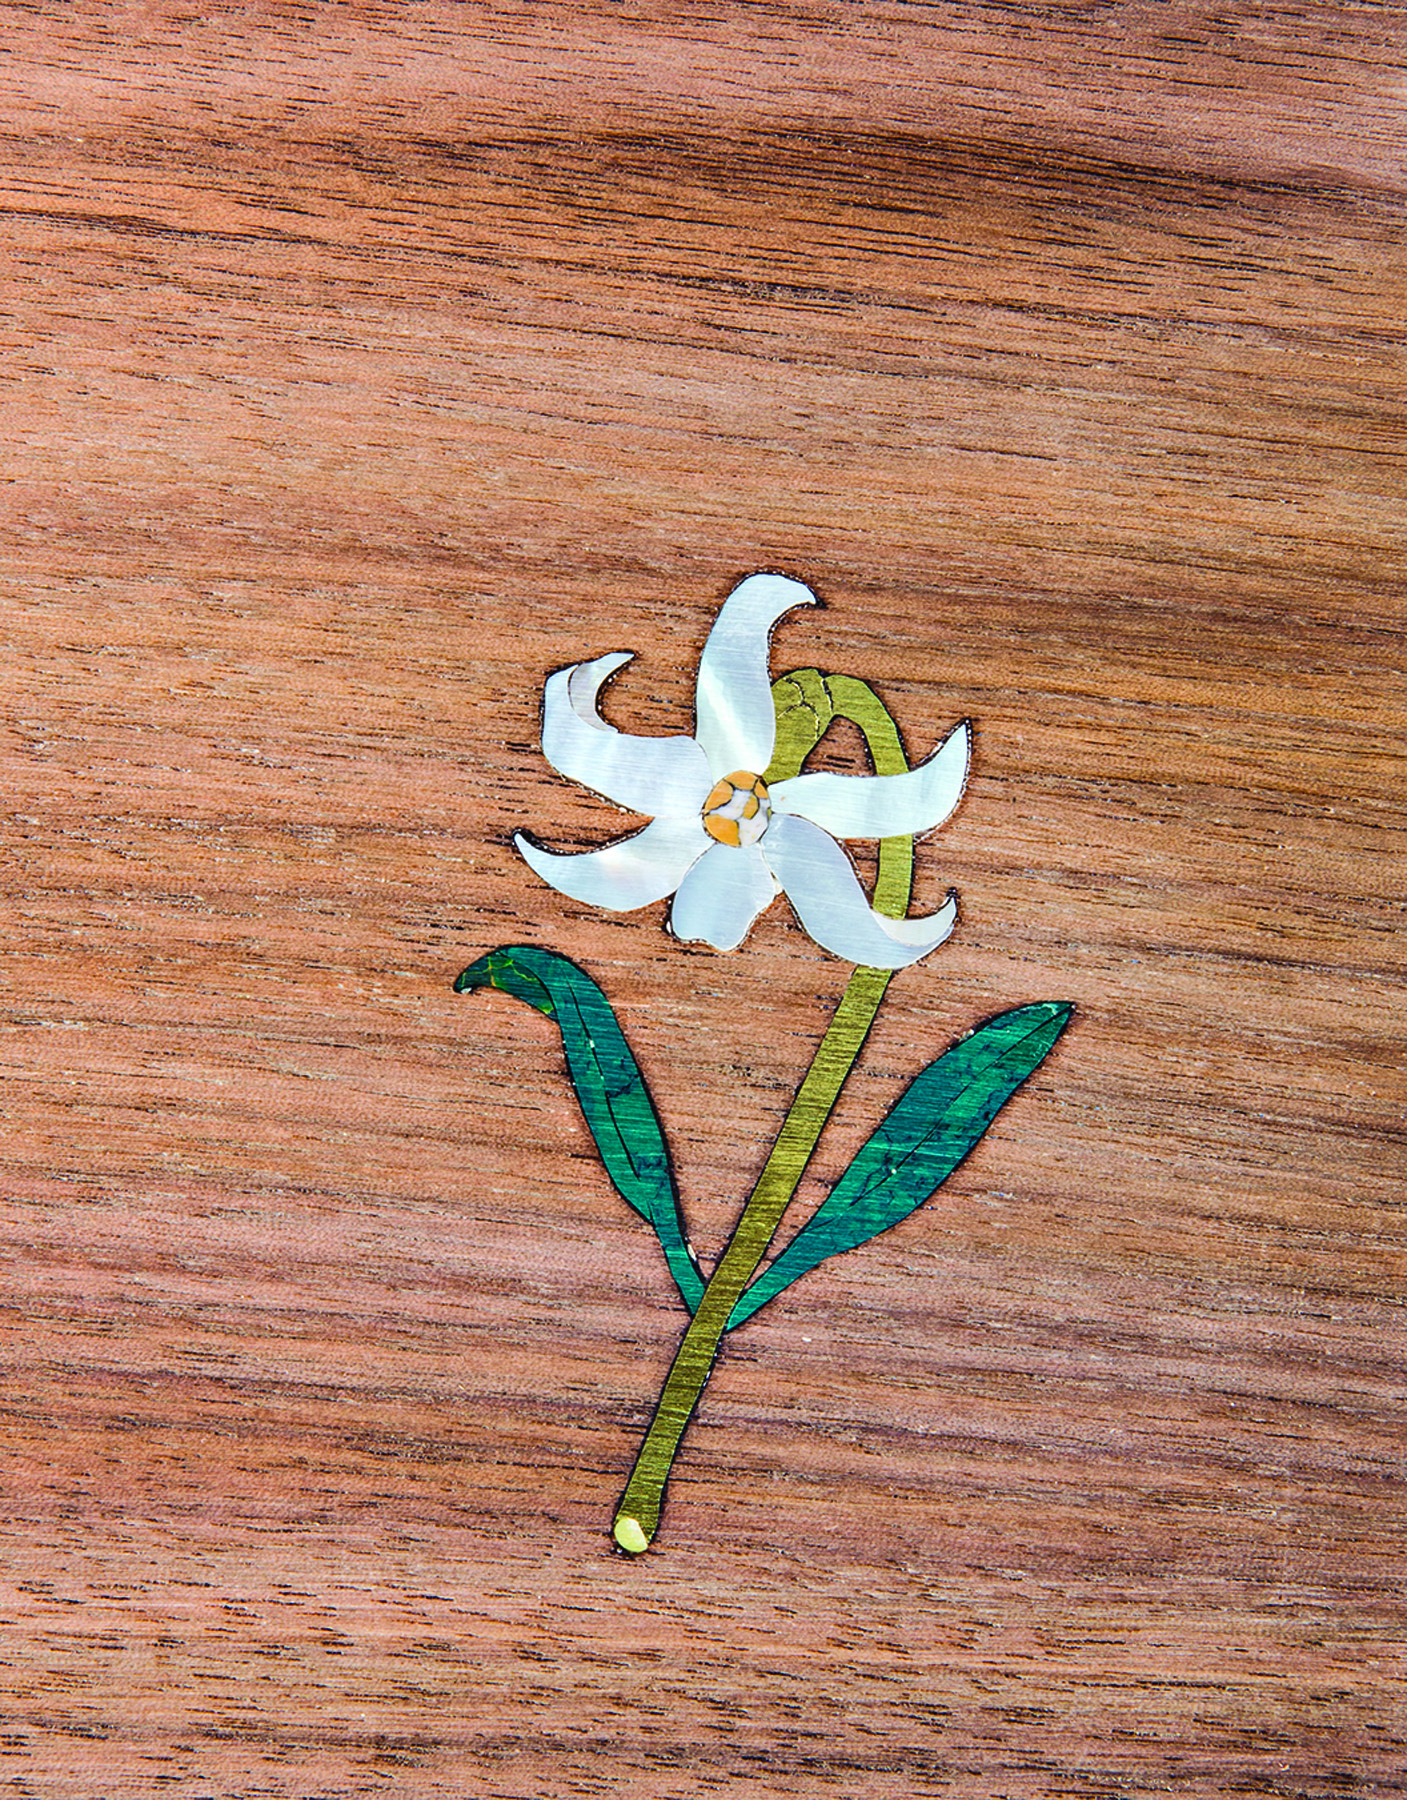
Finish it off. With the inlaid area sanded to #320 and ready for finish, striations are visible on the stem. Those disappear with finishing.
To flatten the surface, use #80-grit sandpaper attached to a hard, flat block (MDF is a good choice) using spray adhesive. If the block flexes, it will round the varying hardness of material instead of truly flattening it. Make sure all the flattening is done with #80-grit sandpaper. There will be sanding scratches on all the wood and inlay material. Continue sanding through the grits to #320. If metal was used, pad the surface with shellac to stop oxidation. Then finish it with the rest of the piece after final shaping. Once you get the hang of the process, you’ll find yourself looking for new materials. Remember, if you can shape, flatten and polish it, you can use it in your next inlay project.
Video: Watch a free video presentation from Marco Cecala on making and installing shell inlay.
Here are some supplies and tools we find essential in our everyday work around the shop. We may receive a commission from sales referred by our links; however, we have carefully selected these products for their usefulness and quality.