We may receive a commission when you use our affiliate links. However, this does not impact our recommendations.
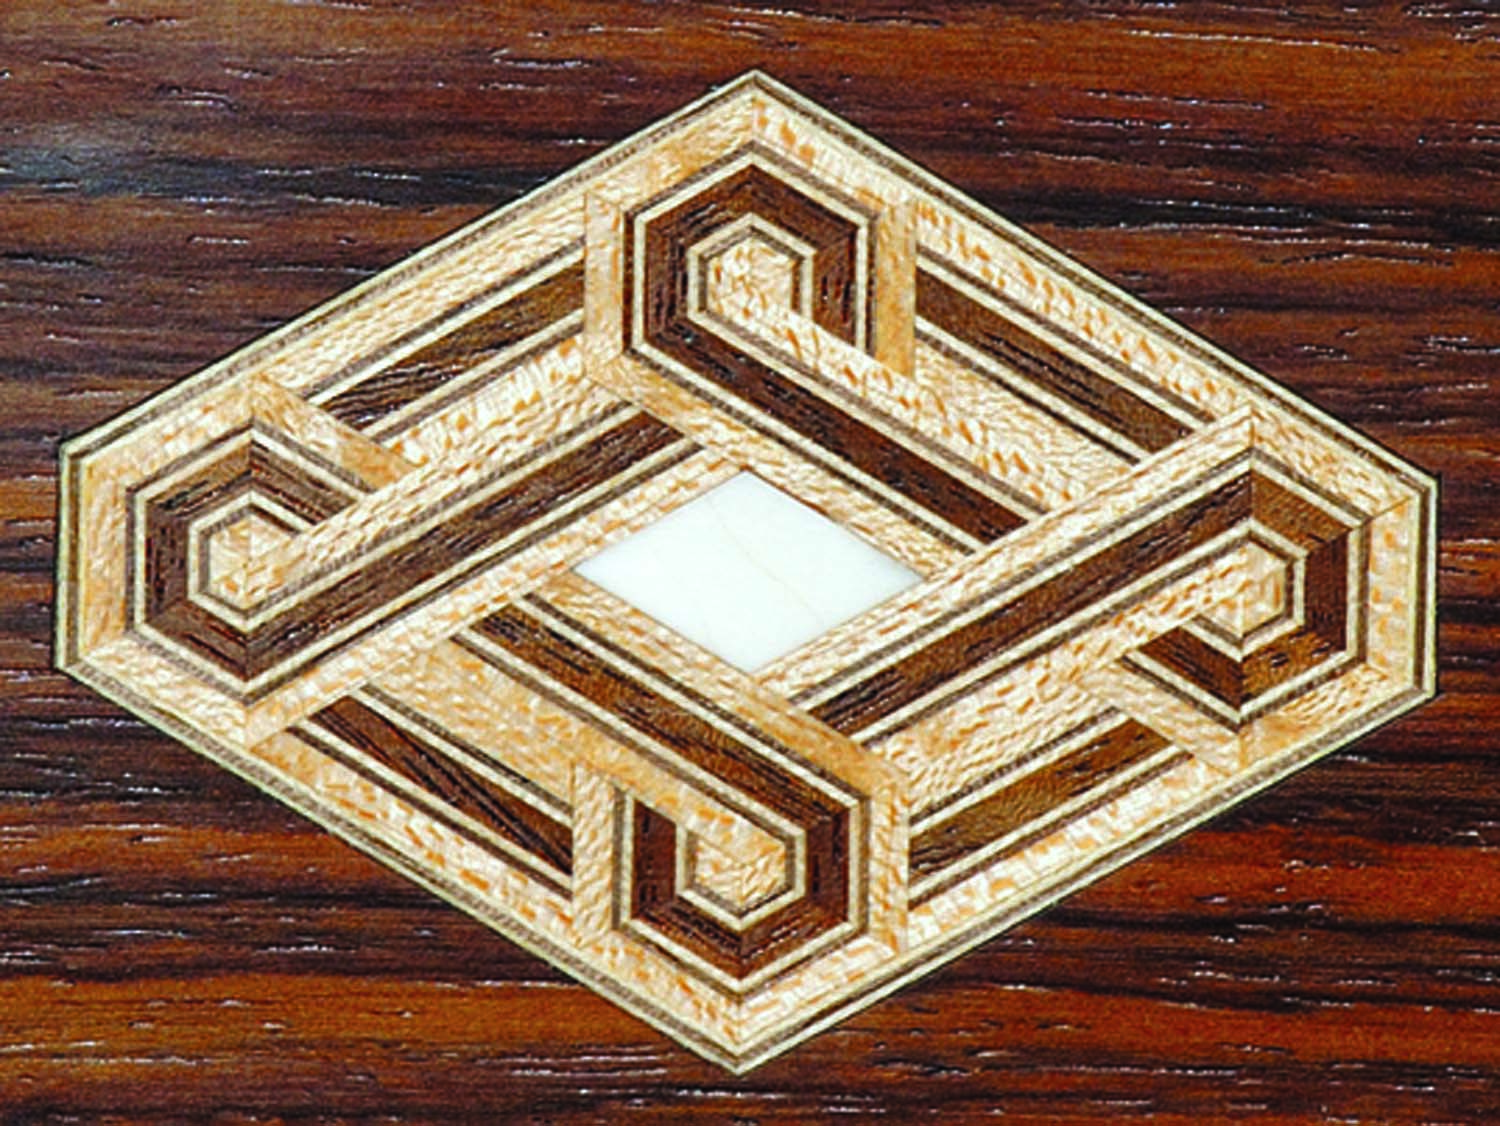
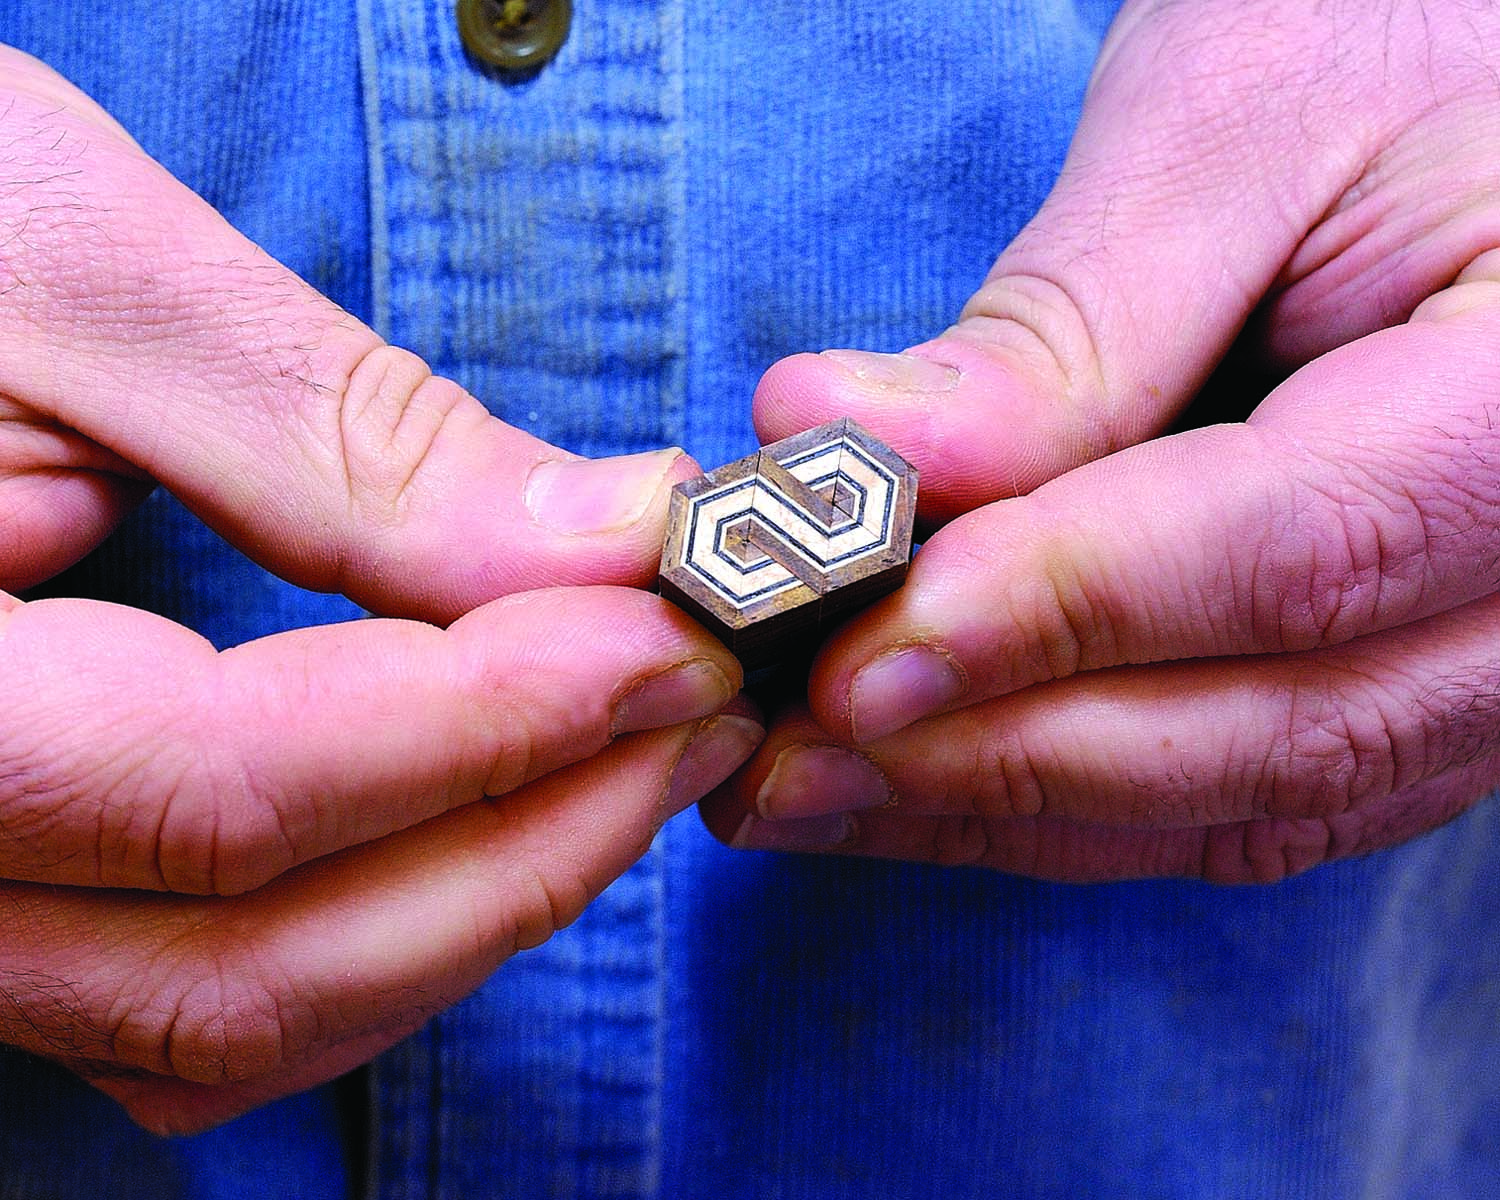
Plentiful patterns. Make hundreds of designs using micro lumber and only two or three miter angles.
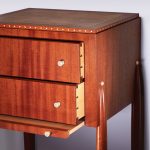
A few shop-made appliances allow you to add stunning face-grain inlay to your work.
Geometric bandings and inlay patterns, or parquetry, are widely used, from Japan to Egypt to Spain. I developed a method of creating parquetry while learning to build ouds, a musical instrument that is the ancestor of the European lute and modern guitar.
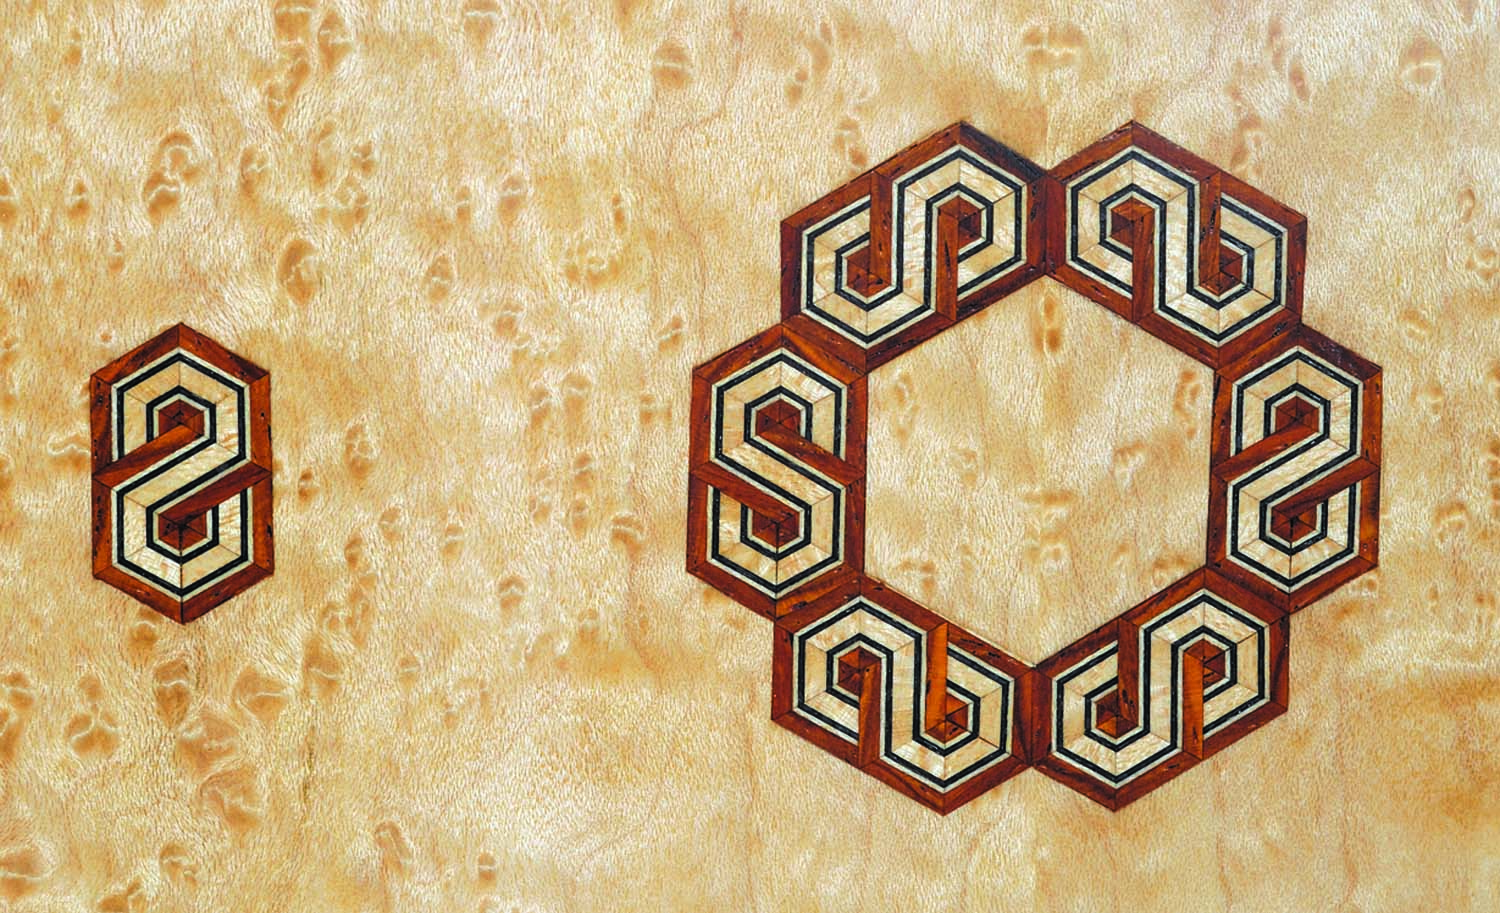
The method can be employed to make bandings and inlays from as little as two species of wood, one at a time, to more detailed patterns using multiple layers to produce several copies of the same pattern. The designs I most frequently use create the illusion of dimension, as if the pattern were a flexible ribbon, folding, twisting and turning along its length. These patterns are fun to design and make, and can richly embellish any project.
This geometric parquetry differs from typical mosaic-wood techniques (think classical guitar rosettes made primarily of dyed strips and sliced into end-grain segments) in that the exposed face is entirely face grain. No end grain is visible, so the chatoyance and color of the wood is vibrant. I like to use figured woods such as curly or bird’s-eye maple. Even at this small scale the wood’s figure creates a shimmer and sparkle.
To my eye, these designs look best when the joints are near perfect, so simply cutting the pieces with machines usually doesn’t cut it, although some of the cuts could be accomplished with precise machine setups. Plus, machines remove large amounts of wood, and many of the designs I use are cut from books of exotic and costly veneers, which take time to mill and assemble. Power machinery would waste more of the carefully prepared material. I also enjoy the process using hand tools – I can listen to music or the birds outside my shop. The fragility of the individual pieces calls for the use of gentler techniques.
Stock Preparation
The process starts with precisely dimensioned stock. My furniture-maker friend Tom Monahan stopped by my shop during this project, spotted my prepped stocked and quipped “nice micro-lumber.”
Packet blanks. Feel free to rearrange the blanks within the packet for a different look.
But you can’t buy this material from tiny sawmills; you have to make it yourself. I use a small wide-belt sander to mill stock down to about .075″ (just over 1⁄16“), but this can also be accomplished by hand with a planing board and jointer plane. For the thinner elements in a design I use commerical sliced veneer.
Planing board. A planing board allows you to plane stock down to crazy thinness with insane accuracy.
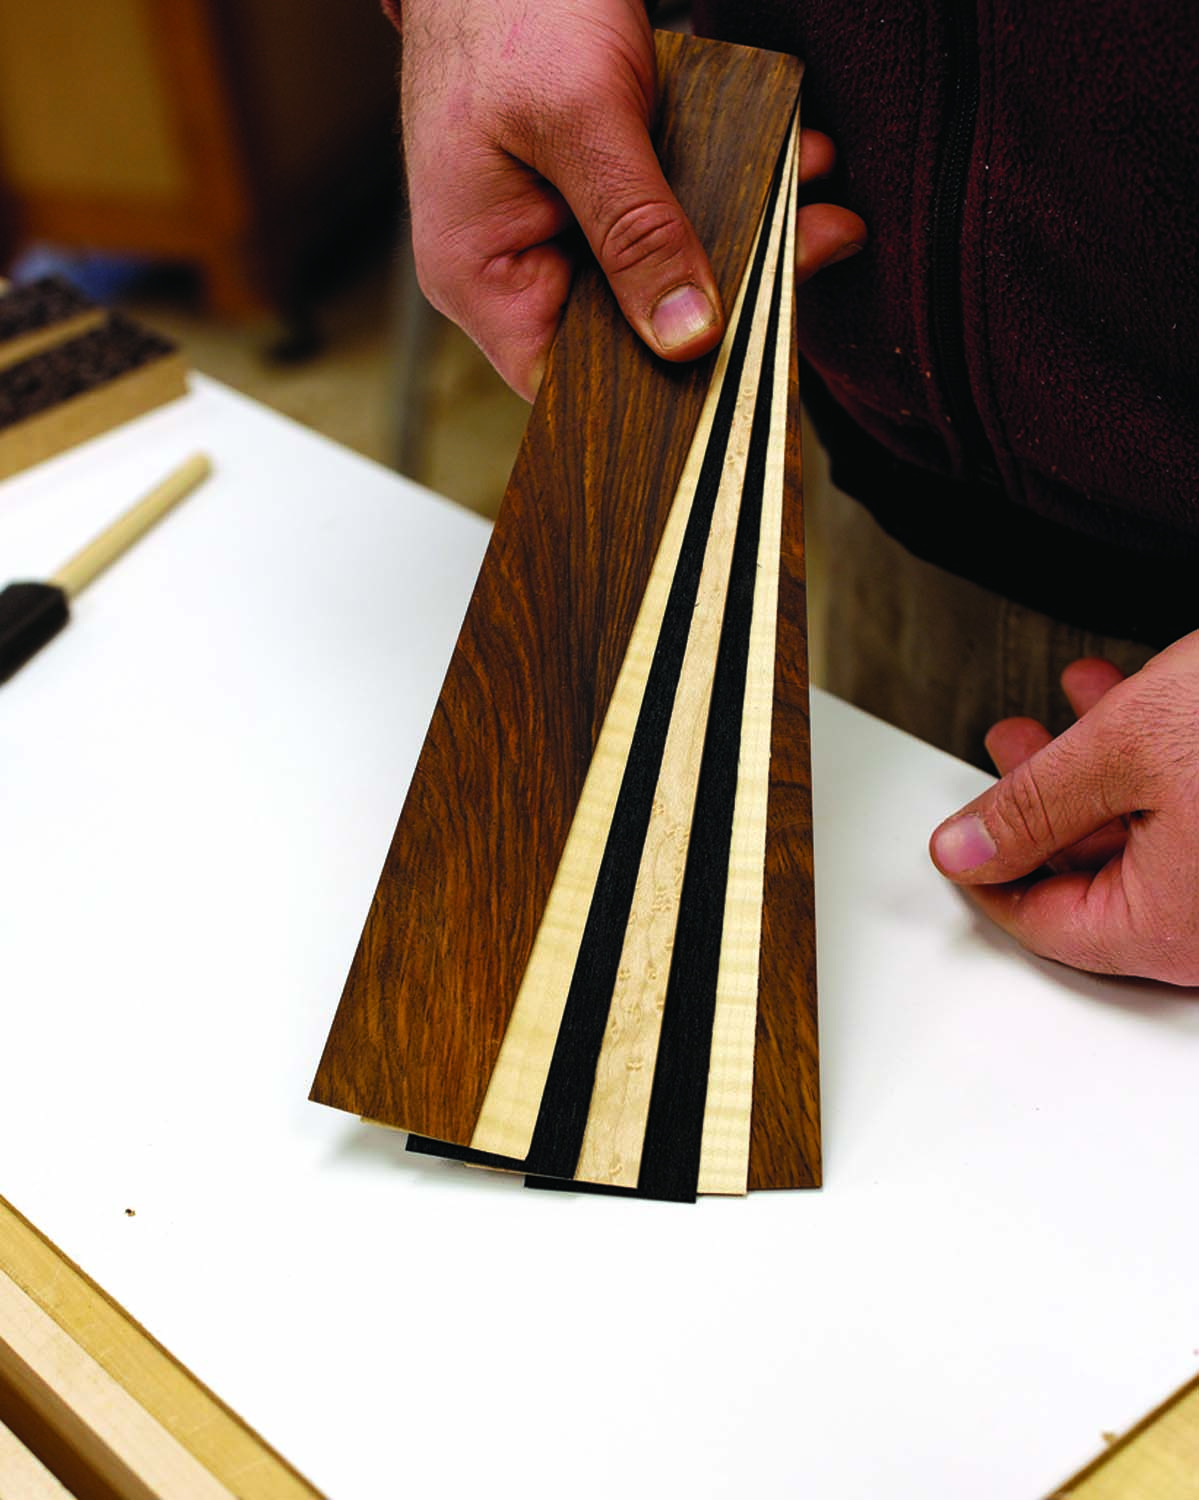
For this book (a veneer packet) I’ll use three thick layers and four veneer layers. I usually make the two outer layers with thicker pieces. This makes the assembly and inlay process a little more forgiving because the extra thickness allows you to flush misaligned pieces after glue-up without compromising the design. If I want a very thin line of contrasting veneer around the perimeter of the piece, I’ll glue this on later, after the assembly process is complete.
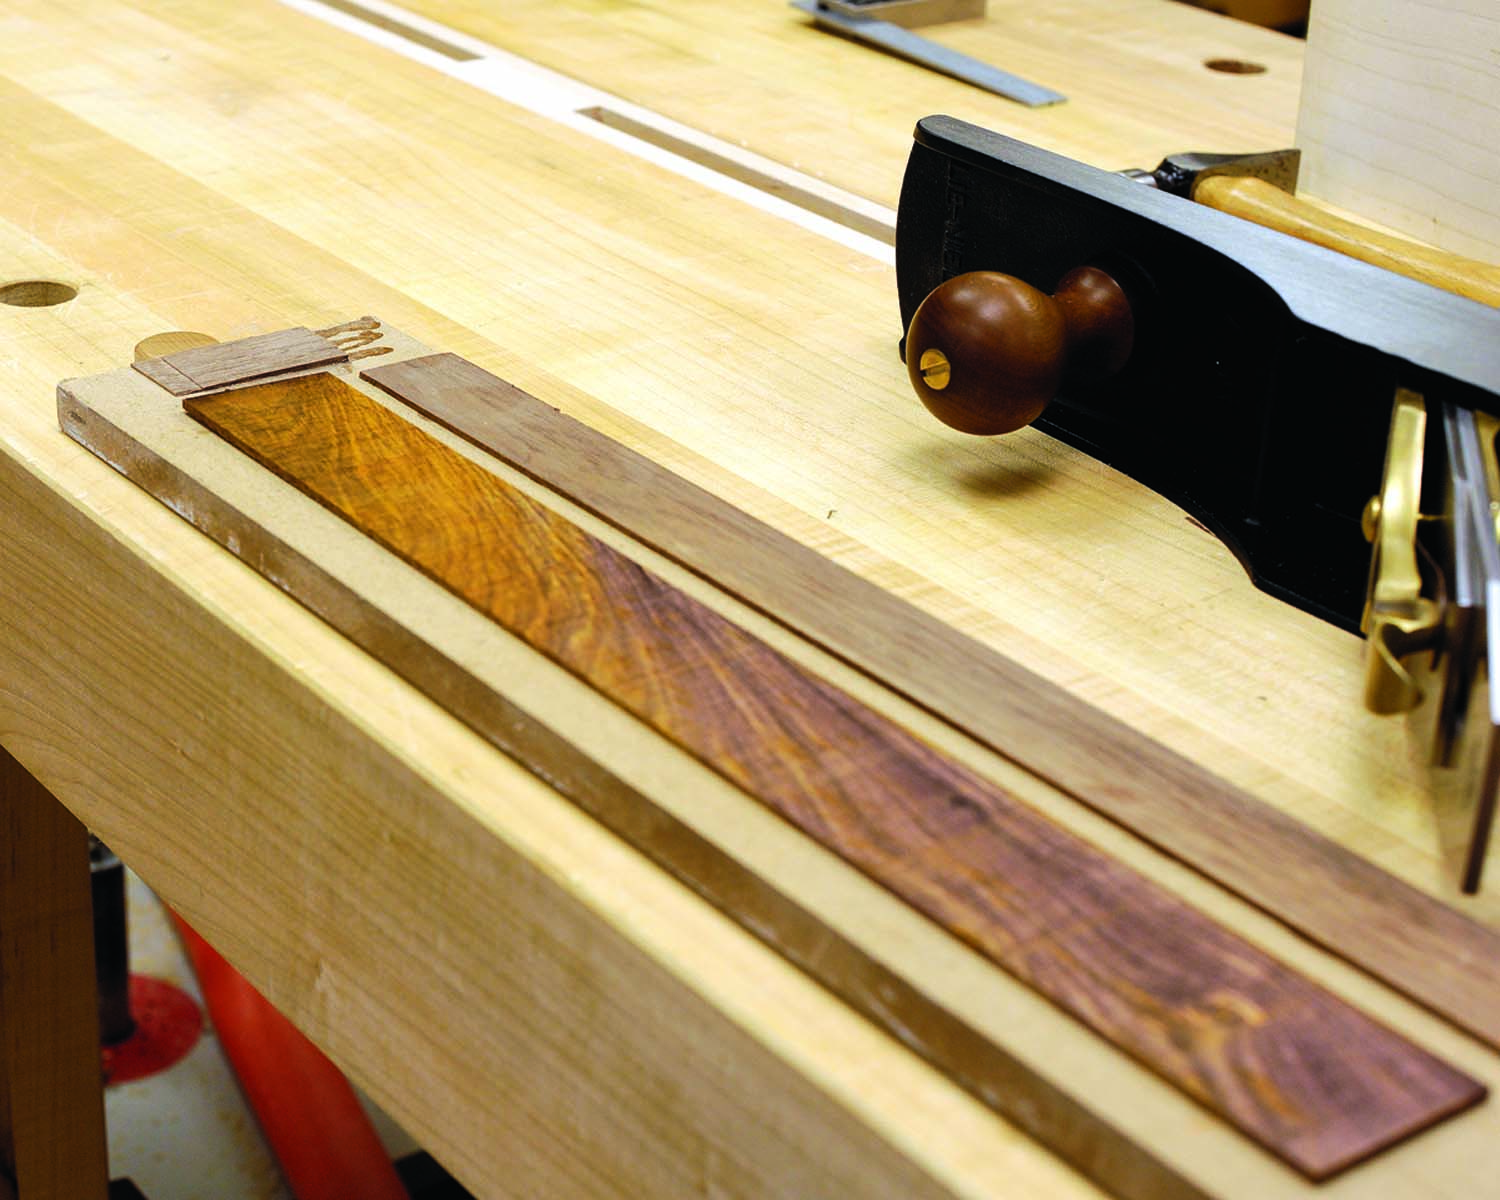
Resawing & the Planing Board
I resaw these pieces off a jointed face of a thicker board then thickness them from the sawn face on the planing board.
To make the planing board, glue some thin offcuts of a mild wood onto a flat substrate. A short stop at the end and a long strip along the side are all you need. You don’t want to clamp the wood in position; you just need to restrain its movement. This works best with short pieces because a longer piece will tend to buckle at the front of the planing board. I also try to keep my workpieces about 2″ wide, no more. This allows me to take a full-width shaving with my No. 7 bench plane. The long toe section of the No. 7 also helps hold down the piece.
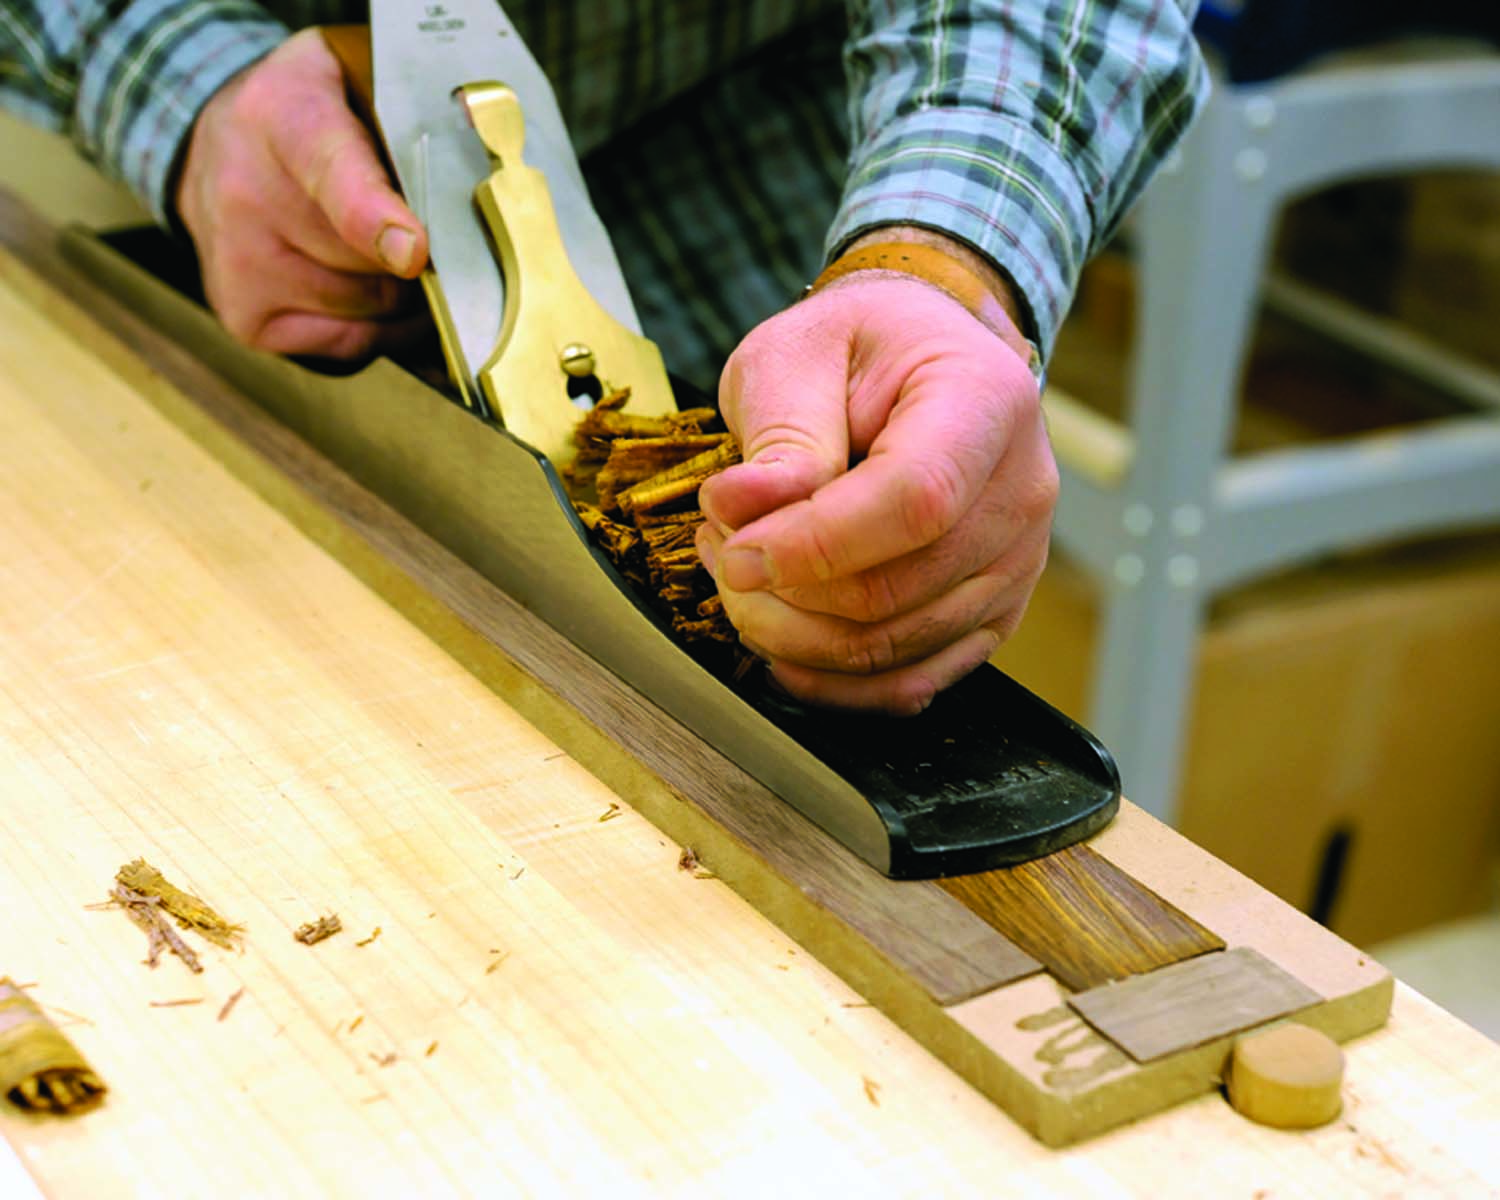
Micro from macro. Use your largest bench plane (here, a No. 7) to keep the thin board held flat while planing the wood to precise thickness.
You’ll also want to make sure the long strip running along the planing board is thinner than your final thickness. If it is thicker, you’ll plane just the far edge of the blank as the plane’s edge rides high on the strip. If you find areas of the blank getting thinner than you want, raise up that section with a layer or two of blue painter’s tape. With a finely set plane and a sharp iron, you can easily get within three or four thousandths of your target. Once you get all your blanks to the right thickness, cut some veneer to complete the packet. With all the layers in the packet complete, clamp the entire packet in the face vise and plane one edge to see how it looks.
Glue-up
You don’t need a veneer press or fancy setup to glue up your packet. This packet contains some rosewood so I’m using epoxy. Yellow glue is fine for five layers or fewer using domestic hardwoods. White glue or liquid hide are good if you like to take your time. Apply glue to the inside face of the first layer, then flip the next layer onto it and repeat. Once the packet is glued, apply a strip of masking tape around both ends to keep the layers from sliding. The “press” consists of two pieces of laminate-covered particleboard cut a bit larger than the packet.
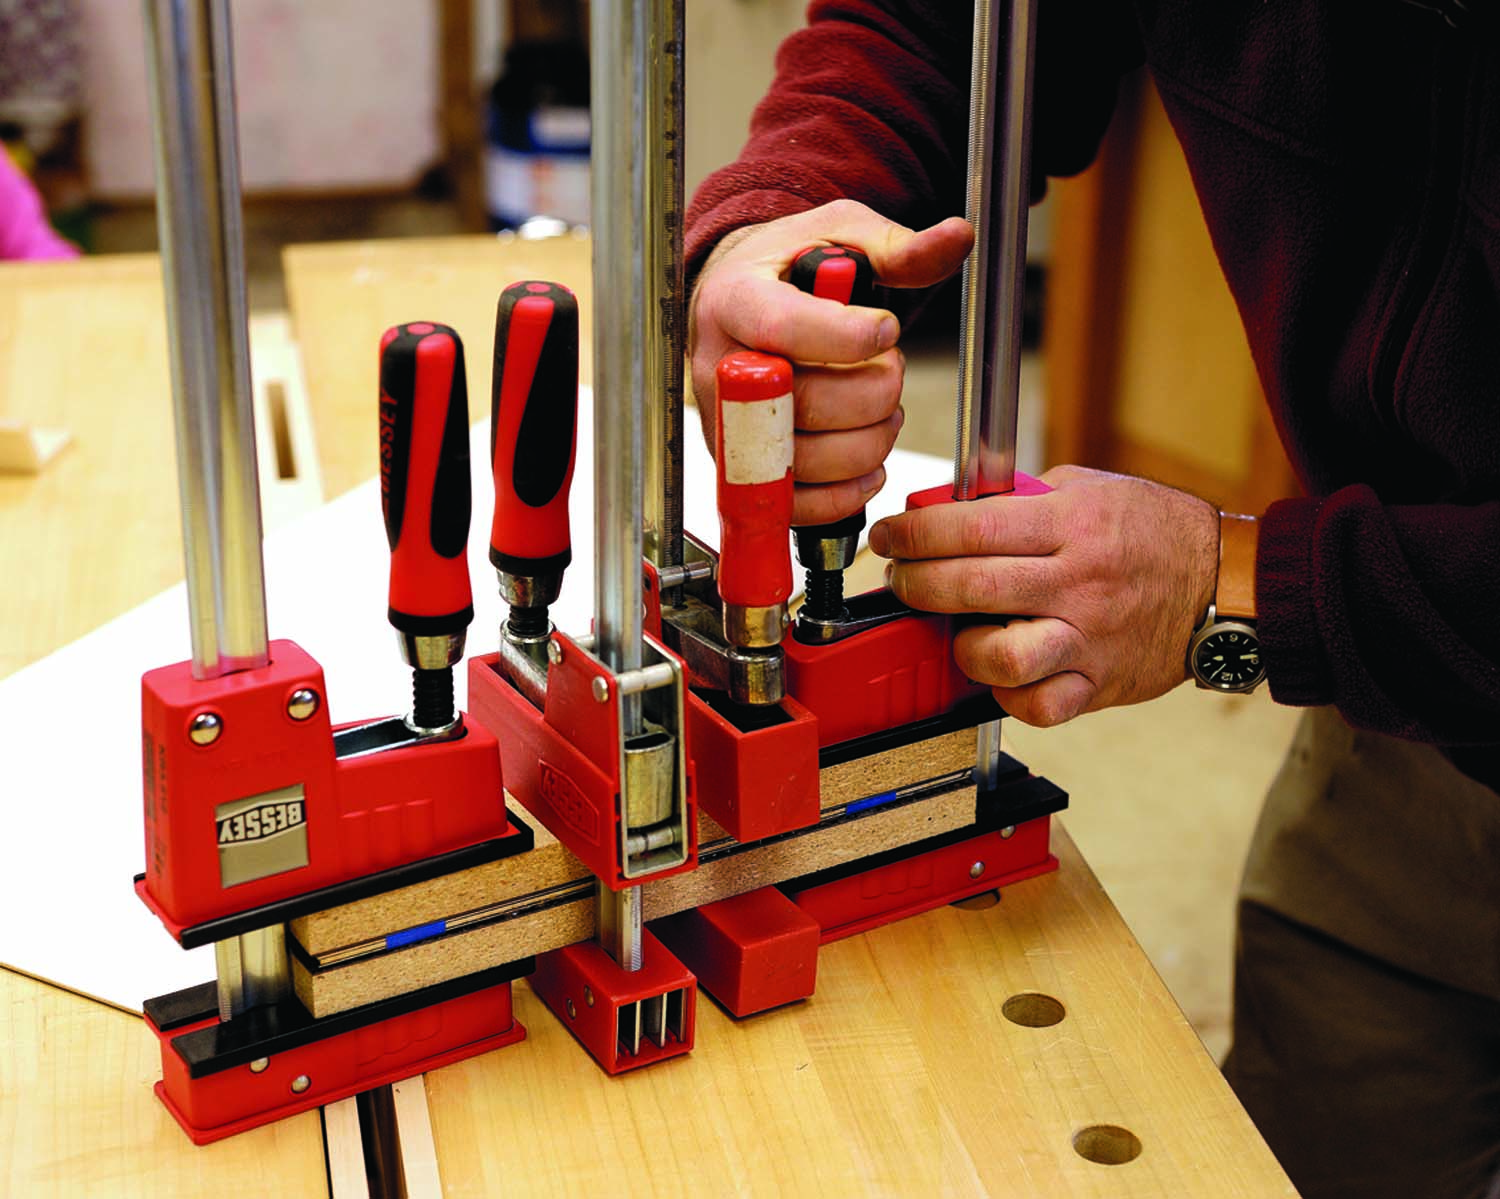
I want you to squeeze. Make the packet into a book in a quick-and-dirty veneer press made from kitchen countertop offcuts. Blue tape prevents slipping. Exert a lot of pressure on the packet. You want to make sure it’s well-adhered and flat.
Clamp the packet and look for squeeze-out along the edge. Make sure the layers haven’t shifted significantly.
After the packet has cured into a “book,” remove it from the clamps, and clean up the edges and ends of excess glue. Then refine it until its edges are parallel and square.
Miter Box & Miter Jack
Other options. Using different veneer combos, angles and arrangements, many designs are possible.
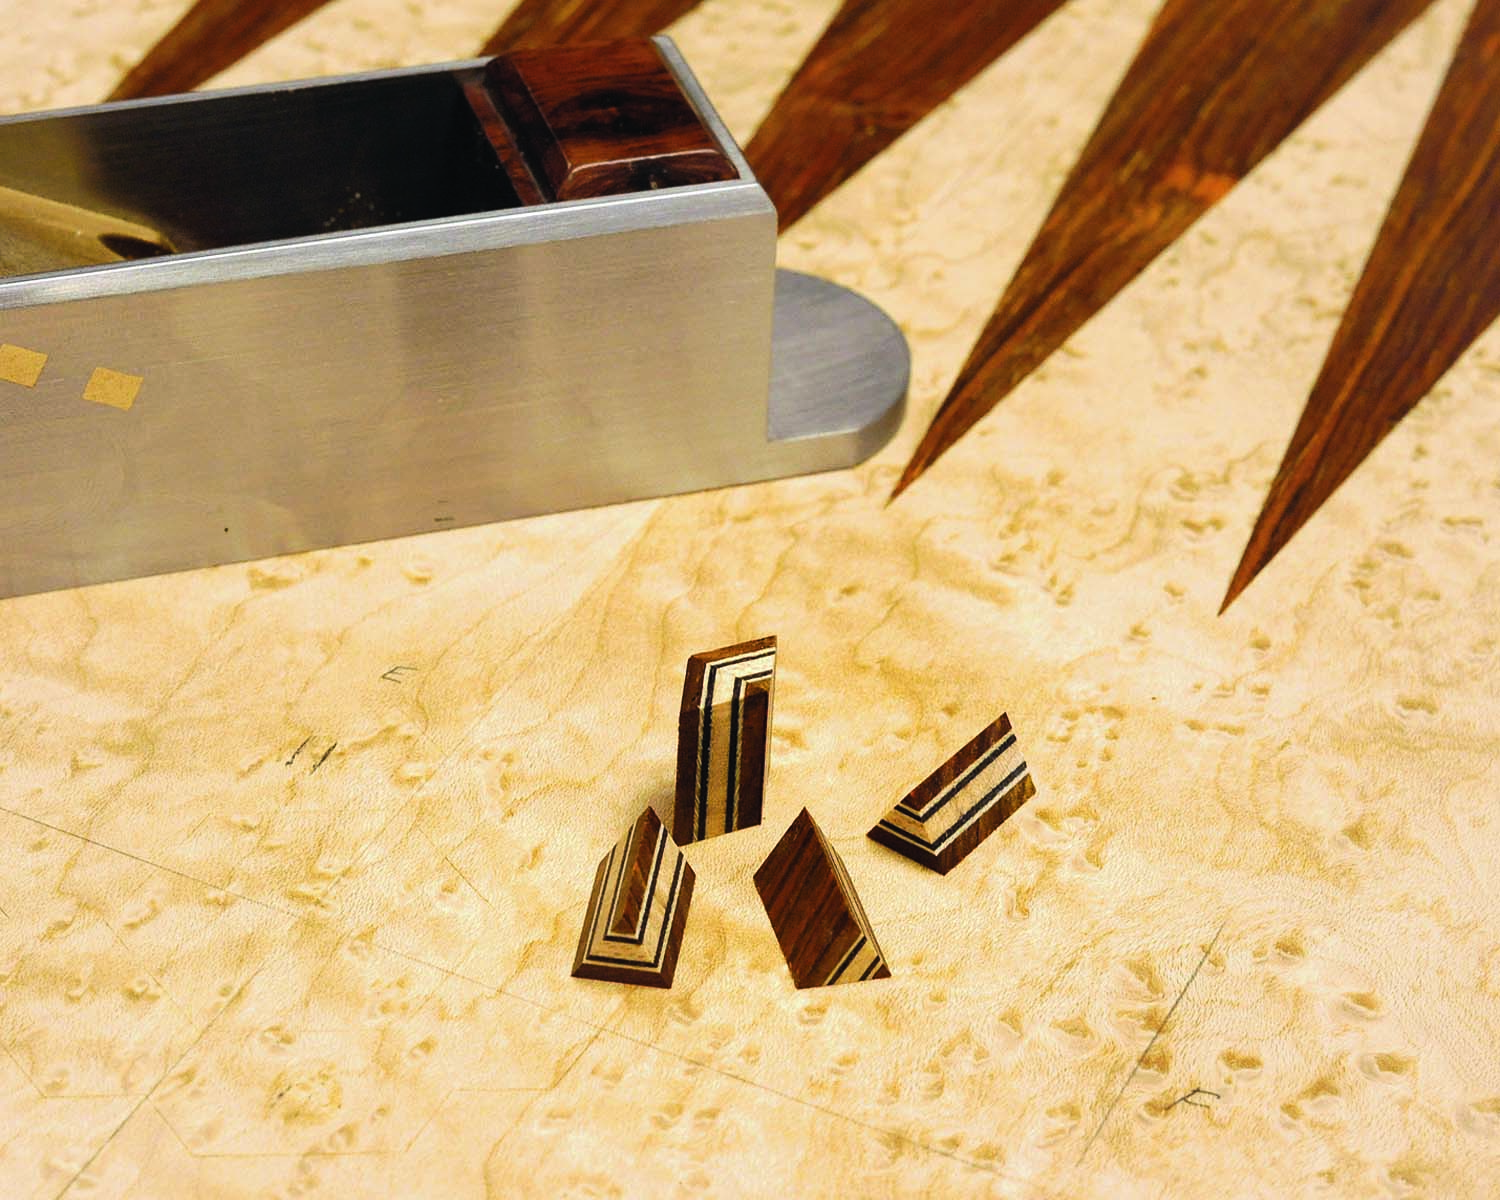
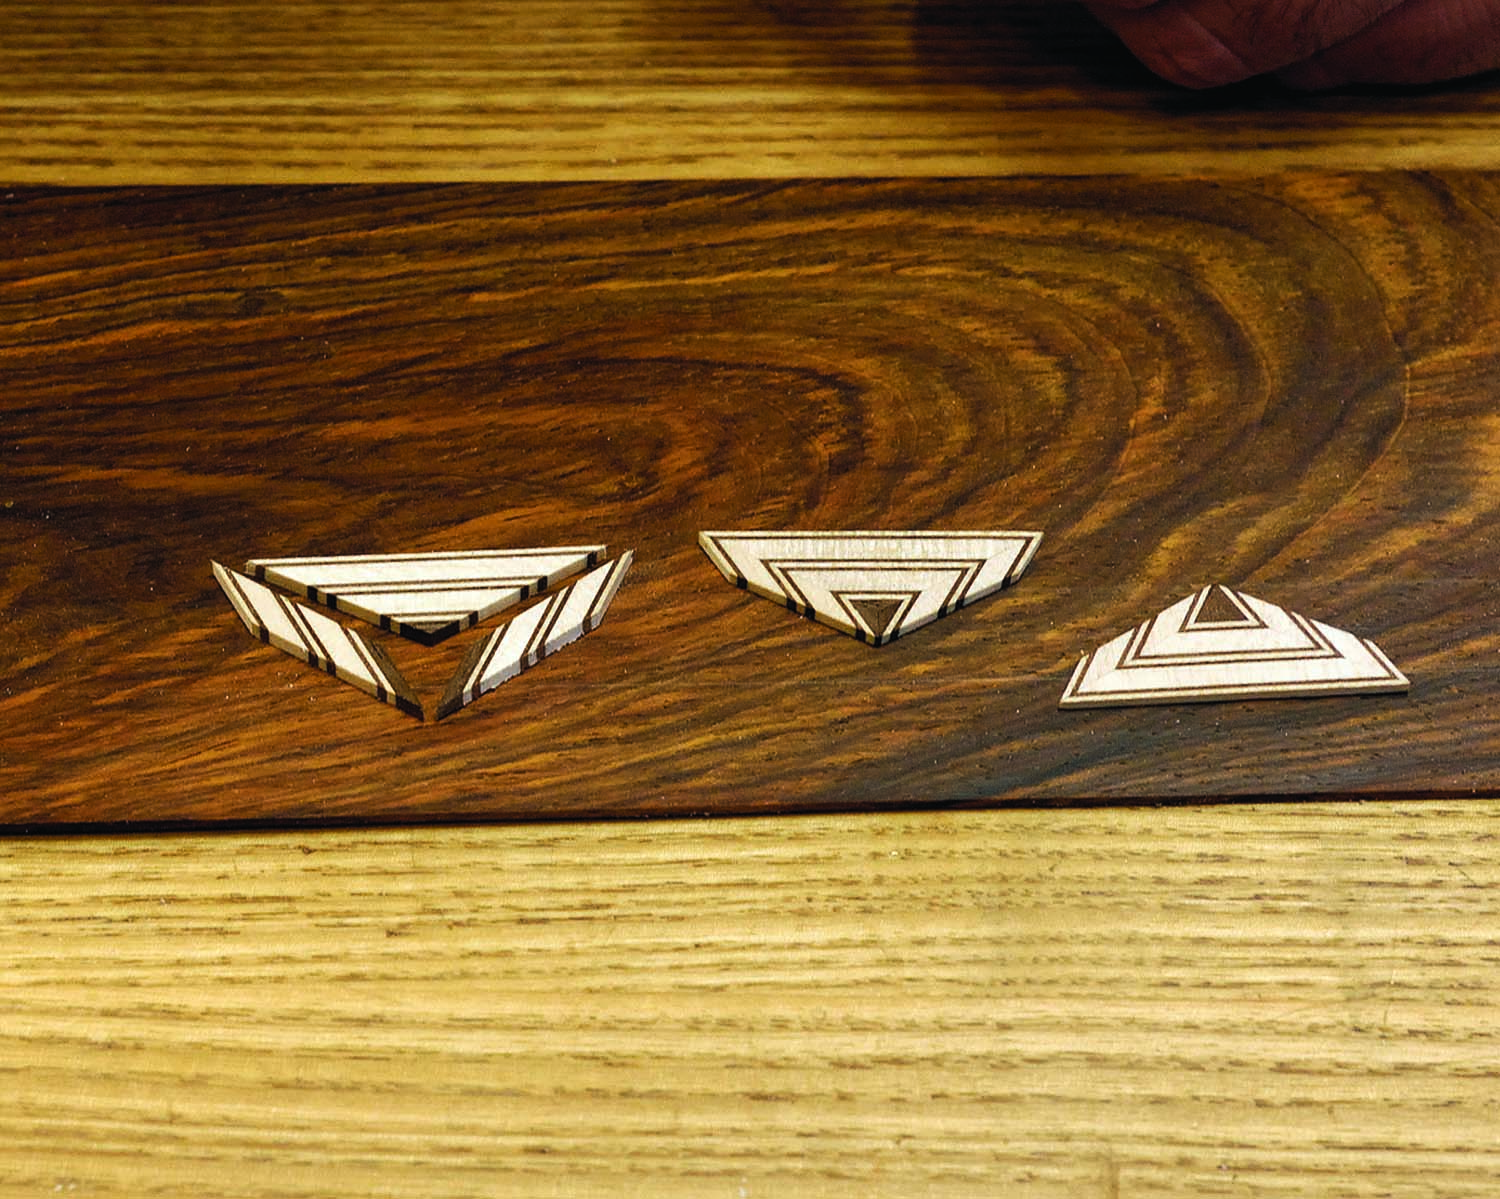
For this article I’m making a design using only one 30° cut. A dazzling array of designs can be made by assembling individual 30° elements of different lengths and configurations.
Can you believe how many designs one cut can produce? The bandings at right are all made from only the three different pieces illustrated at the bottom, all cut with 30° miters.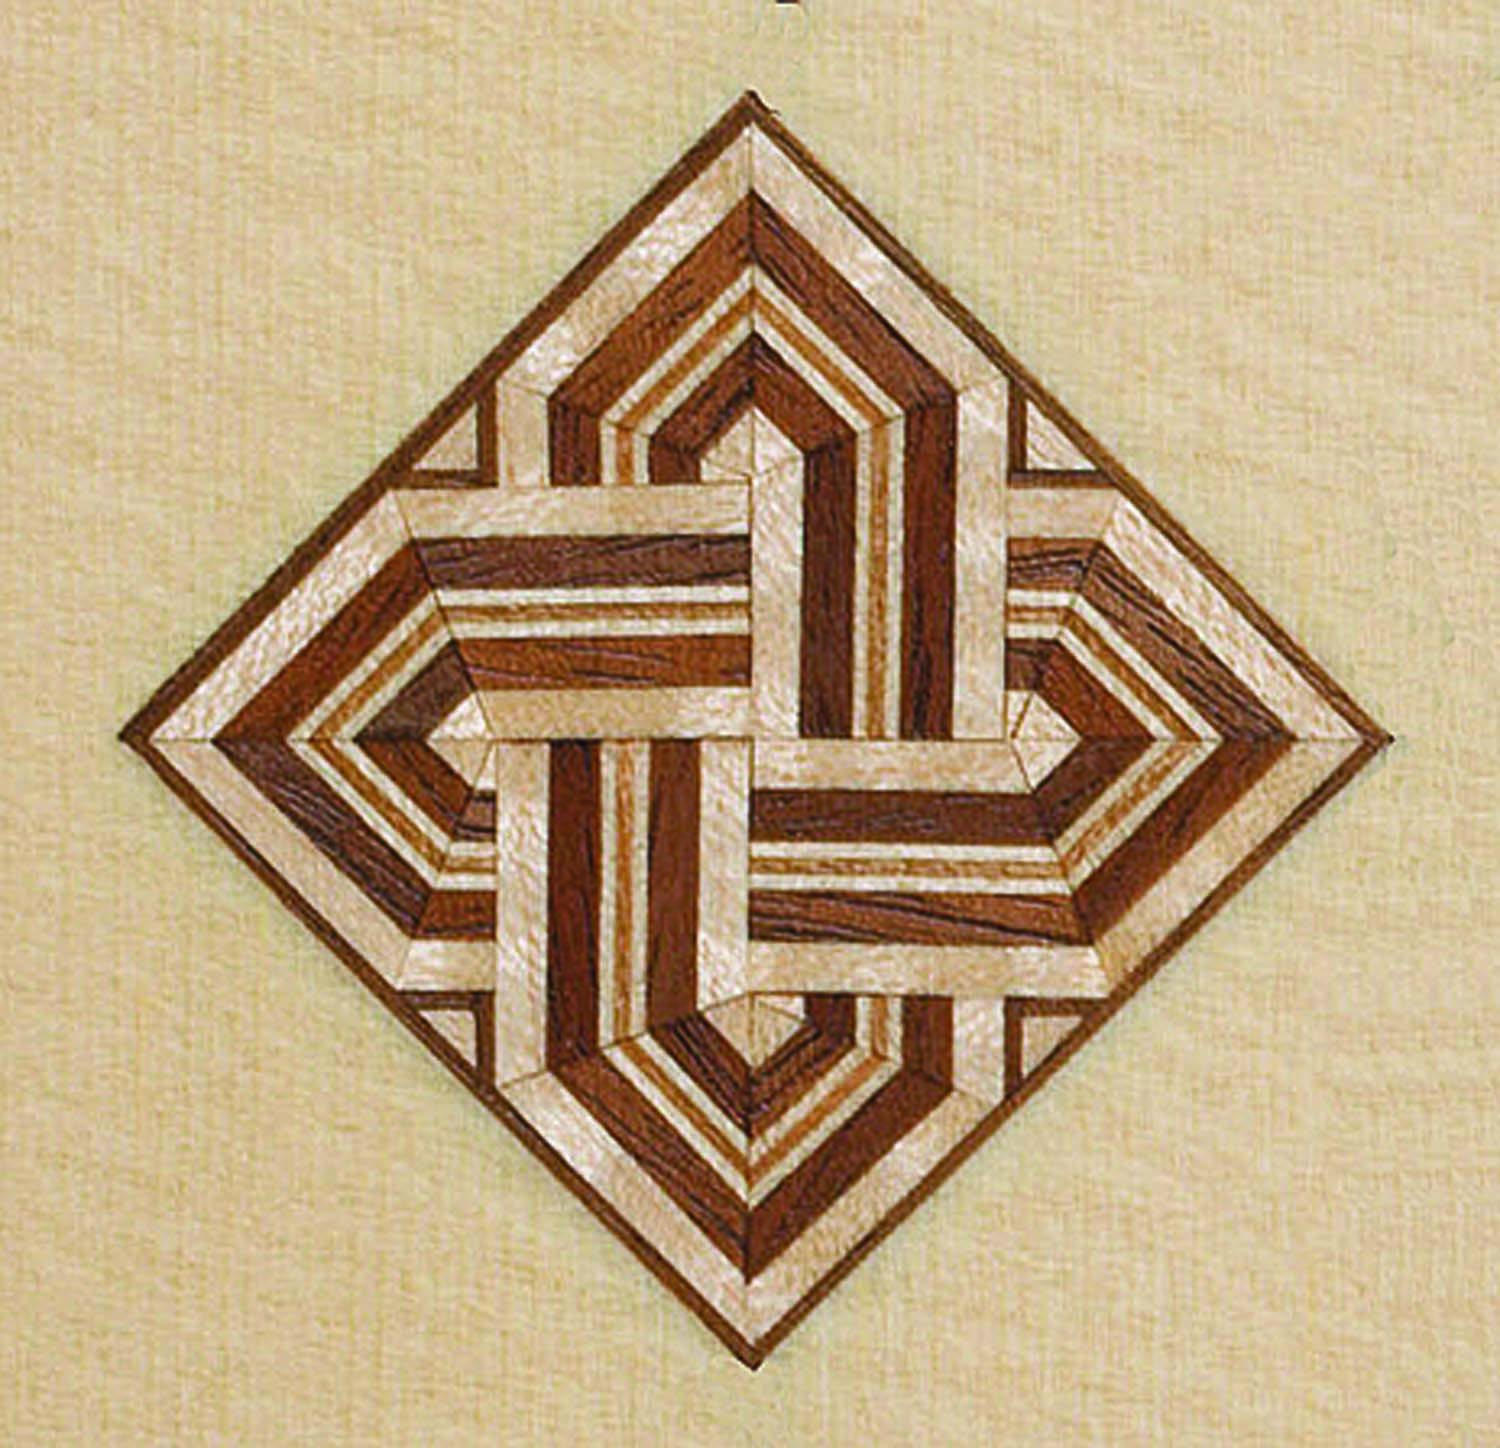
The key to this process is building a simple miter box and miter jack.
The miter box is made from mild hardwood with a groove just a little wider than the thickness of the book. A 30° kerf is cut into the walls of the box to guide the saw. A small, fine-tooth Japanese saw is perfect. I make the front wall of the miter box taller to guide the saw, and the rear wall lower to make it easier for my free hand to hold the work.
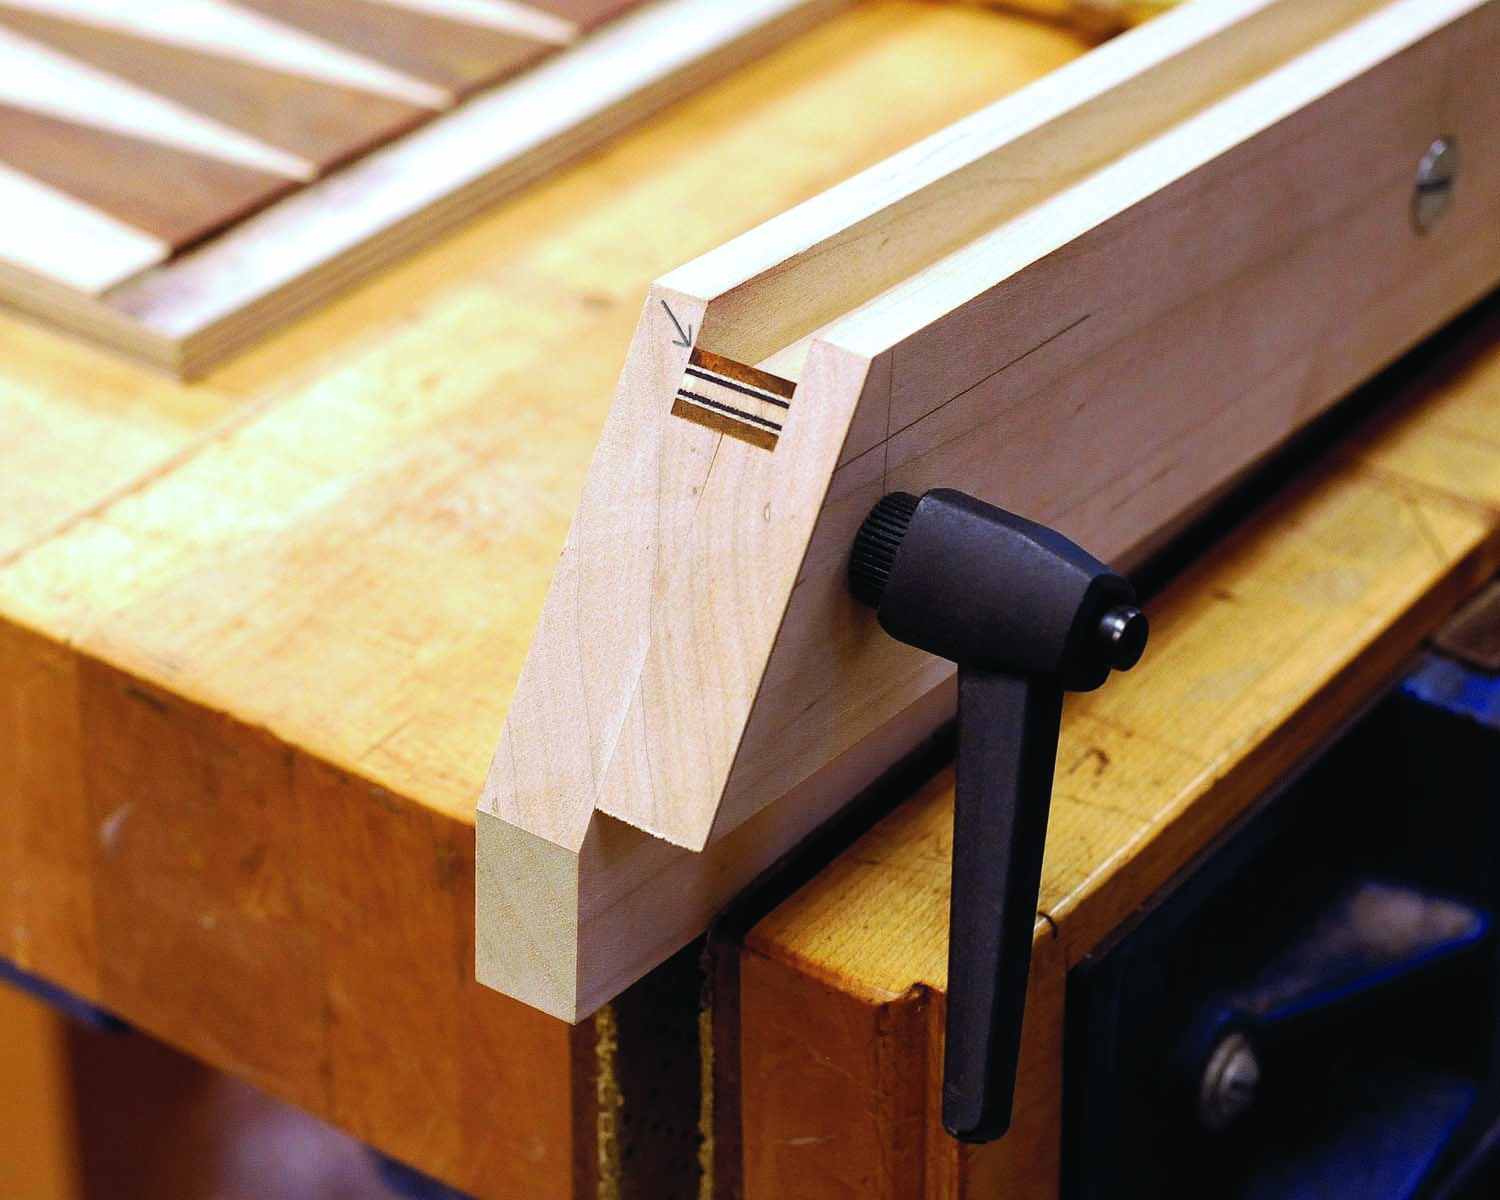
The miter jack consists of two jaws and a clamping knob to hold the workpiece. I cut a groove along a board as wide as the slice from the book – 5⁄8” to 3⁄4” wide is about as wide as I go. Any wider and the workpiece becomes difficult to align in the jack. After plowing the groove, the jack is ripped in half to allow the jaws to grip the workpiece, and holes are drilled for the clamping knob and screw.
The inner jaw is fitted with T-nuts while the outer jaw is fitted with a clamp handle and a machine screw. The outer jaw is then ripped a bit narrower so the inner jaw can be clamped in a face vise, allowing the outer jaw to move freely. Once the jack is assembled and clamped together, cut the 30° ramp on one end. You can also make the jack longer and cut a second ramp, at a different angle, on the other end for other designs.
I use a shooting board to tweak the angle to exactly 30°. This needs to be right on the money because even a small discrepancy can multiply with each piece.
Before committing your prepared material to the saw, cut some samples from a piece of cherry or maple (light colors help precision) to check your miter jack’s angle and your planing technique. The miter box gets the triangles close, but they are planed to perfection in the miter jack.
Here’s the process: Prepare a stick the same width as the groove in the jack and clean up the edges with a plane so they are straight and square; then cut one end of the stick in the miter box. Toss the waste.
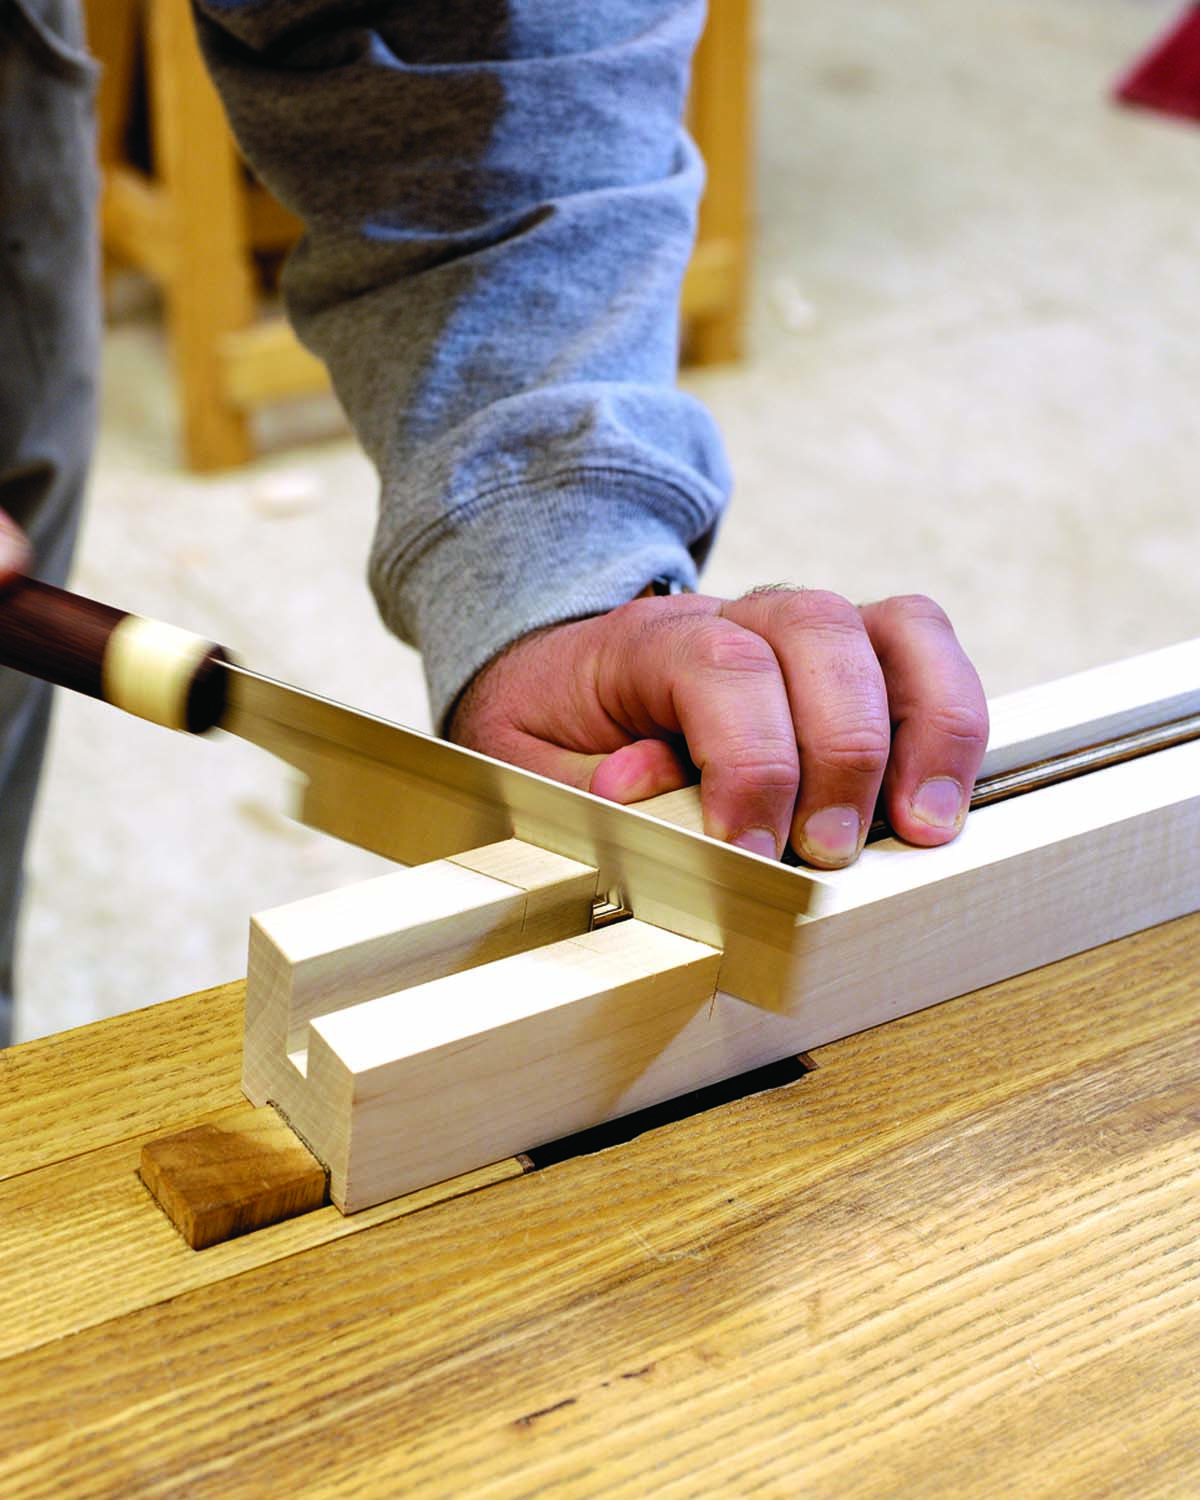
Miter box. A scrap of wood and a cheap Japanese saw cut the rough miters quickly and easily.
Move the stick to the miter jack and clamp it so the end is proud of the ramp by a few thousandths.
Use a low-angle plane to shoot the stick’s end grain. If you’ve never used a miter jack, practice on scrap first. After a few trials you’ll get the feel of the last stroke before you start planing away the jack. You can get precise results, within a thousandth of an inch, with this fixture and a sharp, finely set plane.
Now step back to the miter box and cut the triangle away from the end of the stick. You still need to shoot the other edge of the piece, so leave it about 1⁄32” long. You can use the kerf in the miter box to line up the cut. If you can see a flat area at the top corner of the piece, you’ve done well. This represents the exact amount of material you need to plane off at the jack.
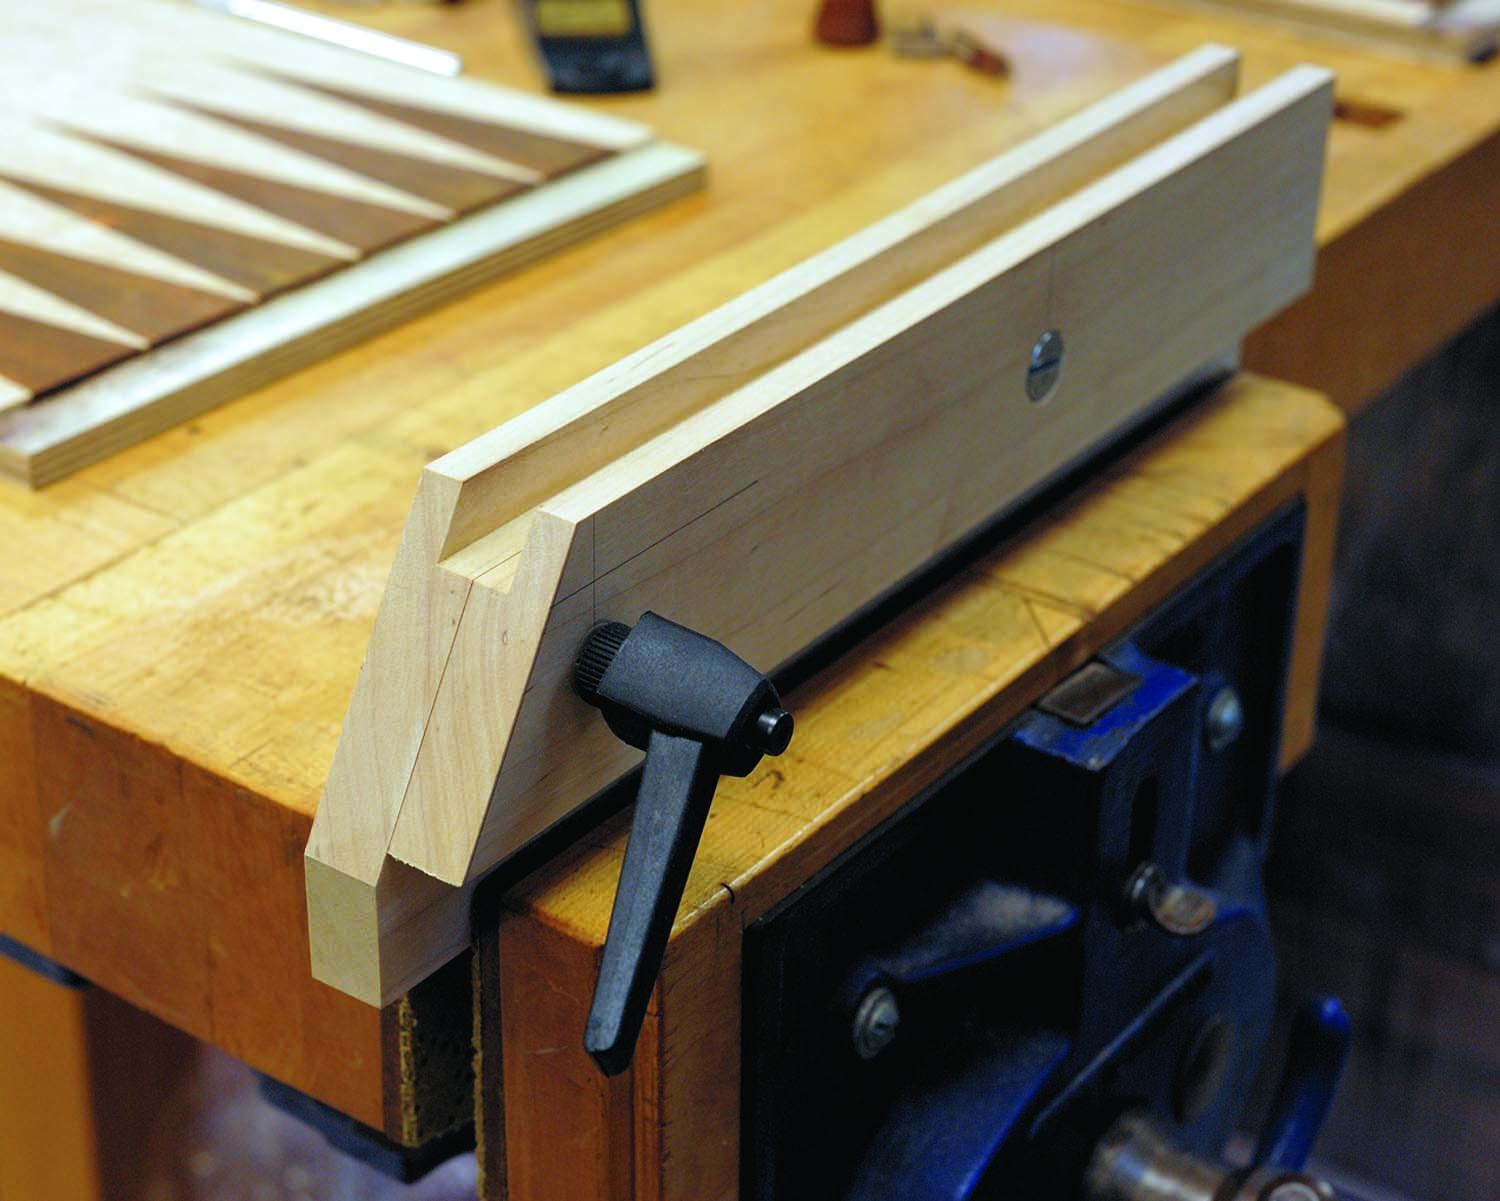
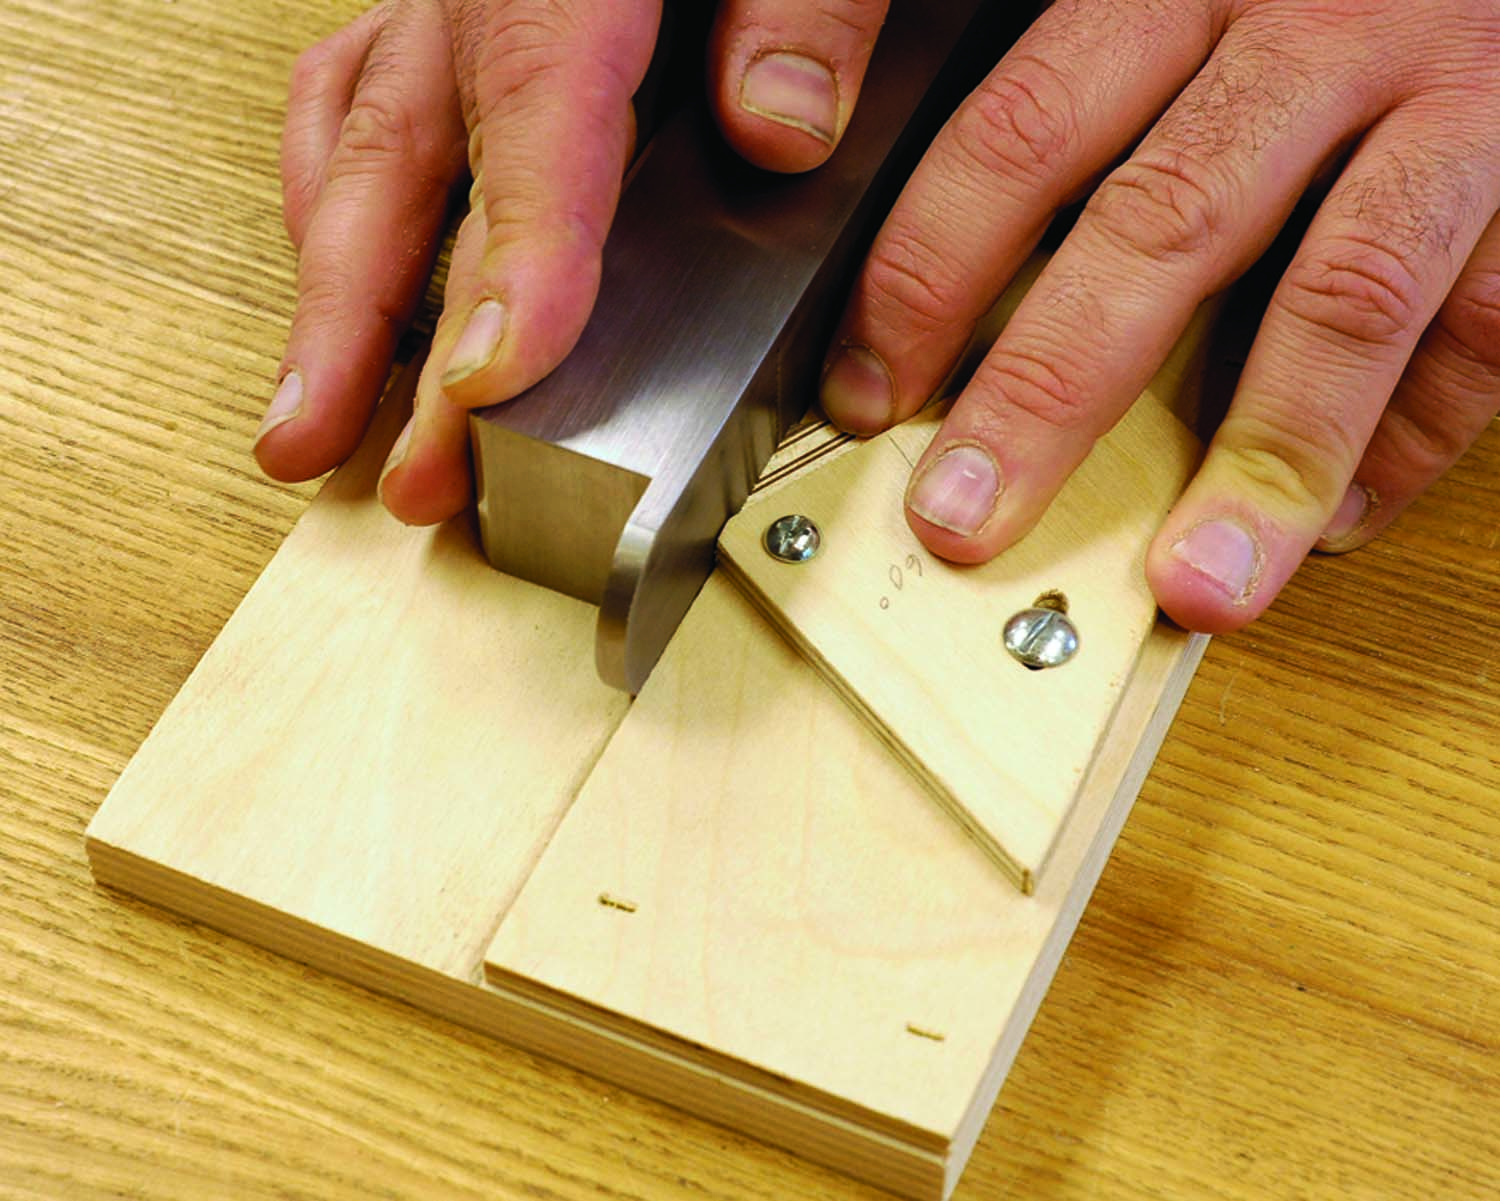
Miter jack. This fixture allows you to perfect the miters with precise control.
Clamp this piece in the jack, aligning the inside edge of that tiny flat with the face of the ramp.
You want to end up with a perfect, sharp arris here without going past. I wear a magnifying visor – it makes everything look huge. Press down on the piece to make sure it’s bottomed out in the jack. Once you’ve planed it to perfection, repeat the process to make additional pieces.
Test the Cut & Join the Pieces
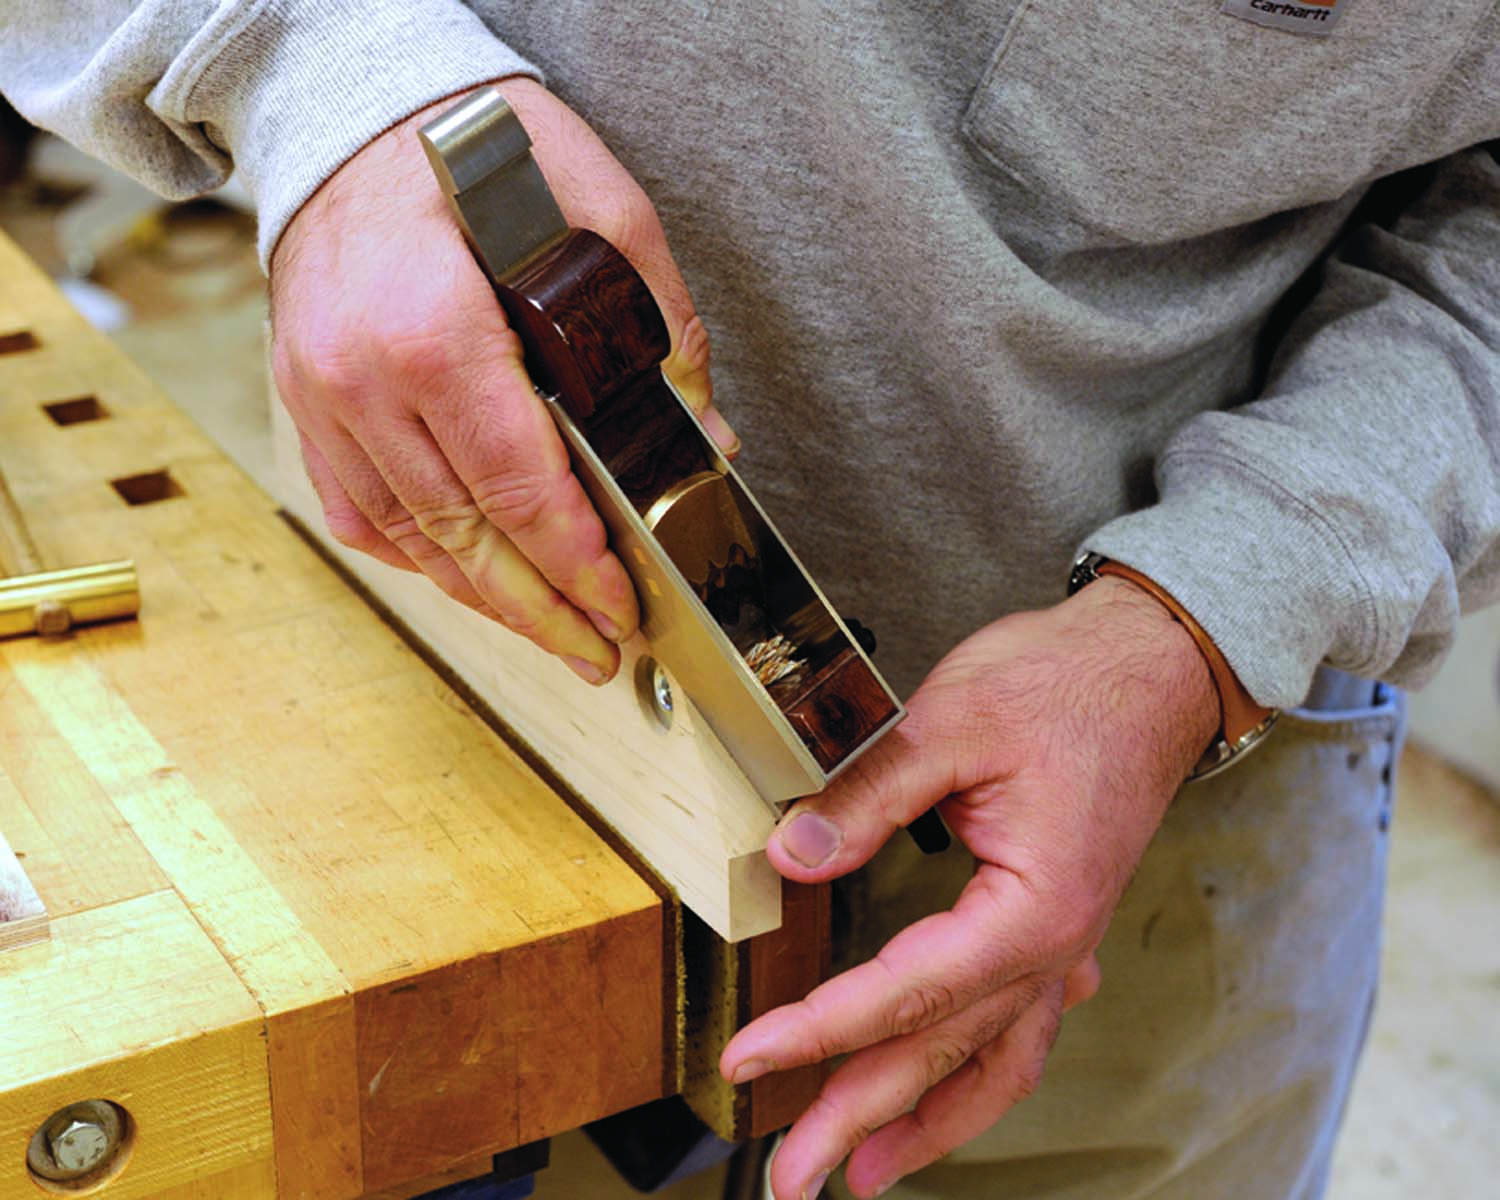
Shoot the stick. Plane the mitered end of the stick in the miter jack.
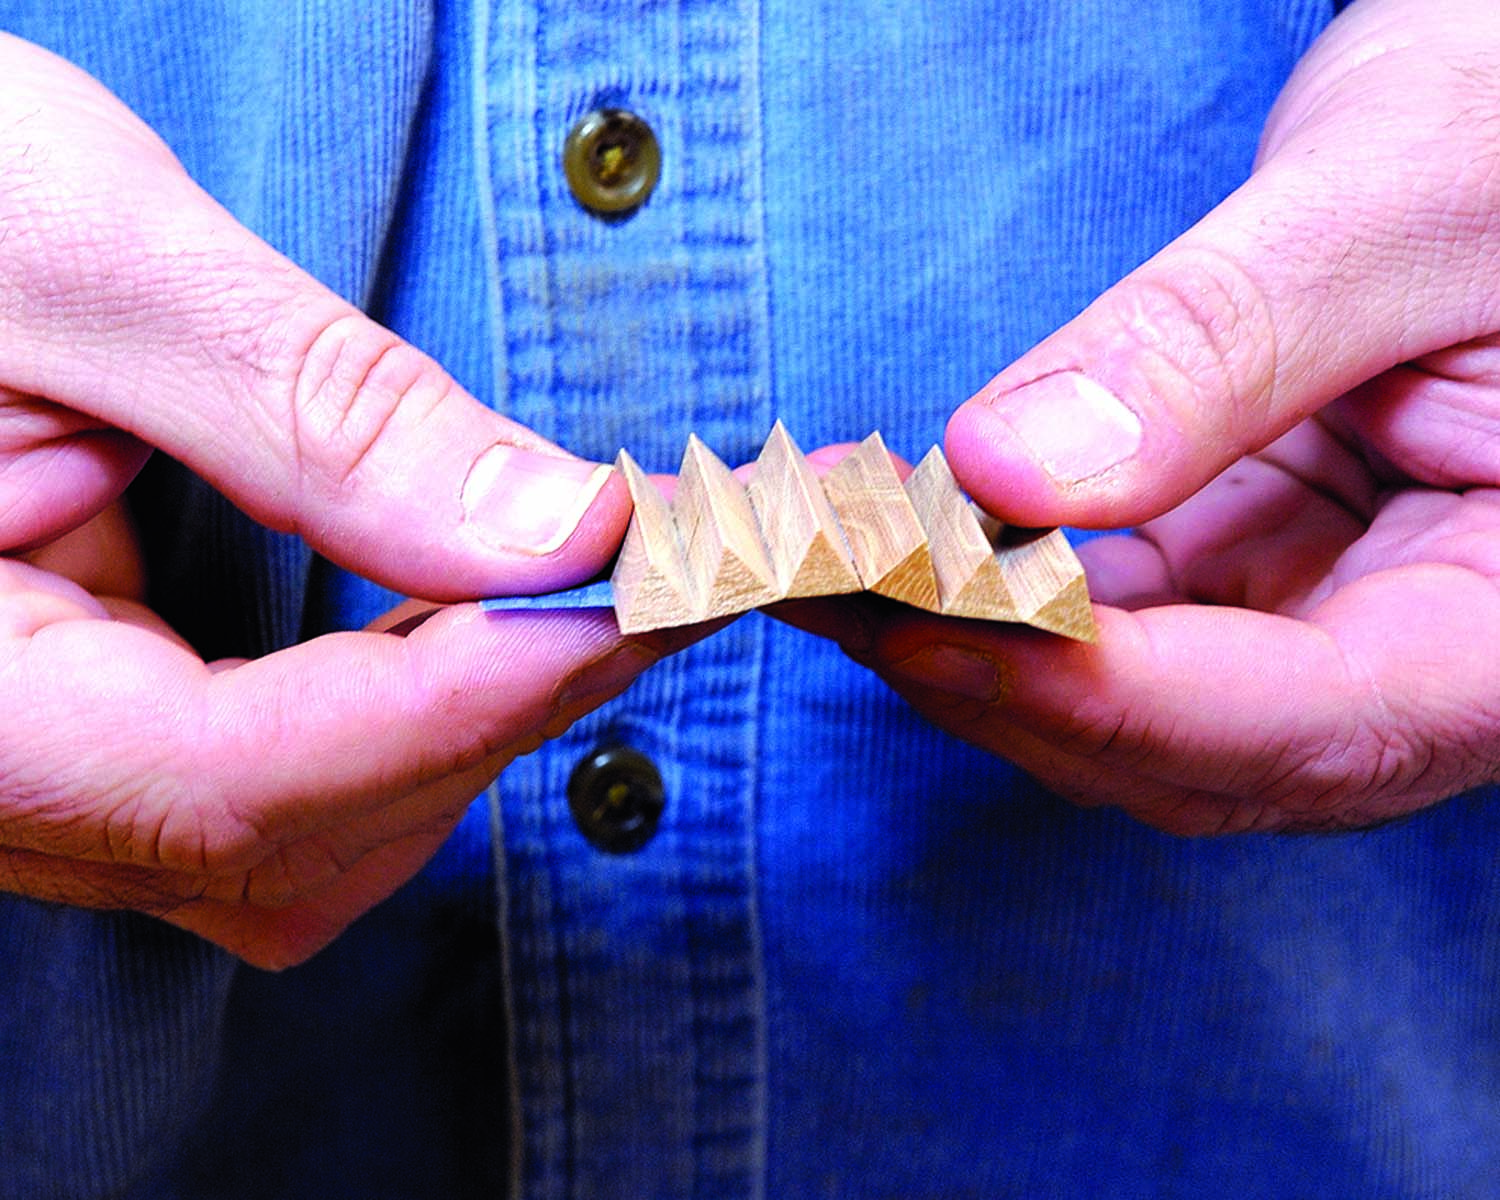
Line up the pieces in a row on a piece of tape, butting the edges tightly. Now roll them up to see how they join up. There should be no gaps. If there is a gap widening toward the outer edge it means your angle is greater than 30°. If the outer edges all join up, but the gap widens toward the center, the angle is less than 30°. You can tweak small discrepancies by clamping the triangle at a slight tilt for individual pieces, but it’s best to adjust the angle of the jack’s ramp so the pieces roll up tight. Once you’ve nailed it, you can start cutting the real deal.
Trim the flat. The narrow band at the top edge represents the amount to be planed off the sawn face to end up with a perfect piece.
To assemble the pieces, butt the edges together as before on a piece of tape and apply glue. Roll up the pieces and shift them around until they align. Wrap a few more pieces of tape around the bundle and set it aside until the glue cures. You can also use rubber bands (I like to use an old bicycle tire innertube) to apply pressure. On smaller pieces such as these, blue painter’s tape has enough stretch to keep things tight.
Jack be nimble. Align the inside edge of the flat with the face of the jack. You’ll plane wood off the sawn face until you reach this edge. The result is a sharp arris along the top edge of the piece.
Making Inlays
Jack be quick. Repeat the process between the miter box and jack to make additional pieces. You’ll want to place your miter box right next to the miter jack on the bench for maximum efficiency.
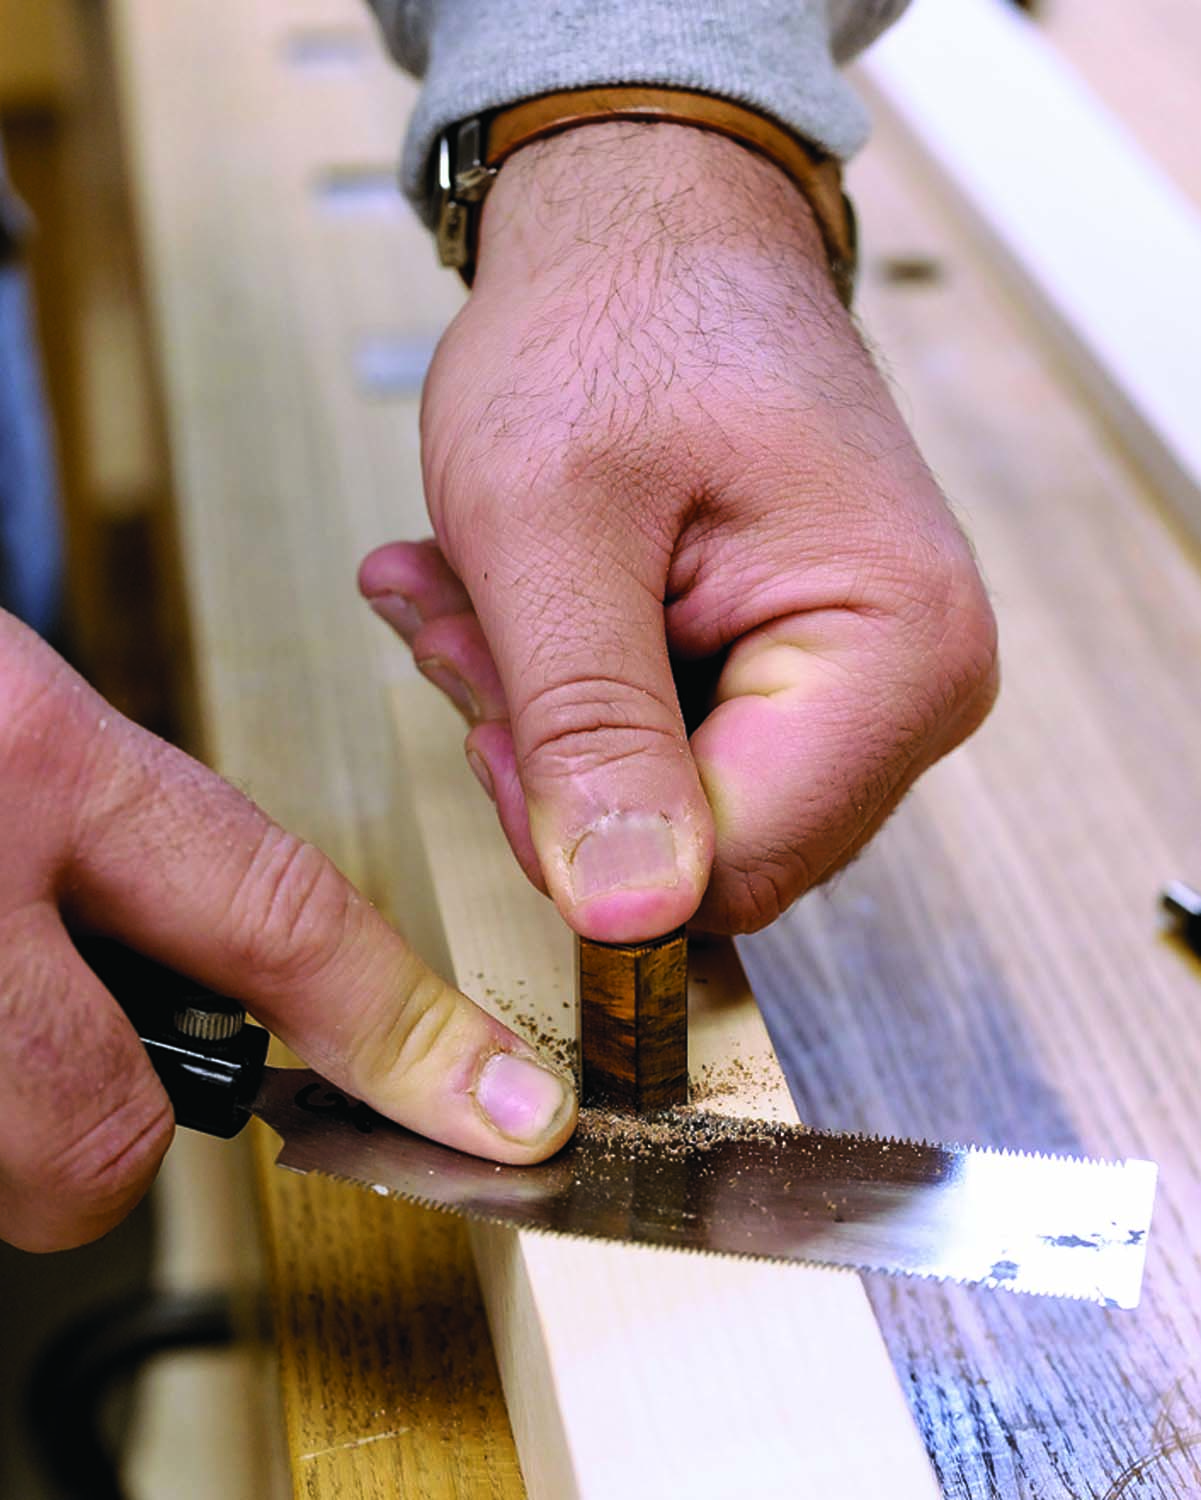
After you unwrap the bundle, clean up any squeeze-out (there shouldn’t be much) by carefully lap sanding on a flat surface. Use a light touch – you don’t want to change the shape of the bundle. Start cutting slices by first truing up one end of the bundle on a shooting board. Next, trace around the perimeter onto a flat piece of scrap and rout a shallow mortise, about 1⁄16” deep. Try to make the mortise fit the bundle; you don’t want it to move around while sawing. Place the bundle into the mortise and using a flush-cutting saw, work around the bundle lightly at first to establish a kerf all around the piece.
Roll the joints. Butt the edges together on piece of tape and roll the joints together. There should be no gaps between joints.
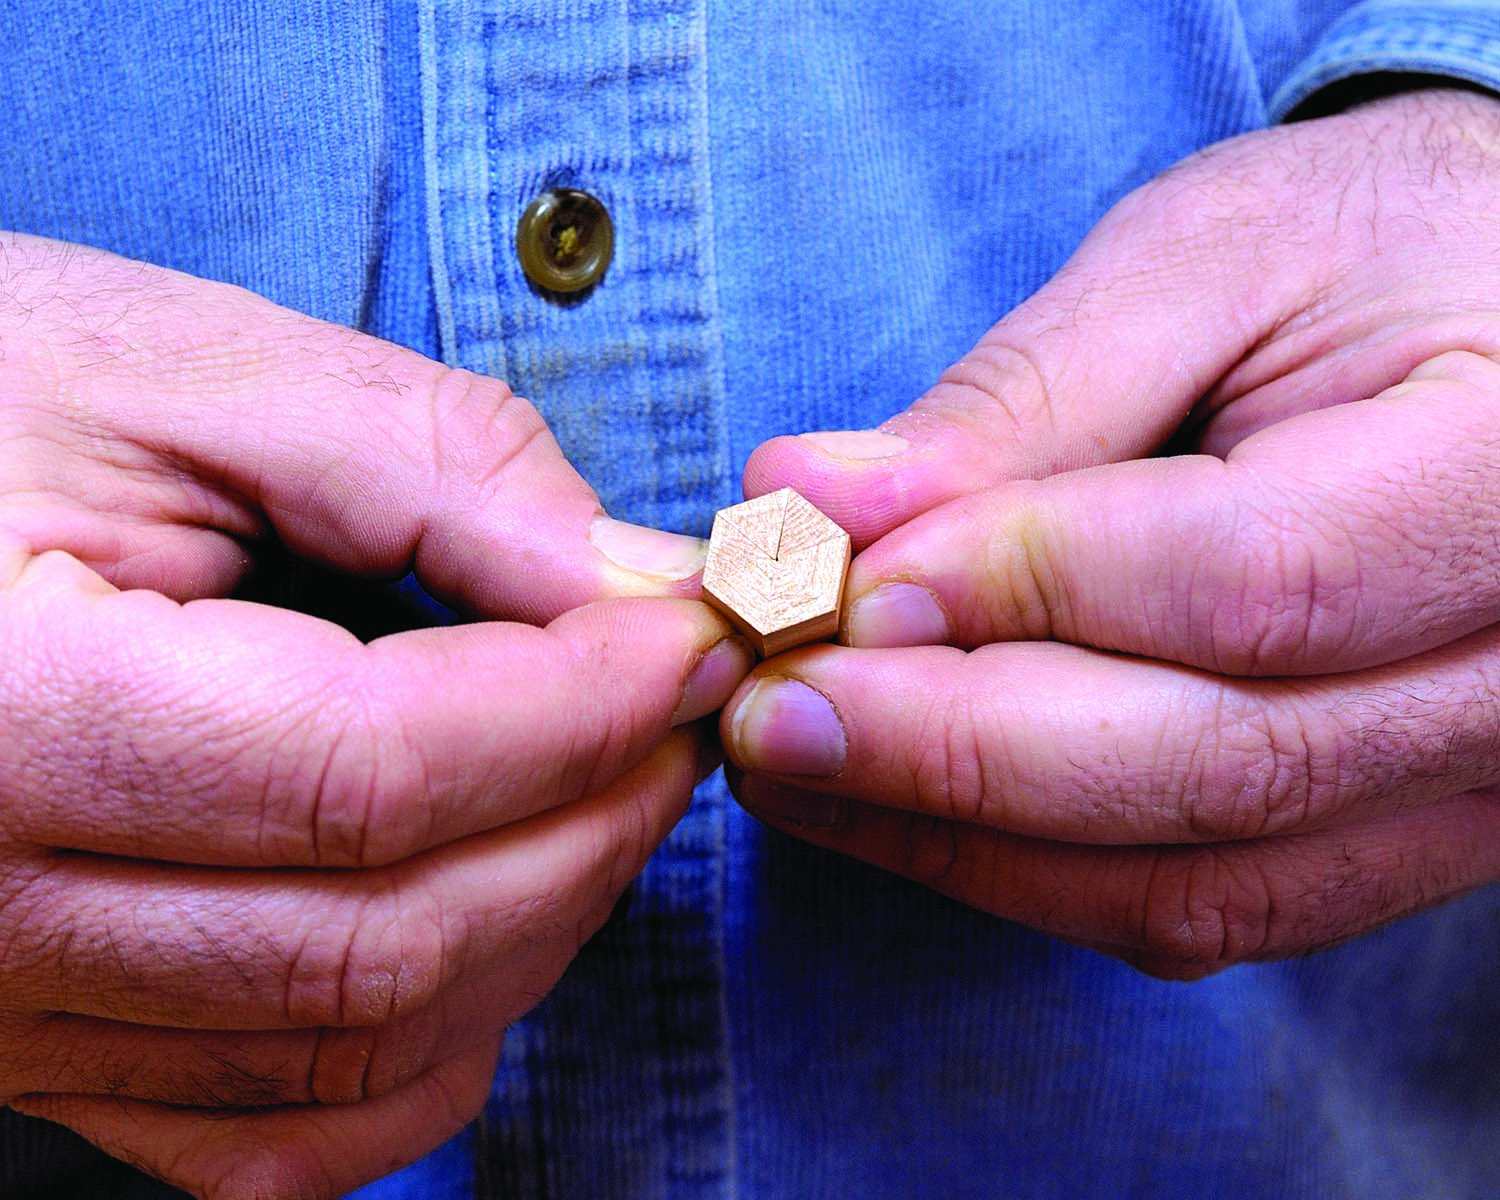

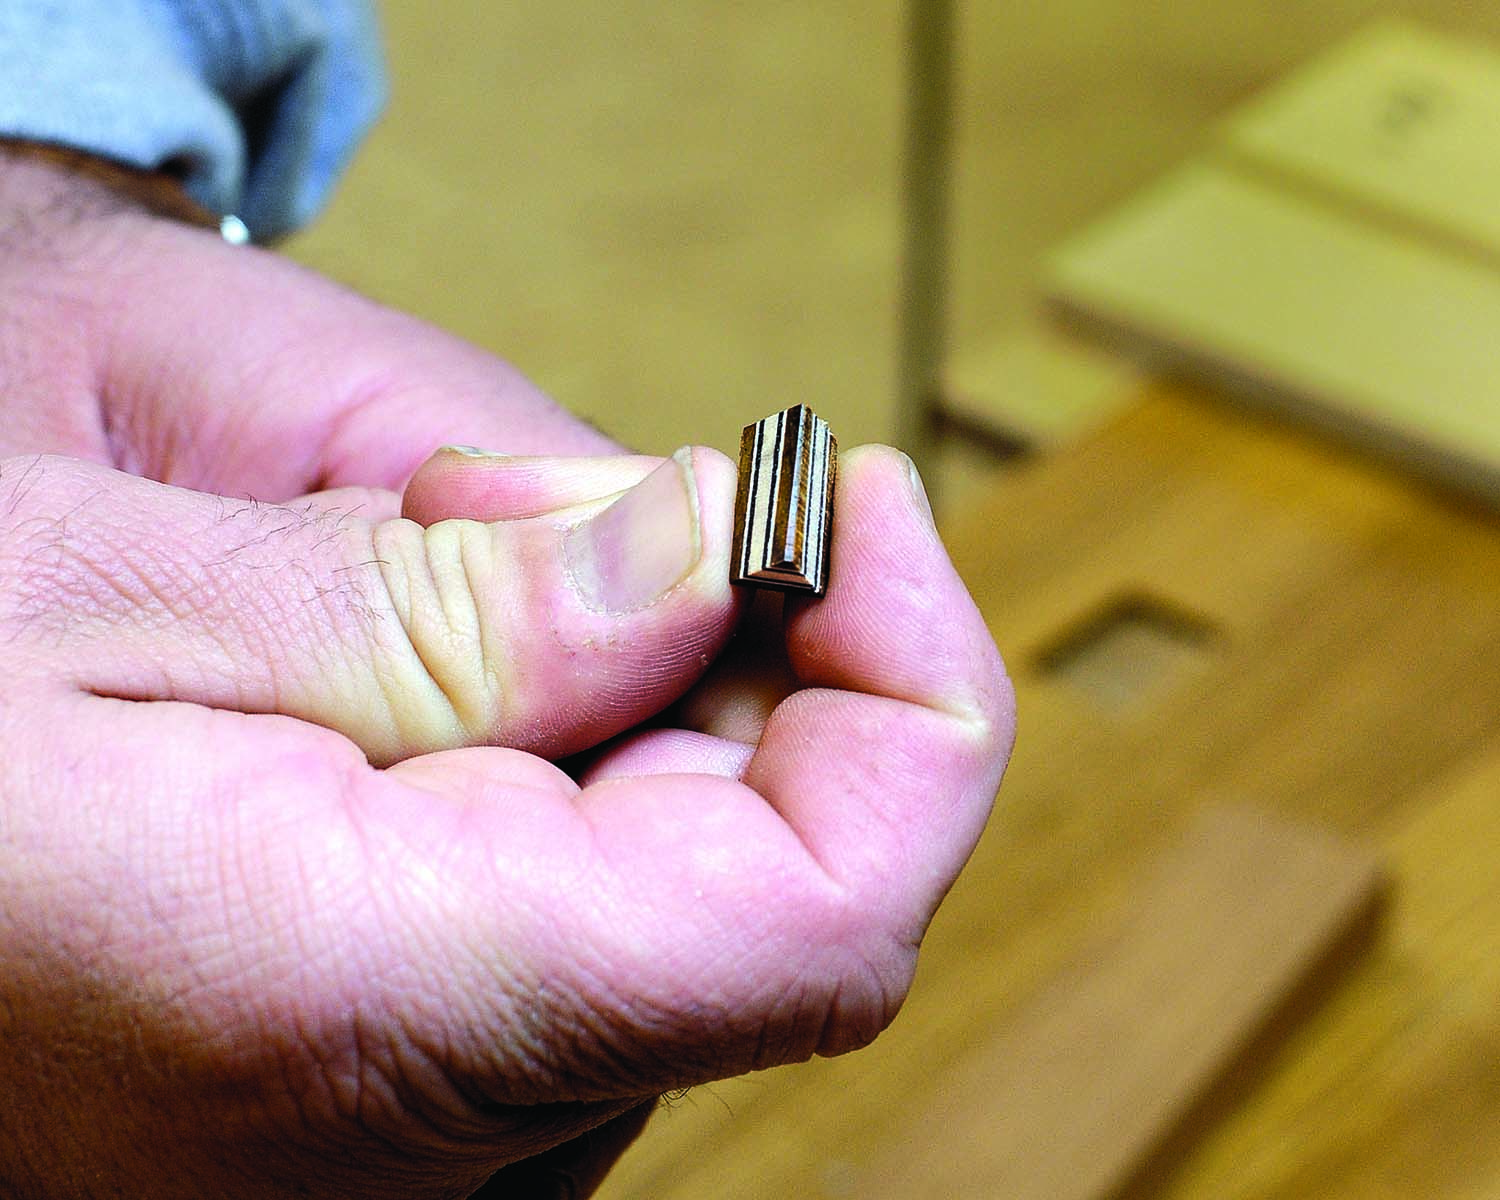
Bundled up. Nail the angle and you’re ready to cut and glue the pieces.
Work toward the center. As you approach the last few strokes, lighten up on the downward pressure (the saw plate is doing most of the holding as you saw) until you gently finish the cut. Pop out the inlay piece, re-shoot the end of the bundle and repeat. One side of each inlay will have the planed surface, and one will have the fuzzy surface left by the saw. You don’t need to clean up the fuzzy side – it will get planed flush after you inlay it.
Save the offcuts. A flush-cut saw consistently slices inlays from the bundle at a fixed thickness.
Shooting-board Method
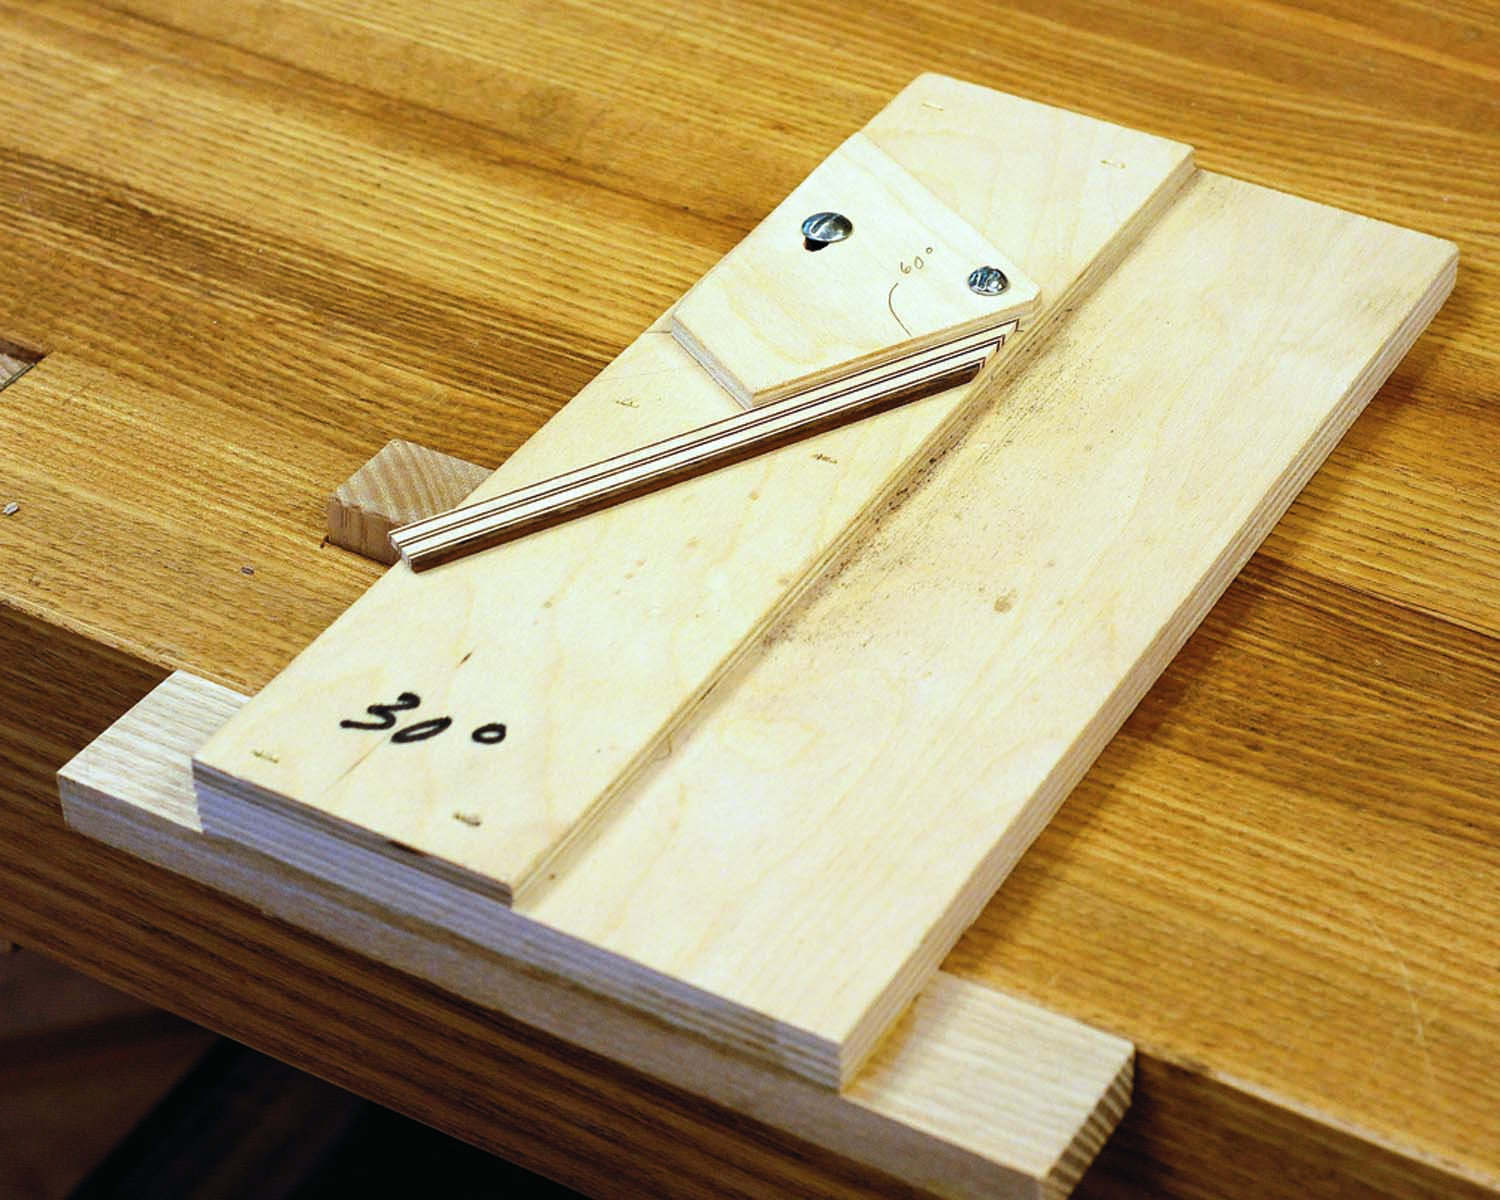
Shoot me now. Shooting boards are another option for truing miters of varying angles.
Just a couple. When you need just a couple pieces of a design, the shooting board method is quicker.
Private plane. I commissioned a small miter plane from Daed Toolworks just for use with this technique. Its boxy sides and long toe section make for efficient shooting. But any block plane with parallel and square sides will work.
To make smaller quantities of inlays you can use a shooting board to true the miters of thin pieces. This technique is useful for rapidly producing test pieces or samples. I prefer this method to the miter jack for designs containing fewer elements, as it’s quicker to make them one at a time than to saw the pieces from a thicker bundle using the miter jack method. The process is also more forgiving. Rip a 1⁄8“-thick stick from the book and use a miter box with a shallower groove to make your cuts.

Return the miters. The back edge of the fence is 90° to the leading edge, meaning I can plane the areas where certain elements meet.
Then plane the edge on the shooting board. Notice that the fence on the shooting board is set to the appropriate angle, but that the opposite edge of the fence is different by 90°. On this shooting board that means one edge is 30° and the other is 60°. This allows me to use the back edge of the fence to shoot the return miters without using a separate tool.
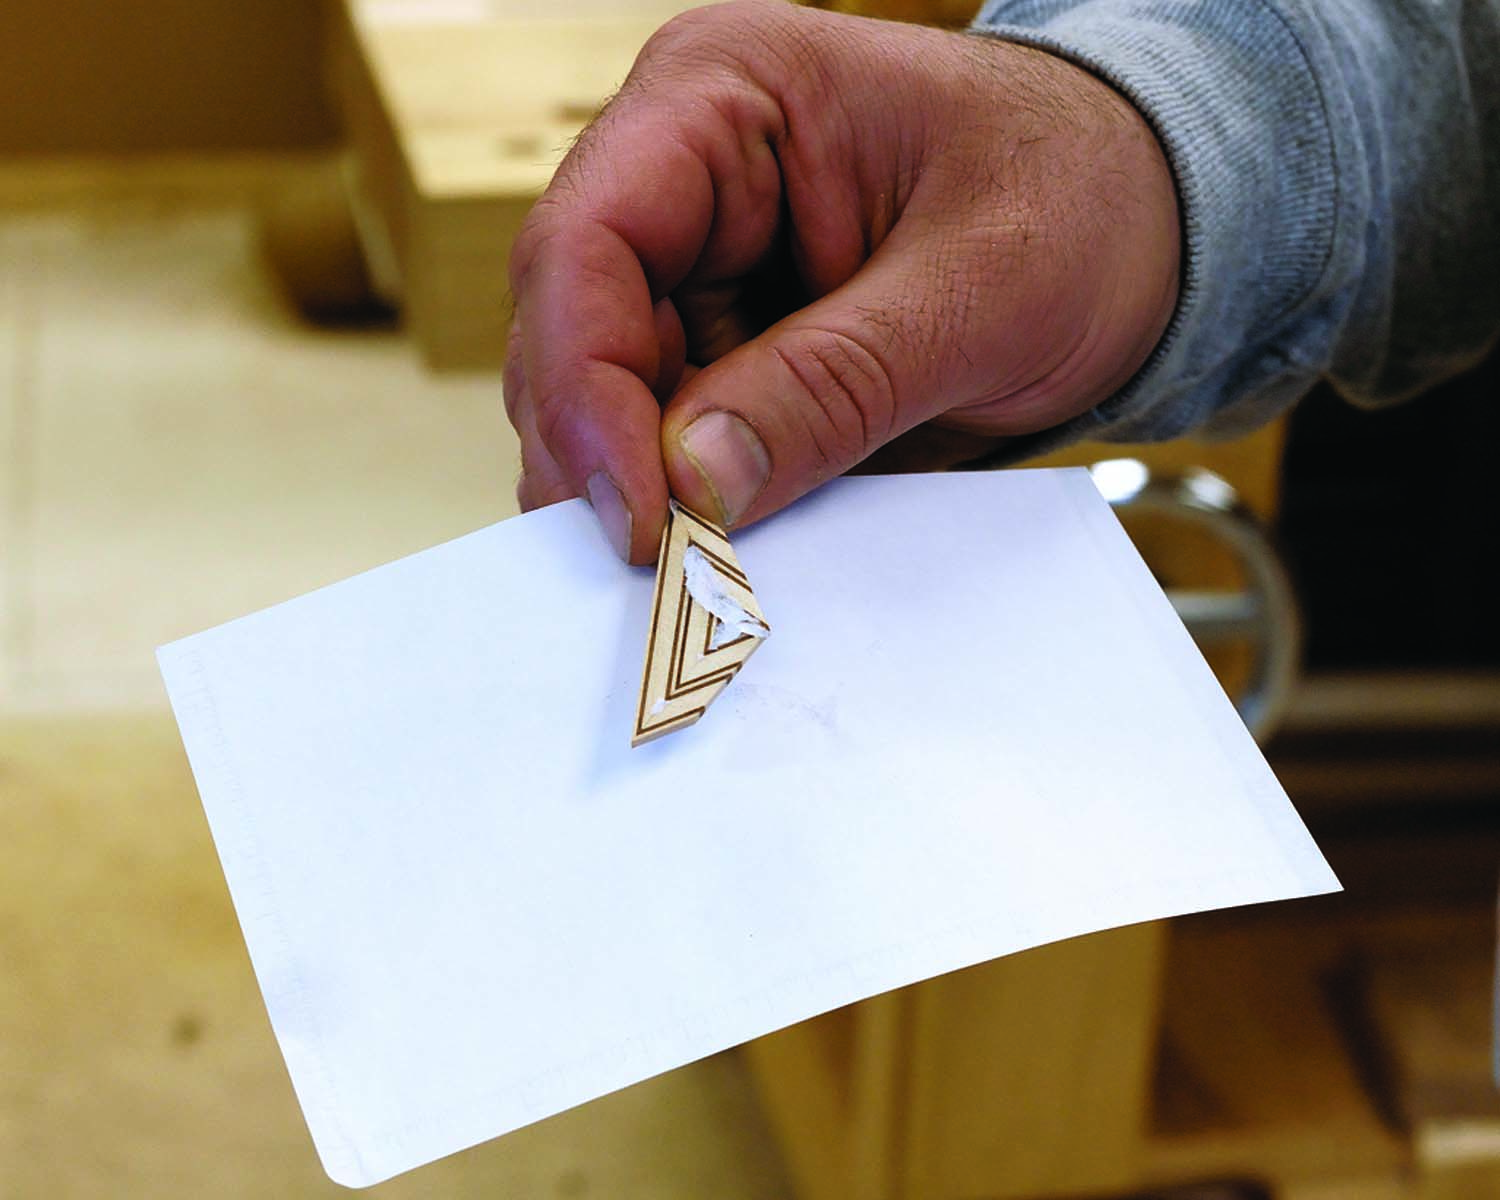
Can you spare a square? Glue the pieces’ edges together on a flat surface separated by a small square of paper. Peel the paper off after the glue dries and lap off the residue.
Getting small pieces aligned and glued together is easy. I use gap-filling
cyanoacrylate (the thin stuff is too runny) on the edges of one piece and press its mate in place. The thick cyanoacrylate allows a couple seconds of movement.
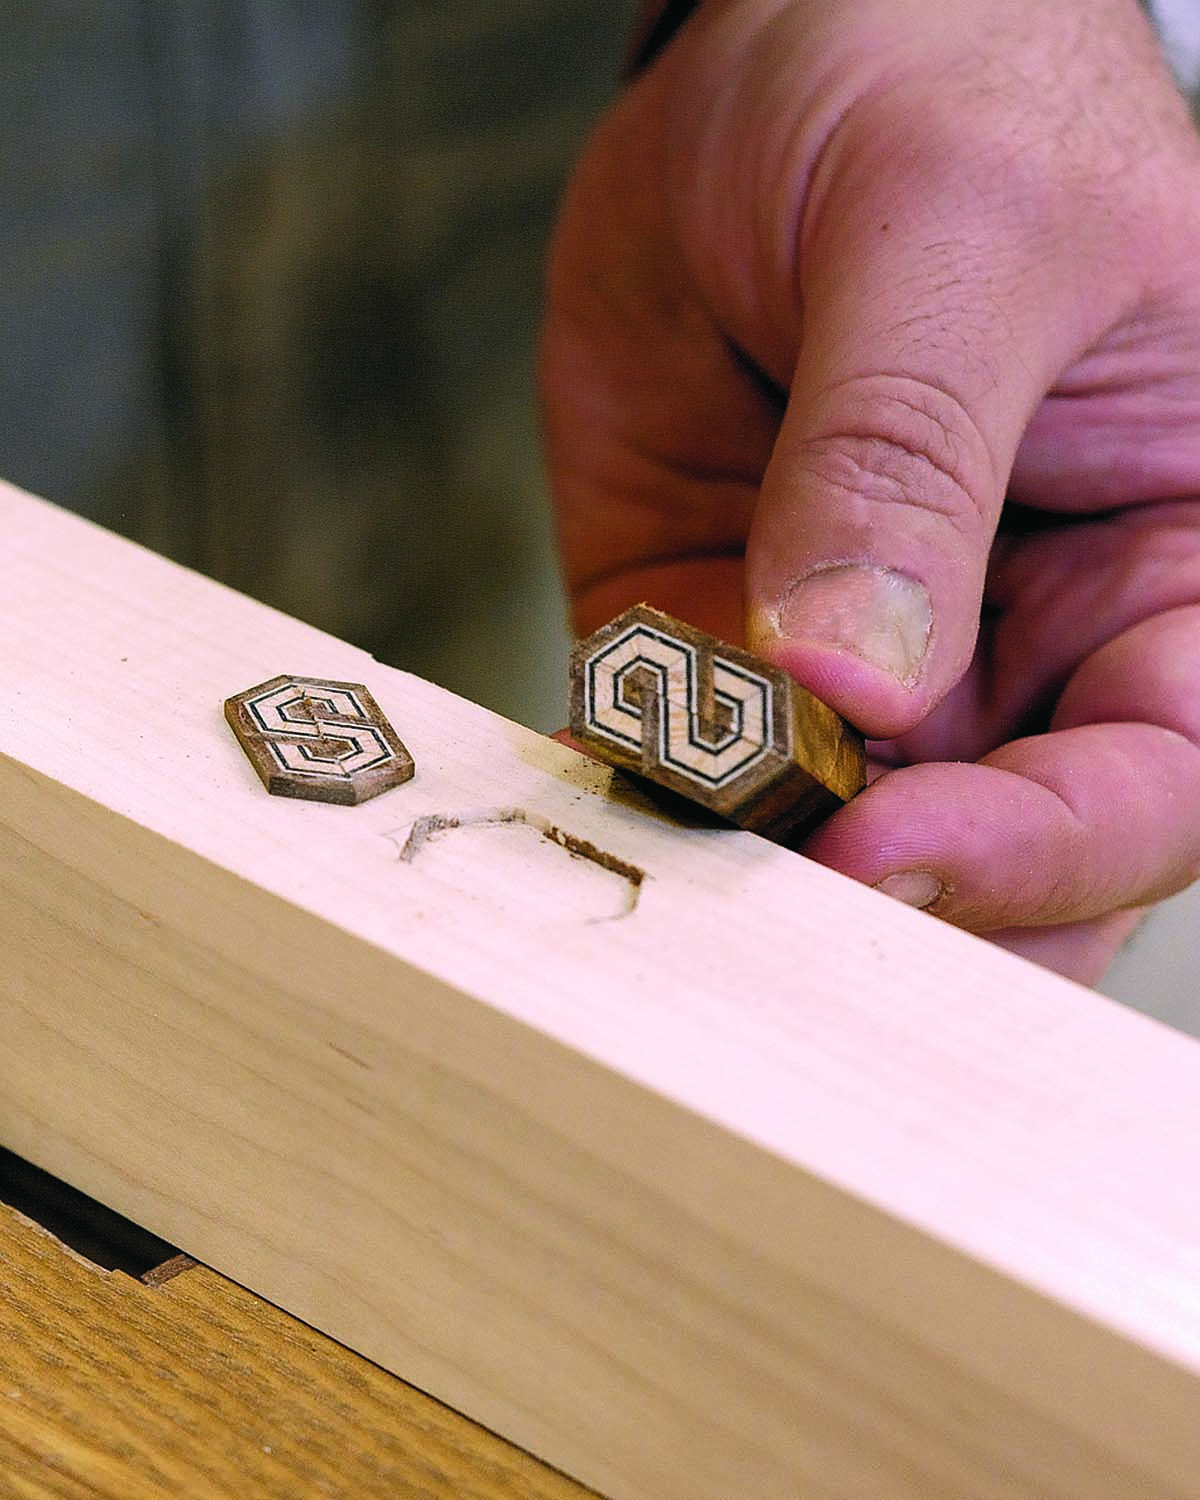
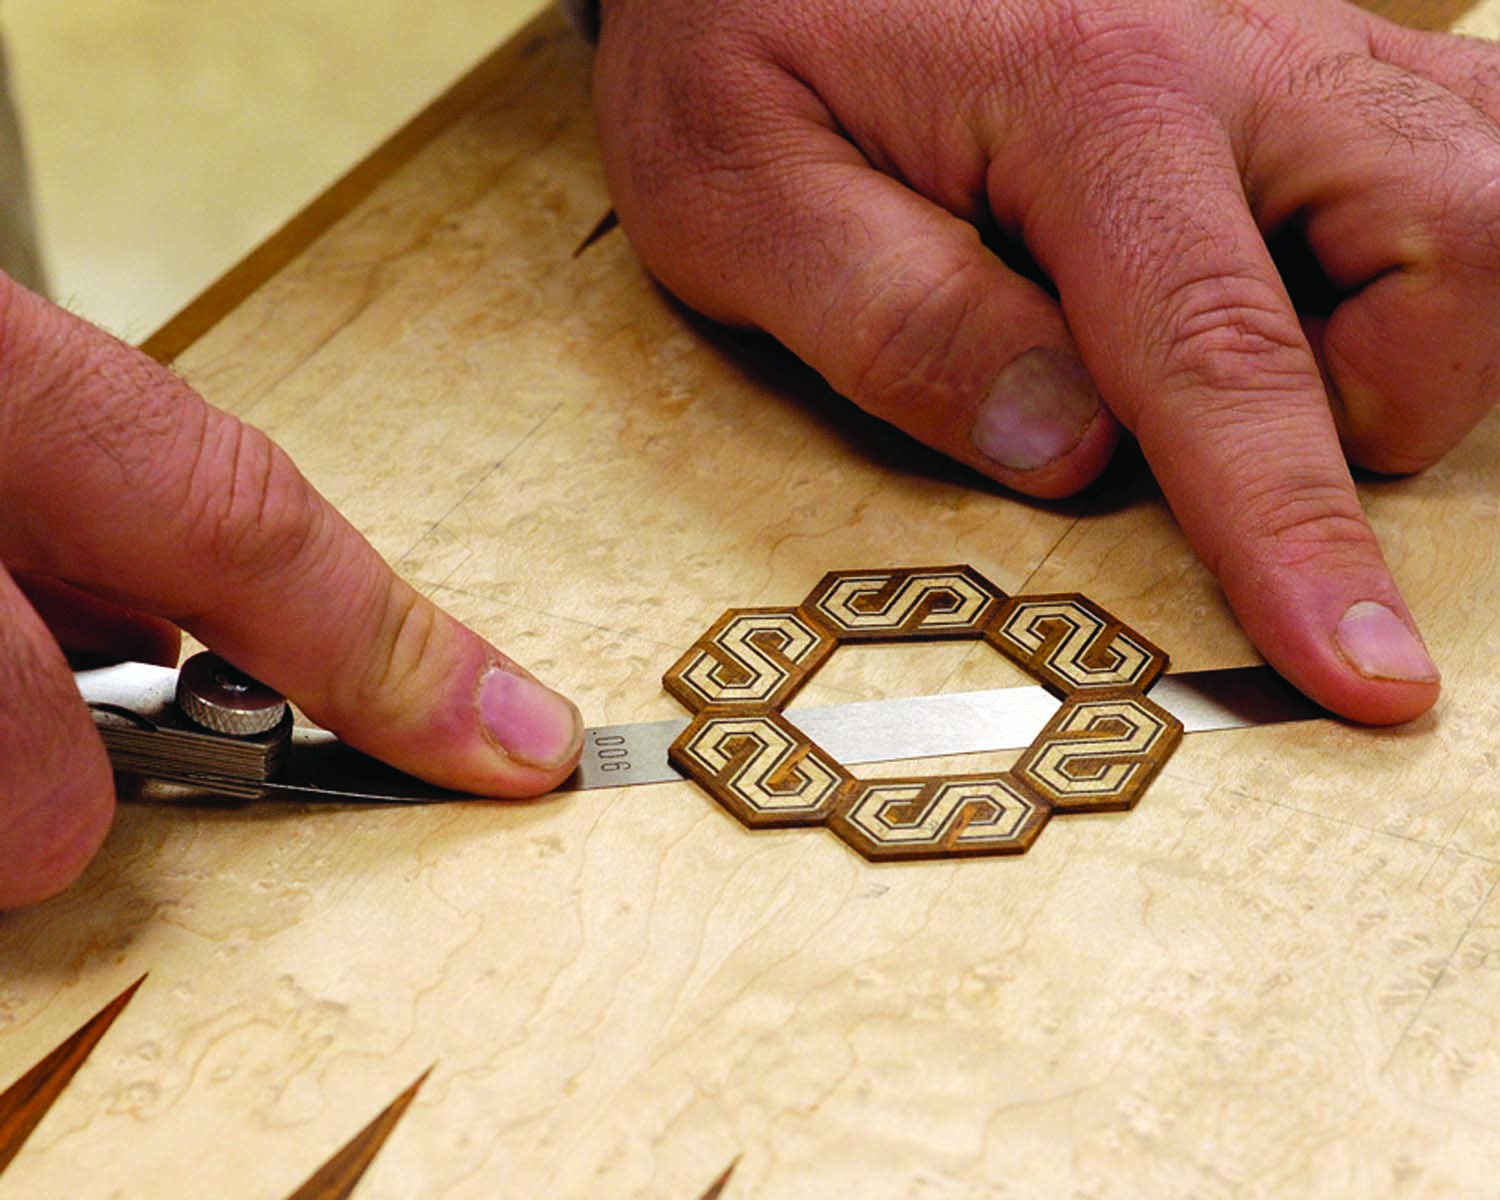
Inlaying the Pieces
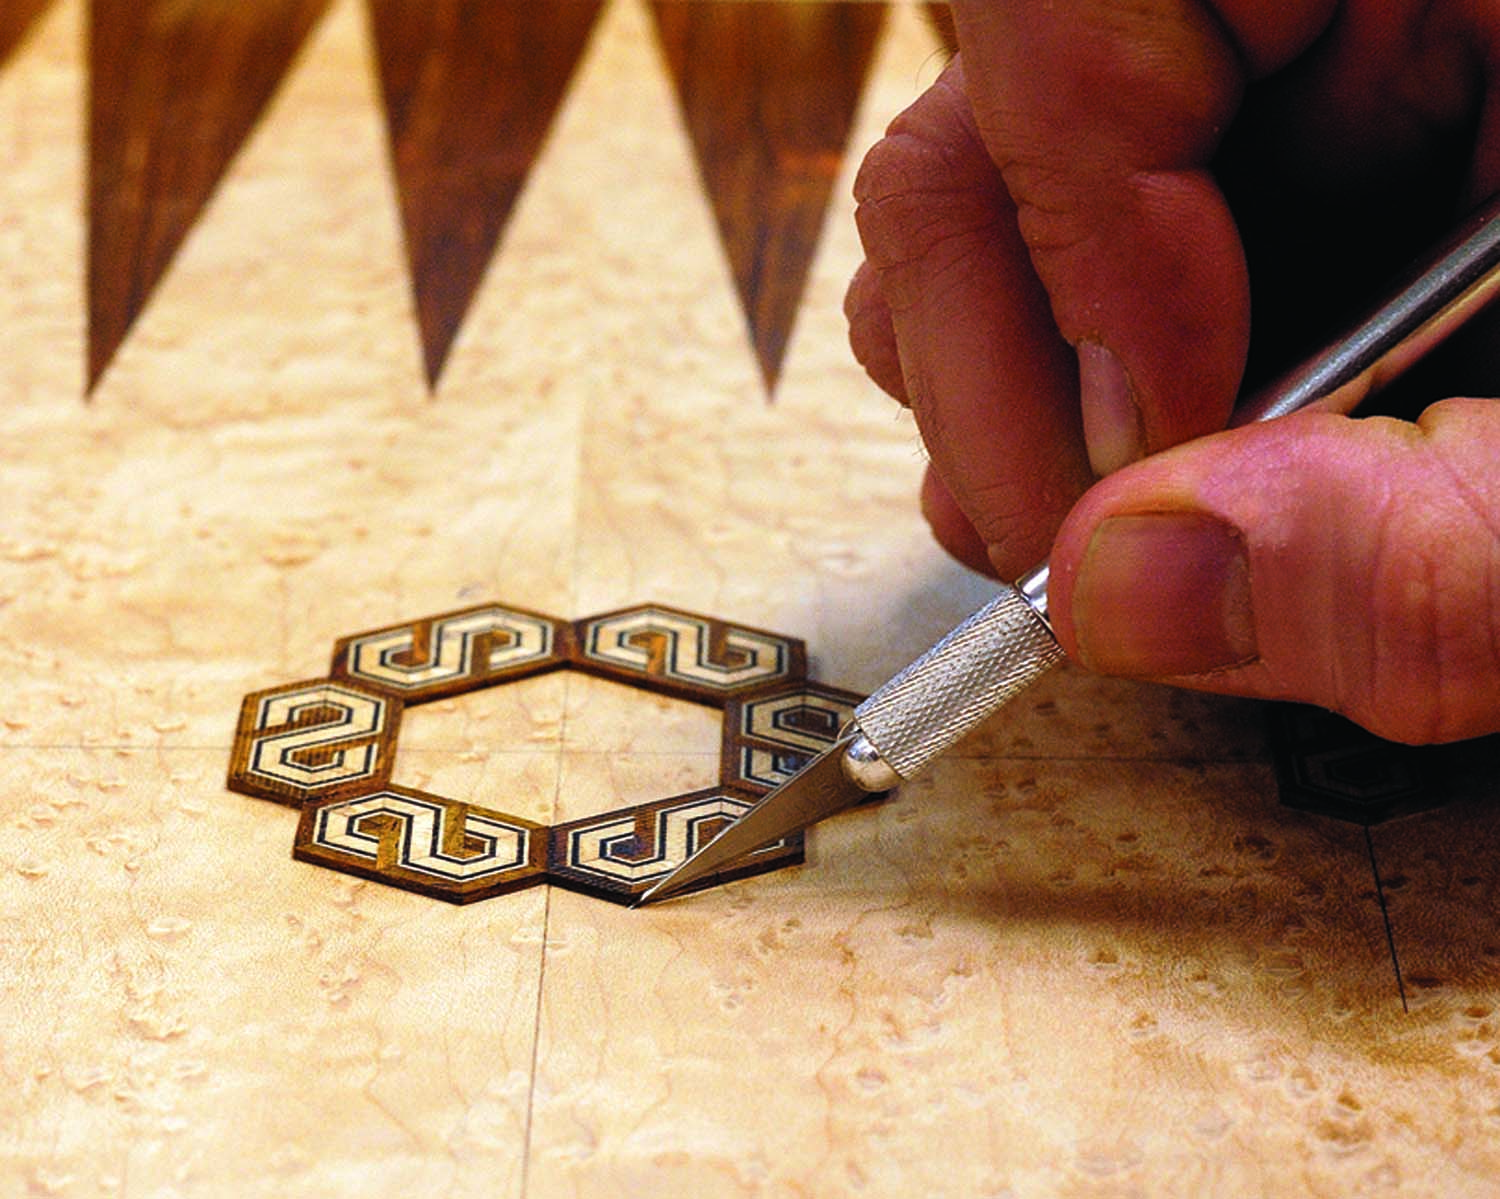
Scribe. A #11 X-Acto is the best tool for creating an ultra-thin scribe line. Try to scribe so the grain of the background wood forces the knife toward the inlay.
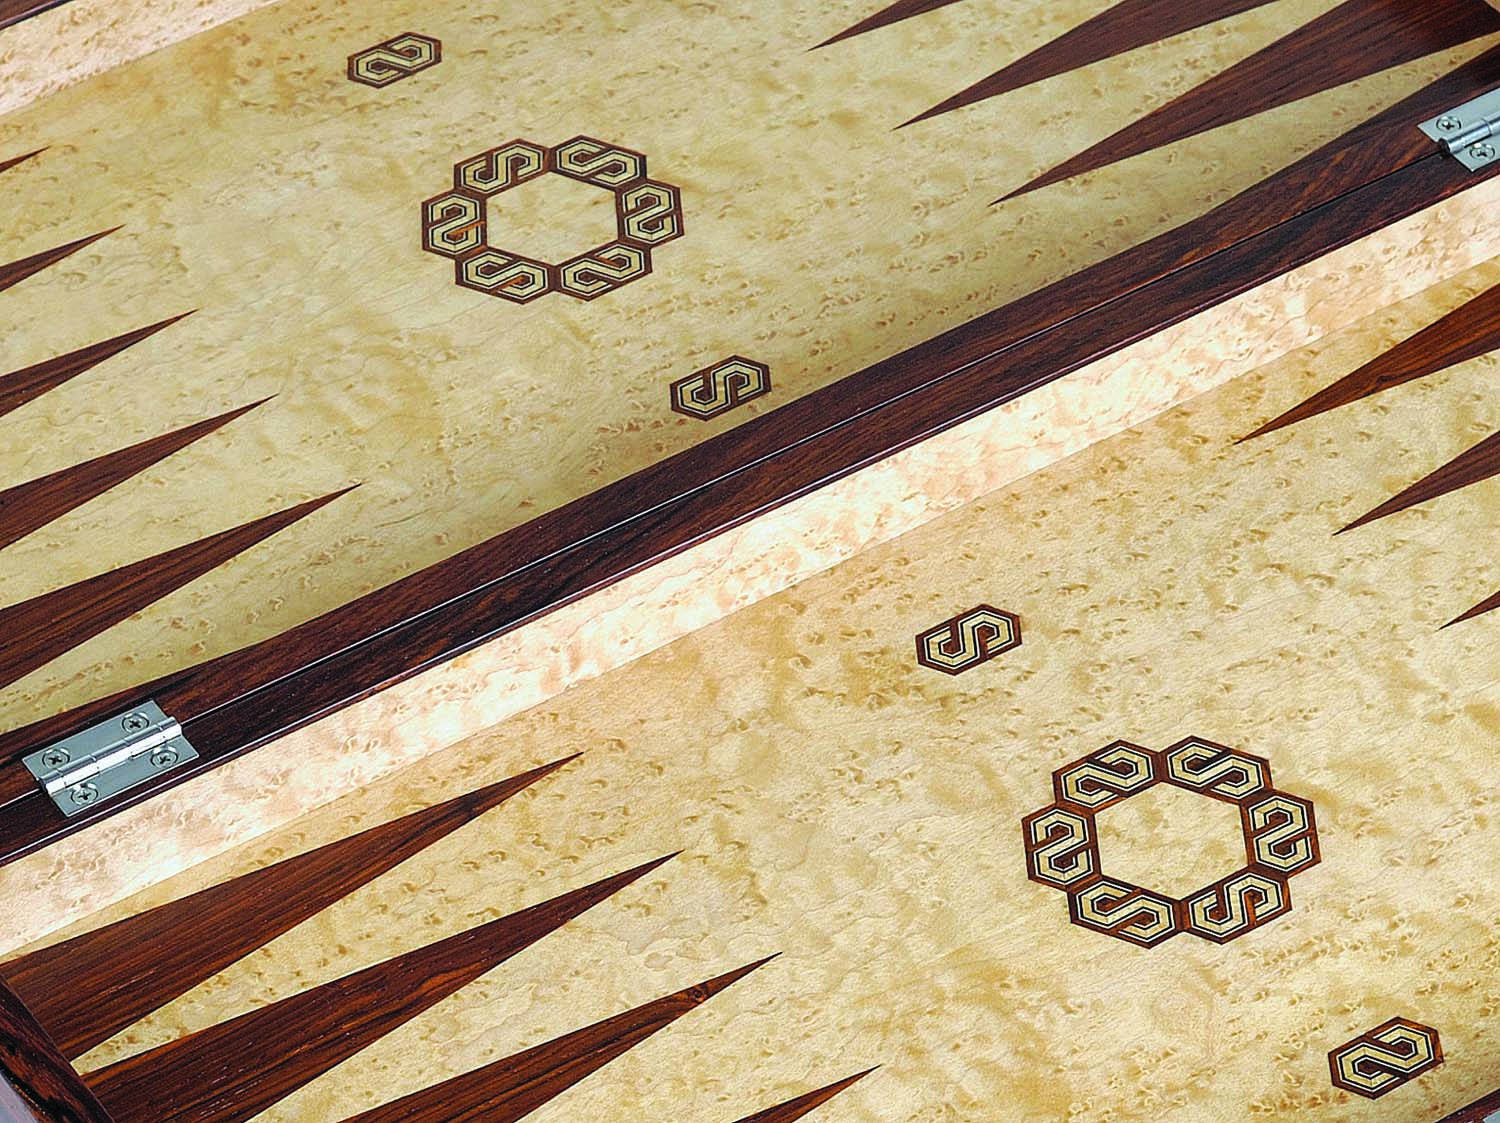
This particular pattern I’m using is quite busy-looking, so keep that in mind when designing how you incorporate inlays into a project. Designs like this can overwhelm a project if overused. I’ve chosen six pieces to create a central rosette for the backgammon board shown in the opening photo. You can see the designs automatically fit together to create new designs. This is the fun part of creating these decorative elements.
To make the rosette, just glue the pieces together with cyanoacrylate on a piece of paper. Draw some layout lines on the background so positioning the inlay for scribing is quick and easy. Place a single, tiny drop of cyanoacrylate on the back of the inlay and place it in position. Use as little glue as possible.
Side slide. A feeler gauge removes the tacked inlay without damaging it. Use side-to-side motion here; don’t pry.
Once the pieces are tacked in place, scribe around the perimeter of the inlay. I use a new X-Acto No. 11. The blade is double-beveled, so tilt the knife to guarantee the knife is riding the edge of the inlay. I take two to three passes. On the first pass I hold the knife tight to the inlay, but I use little downward pressure. You want the knife to follow the inlay, not the grain. This cut establishes the line. On the next pass I use a tad more downward pressure. Now look at the line (I wear a magnifying visor for scribing). If you can see it, stop. The more passes you take, the wider your scribe line, and the worse the inlay will fit. This line needs to be crisp.
After scribing, I remove the inlay with a thin blade. If you try to pry up the piece, it will break. But it’s not the end of the world if this happens. Chances are it will break on a glue line and you can reassemble it when you glue it in place. But if you have a lot of pieces it’s better to keep them intact. I’ve found that a long set of feeler gauges (I got mine from Lee Valley Tools) does the trick. The .006″ blade slips under the edge and I can work the blade side to side to pop the glue joint. I use no upward force.
Don’t forget to mark your inlay and background so you can reorient the pieces later. You can rout the mortise with a number of tools. I use an old rotary-tool handpiece with a 1⁄16” upcut-spiral bit in a small shop-made router base. Set the depth a little shallower than the thickness of your inlay piece. A magnifying visor and strong light are a must.
Satisfying. After the inlays are glued in and planed flush, you get to see the final results of your effort.
Rout close to the scribe line but don’t touch it. To remove the remaining waste drop a chisel into the scribe line and tap down lightly. A couple years ago I commissioned Czeck Edge Hand Tool to create a custom chisel for this type of work (which the company now offers as a regular item). It has a short blade and handle for a low center of gravity, and finely ground side bevels for preserving the mortise corners. All the butt chisels on the market are too beefy for this fine work, and the fine chisels that are available are all too long and heavy.
Once you tap in the scribe lines, use the same chisel, bevel down, to free the sliver of waste. When you press the blade in, don’t lift up (you could split out the edge of the mortise). Instead retract the blade and try to blow the chip away. If the mortise is large enough, I use a small router plane to work the perimeter. I grind the cutter to a 1⁄32” width to sneak into corners.
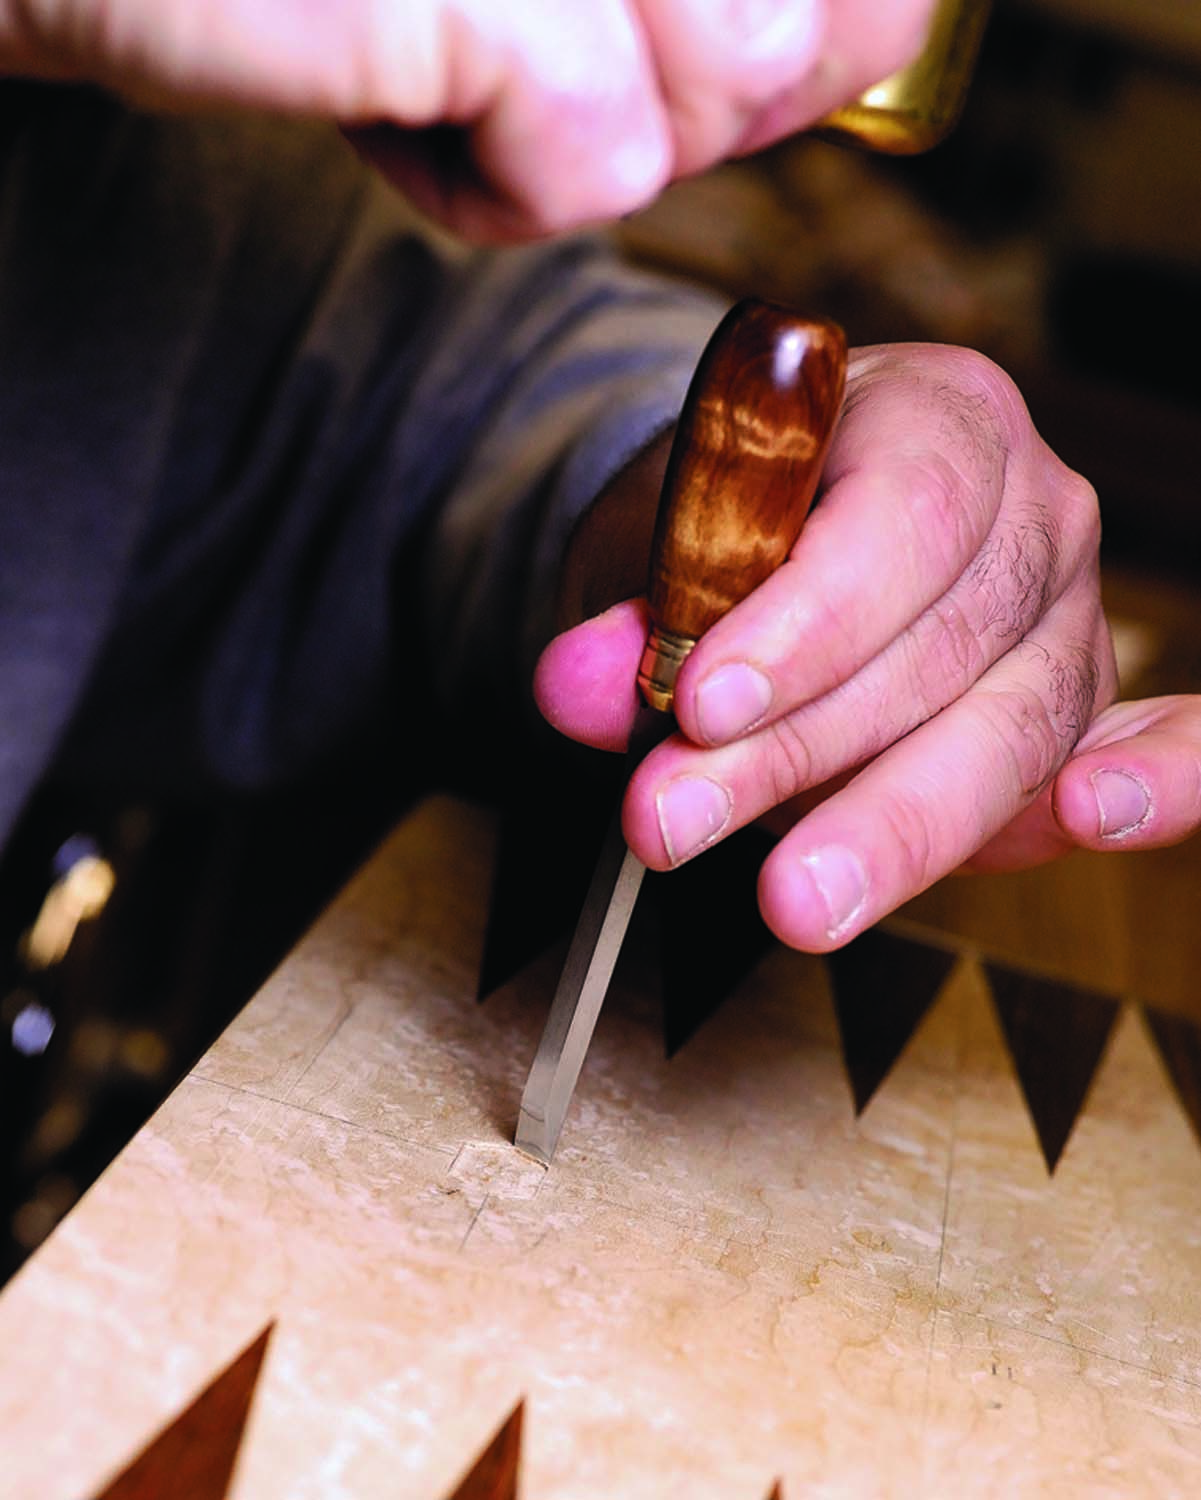
Gentle taps. Set the chisel in the scribe line and tap gently. A short chisel with fine side grinds is paramount to precision and control.
Test-fit the inlay. It should be snug and there should be no gaps around the edge.
Removing the piece can be tricky. Here’s the best way: Take a sharp chisel and touch it to the protruding edge of the inlay that’s proud of the surface (you didn’t rout too deeply, did you?). Without pushing in (you don’t want to slice the inlay flush) gently tilt the chisel up. The sharp edge will grab the inlay and lift it out. Once you’re satisfied with the fit, glue the inlays in and plane them flush after the glue dries.
Jameel’s interest in woodworking began in both of his grandfathers’ shops. He’s also a painter, oud maker and carver, and co-founder (with his brother and father) of Benchcrafted.

Here are some supplies and tools we find essential in our everyday work around the shop. We may receive a commission from sales referred by our links; however, we have carefully selected these products for their usefulness and quality.