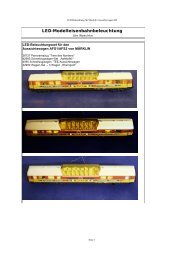
- LED lighting set for ROCO Aln 442 TEE- Mounting instructions ...
- LED lighting set for ROCO Aln 442 TEE- Mounting instructions ...
- LED lighting set for ROCO Aln 442 TEE- Mounting instructions ...

Create successful ePaper yourself
Turn your PDF publications into a flip-book with our unique Google optimized e-Paper software.
- <strong>LED</strong> <strong>lighting</strong> <strong>set</strong> <strong>for</strong> <strong>ROCO</strong> <strong>Aln</strong> <strong>442</strong> <strong>TEE</strong>-<br />
<strong>Mounting</strong> <strong>instructions</strong><br />
Separate body and frame according to Roco <strong>instructions</strong>.<br />
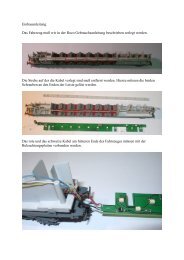
A – Motorless car<br />
Take off the cable way by unscrewing the two screws at the ends.<br />
Connect the lignting board to the red and black cables located at the end of the car.<br />
Copyright Jorns Modellbeleuchtung Page 1/4
Place the <strong>lighting</strong> board now replacing the cable way and tighten it with the two Roco screws.<br />
A series of small holes are available on the board to fasten the Roco cables with short lengths<br />
of insulated wire.<br />
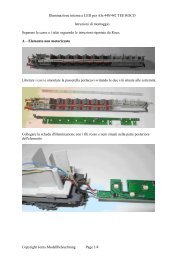
The capacitor wil be placed in the blind room at the car front. The <strong>LED</strong> <strong>for</strong> the engineer’s<br />
cabin can be fastened at the Roco light conduct of the upper front.<br />
Copyright Jorns Modellbeleuchtung Page 2/4
B – Motor car<br />
<strong>Mounting</strong> principles are the same as <strong>for</strong> the motorless car.<br />
Again the <strong>lighting</strong> board must be connected to red and black Roco cables.<br />
The capacitor is connected to the board with cables allowing to hide it in one of the rooms<br />
with white windows.<br />
Copyright Jorns Modellbeleuchtung Page 3/4
C – Special <strong>instructions</strong> when using a Decoder<br />
When mounting a decoder, in order to control the inner <strong>lighting</strong>, the board must be connected<br />
to the corresponding decoder cables and a function decoder will be needed in the motorless<br />
car.<br />
When mounting a sound decoder it may be necessary to separate the part of the board bearing<br />
the first <strong>LED</strong> to free the room <strong>for</strong> the loudspeaker. The cut off part may be reused by shifting<br />
it <strong>for</strong>ward and connecting it to the main part of the board with cables. The necessary<br />
connecting pads are provided on the board.<br />
Copyright Jorns Modellbeleuchtung Page 4/4