

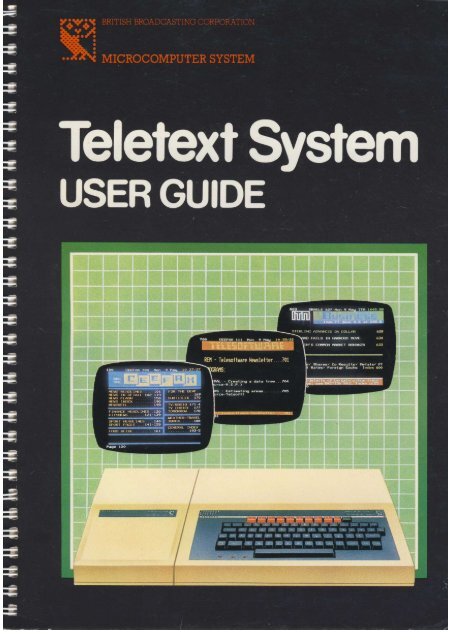
The BBC Microcomputer Teletext System User Guide
The BBC Microcomputer Teletext System User Guide
The BBC Microcomputer Teletext System User Guide

Create successful ePaper yourself
Turn your PDF publications into a flip-book with our unique Google optimized e-Paper software.
<strong>The</strong> <strong>BBC</strong> <strong>Microcomputer</strong><br />
<strong>Teletext</strong> <strong>System</strong><br />
<strong>User</strong> <strong>Guide</strong><br />
Part no 404000<br />
Issue no 1<br />
Date June 1983
WARNING: THE TELETEXT ADAPTER MUST BE EARTHED<br />
Important: <strong>The</strong> wires in the mains lead for the <strong>Teletext</strong> Adapter are coloured in accordance with<br />
the following code:<br />
Green and yellow Earth<br />
Blue Neutral<br />
Brown Live<br />
As the colours of the wires may not correspond with the coloured markings identifying the<br />
terminals in your plug, proceed as follows:<br />
<strong>The</strong> wire which is coloured green and yellow must be connected to the terminal in the plug which<br />
is marked by the letter E, or by the safety earth symbol + or coloured green, or green and yellow.<br />
<strong>The</strong> wire which is coloured blue must be connected to the terminal which is marked with the<br />
letter N, or coloured black.<br />
<strong>The</strong> wire which is coloured brown must be connected to the terminal which is marked with the<br />
letter L, or coloured red.<br />
If the socket outlet available is not suitable for the plug supplied, the plug should be cut off and<br />
the appropriate plug fitted and wired as previously noted. <strong>The</strong> moulded plug which was cut off<br />
should be disposed of as it would be a potential shock hazard if it were to be plugged in with the<br />
cut off end of the mains cord exposed. <strong>The</strong> moulded plug must be used with the fuse and fuse<br />
carrier firmly in place. <strong>The</strong> fuse carrier is of the same basic colour* as the coloured insert in the<br />
base of the plug. Different manufacturers' plugs and fuse carriers are not interchangeable. In the<br />
event of loss of the fuse carrier, the moulded plug MUST NOT be used. Either replace the<br />
moulded plug with another conventional plug wired as previously described, or obtain a<br />
replacement fuse carrier from an authorised <strong>BBC</strong> <strong>Microcomputer</strong> dealer. In the event of the fuse<br />
blowing it should be replaced, after clearing any faults, with a 3 amp fuse that is ASTA approved<br />
to BS1362.<br />
*Not necessarily the same shade of that colour.<br />
© Copyright Arnie Computers Limited 198:1<br />
Neither the whole or any part of the information contained in, or the product described in, this manual may be adapted or<br />
reproduced in any material form except with the prior written approval of Acorn Computers Limited (Acorn Computers).<br />
<strong>The</strong> product described in this manual and products for use with it. are subject to continuous development and improvement. All<br />
information of a technical nature and particulars of the product and its use (including the information and particulars in this<br />
manual) are given by Acorn Computers in good faith. However, it is acknowledged that there may be errors or omissions in this<br />
manual. A list of details of any amendments or revisions to this manual can be obtained upon request from Acorn Computers<br />
Technical Enquiries. Acorn Computers welcome comments and suggestions relating to the product and this manual.<br />
All correspondence should be addressed to:<br />
Technical Enquiries<br />
Acorn Computers Limited<br />
Fulbourn Road<br />
Cherry Hinton<br />
Cain Midge CB1 4JN<br />
All maintenance and service on the product must be carried out by Acorn Computes' authorised dealers. Acorn Computers can<br />
accept no liability whatsoever for any loss or damage caused by service or maintenance by unauthorised personnel. This manual in<br />
intended only to assist the reader in the use of the product, and therefore Acorn Computers shall not be liable for any loss or<br />
damage whatsoever arising from the use of any information or particulars in, or any error or omission in, this manual, or any<br />
incorrect use of the product.<br />
First published 198:1<br />
Published by Acorn Computers Limited, Fulbourn Road, Cherry Hinton. Cambridge CB1 4JN<br />
Typeset by Bateman Typesetters. Cambridge<br />
Printed by Saunders & Williams, Croydon
Contents<br />
1 About this <strong>User</strong> <strong>Guide</strong> 1<br />
2 What is <strong>Teletext</strong>?<br />
3 What does the <strong>BBC</strong> <strong>Microcomputer</strong><br />
<strong>Teletext</strong> <strong>System</strong> do? 3<br />
3.1 Introduction 3<br />
3.2 Terminal mode 3<br />
3.3 Telesoft mode 4<br />
3.4 Assembler level 4<br />
4 Getting started 5<br />
4.1 Connecting up the units 5<br />
4.2 General information on the format of commands 8<br />
4.3 Tuning in the <strong>Teletext</strong> Adapter 8<br />
4.4 A first attempt at Telesoftware 11<br />
Downloading a disordered program 12<br />
Downloading an ordered program 13<br />
5 Using the system in Terminal mode 14<br />
5.1 Introduction 14<br />
5.2 Terminal mode commands 14<br />
Selecting a channel 14<br />
Fine tune 15<br />
Select a page 15<br />
Keep a page 15<br />
Release a kept page 16<br />
Select the last explicit page 16<br />
Select index page 16<br />
Reveal and conceal 16<br />
Save a page to file 17<br />
Load a page from file 17<br />
Hold page 18<br />
Enter * command 18<br />
Exit to previous language 18
Exit to Telesoft mode 19<br />
Select wild card 19<br />
5.3 Accessing linked pages 20<br />
6 Using the system in Telesoft mode 23<br />
6.1 Introduction 23<br />
6.2 Telesoft mode commands 25<br />
*<strong>BBC</strong>1, *<strong>BBC</strong>2 25<br />
*CH1, *CH2, *CH3, *CH4 26<br />
*DATE 27<br />
*DISPLAY 27<br />
*EXEC 28<br />
*HELP 29<br />
*ITV1, *ITV2 29<br />
*OPT0 30<br />
*OPT1 30<br />
*OPT2 31<br />
*OPT3 32<br />
*PAGE 33<br />
*TIME 34<br />
*TRANSFER 34<br />
*TUNE 35<br />
7 Using the <strong>Teletext</strong> system at assembly level 36<br />
7.1 <strong>Teletext</strong> assembly level interface 36<br />
7.2 <strong>Teletext</strong> OSWORD calls 38<br />
8 Changing the filing system 41<br />
9 Technical information 42<br />
9.1 <strong>The</strong> structure and numbering of <strong>Teletext</strong> pages 42<br />
9.2 <strong>Teletext</strong> signals 44<br />
Rows 1 to 23 45<br />
Row 0 45<br />
Rows 24 to 31 46<br />
Page check word (row 27) 46<br />
9.3 Character codes 48<br />
Display modes 48<br />
Colour 48<br />
Flashing and concealed characters 49
Double height 49<br />
Hold graphics control 49<br />
9.4 Reference 49<br />
9.5 <strong>The</strong> television service data packet 49<br />
Byte structure of the television service data packet 50<br />
Bytes 1 to 6 – decoder information 50<br />
Bytes 7 to 12 51<br />
Bytes 13 and 14 – channel identification 51<br />
Byte 15 – time offset 51<br />
Bytes 16 to 18 – modified Julian date 51<br />
Bytes 19 to 21 – coordinated universal time 52<br />
Bytes 26 to 45 – status display message 52<br />
9.6 <strong>The</strong> Telesoftware format 52<br />
Names 52<br />
Command subroutines 57<br />
Start block and medium description commands 59<br />
Start block 59<br />
<strong>Teletext</strong> 60<br />
End block 60<br />
File and segment information commands 60<br />
End of file 60<br />
Title of file 61<br />
Comment 61<br />
Ignore 61<br />
Load address (absolute) 62<br />
Load address (relative) 62<br />
Execution address (absolute) 62<br />
Execution address (relative) 62<br />
Inhibit run 63<br />
Define data type 63<br />
Format redefinition commands 63<br />
Change escaped-name's meaning (decoded string) 63<br />
Change escaped-name's meaning (command) 63<br />
Change lone-name's meaning (decoded string) 64<br />
Change lone-name's meaning (command) 64<br />
No reversion to default format before next file 64<br />
Revert to default format 64<br />
<strong>The</strong> escape operator 64<br />
Eight-bit byte adjustment 65<br />
Eight-bit byte adjustment (lower) 65<br />
Eight-bit byte adjustment (raise) 65
Figures<br />
Error in transmission 65<br />
4.1 Connecting the <strong>Teletext</strong> Adapter 7<br />
4.2 Rear view of the <strong>Teletext</strong> Adapter 10<br />
4.3 Tuning picture format 10<br />
5.1 Linked pages 21<br />
9.1 Byte structure of <strong>Teletext</strong> rows 1 to 23 45<br />
9.2 Contiguous and separated graphics modes 48<br />
Tables<br />
9.1 <strong>Teletext</strong> character codes 47<br />
9.2 Name tables — default entries 54<br />
9.3 <strong>The</strong> command subroutines 59<br />
Appendices<br />
Appendix 1<br />
Installing the TELEROM into the <strong>BBC</strong> <strong>Microcomputer</strong> 66<br />
Appendix 2<br />
<strong>Teletext</strong> reception 69<br />
Appendix 3<br />
Summary of Terminal mode commands 71<br />
Appendix 4<br />
A statement about Telesoftware by the <strong>BBC</strong> 72<br />
IMPORTANT<br />
IF YOU ARE RECEIVING TELETEXT ON AN ORDINARY TELEVISION<br />
RECEIVER, YOU ARE COVERED BY YOUR EXISTING TELEVISION LICENCE,<br />
WHICH OF COURSE MUST BE VALID. IF YOU DO NOT HAVE A TELEVISION<br />
RECEIVER BUT ARE RECEIVING TELETEXT WITH THE AID OF A VIDEO<br />
MONITOR UNIT, YOU MUST HAVE A COLOUR OR BLACK AND WHITE<br />
TELEVISION LICENCE DEPENDING ON WHETHER YOUR MONITOR IS<br />
COLOUR OR BLACK AND WHITE.
1 About this <strong>User</strong><br />
<strong>Guide</strong><br />
This <strong>User</strong> <strong>Guide</strong> contains all the information you need to use the <strong>BBC</strong> <strong>Microcomputer</strong><br />
<strong>Teletext</strong> <strong>System</strong>. Whilst it is essentially an operating manual, the <strong>User</strong> <strong>Guide</strong> contains<br />
certain technical information which will help you to understand generally what<br />
<strong>Teletext</strong> is all about and gain some appreciation of the future potential offered by this<br />
system.<br />
Chapters 2 and 3 are introductory. Chapter 2 explains briefly what <strong>Teletext</strong> is all about<br />
and chapter 3 deals briefly with the various ways in which you can use your <strong>BBC</strong><br />
<strong>Microcomputer</strong> with the <strong>Teletext</strong> service.<br />
Chapter 4, as its title suggests, gets you started. It explains how to connect up the<br />
system, tune into <strong>Teletext</strong> and quickly run a Telesoftware program.<br />
Chapters 5, 6 and 7 contain the detailed instructions for using the system in the three<br />
modes of operation: Terminal, Telesoft and assembly level.<br />
Chapter 8 explains how to select, as the current system, the various filing systems (<br />
including Telesoft) which may be available on your computer.<br />
Chapter 9 contains information which will probably be of interest to the more<br />
technically minded user, but which is not essential for using the system.
2 What is <strong>Teletext</strong>?<br />
<strong>Teletext</strong> is a service offered by the <strong>BBC</strong> and IBA which makes available a wide variety<br />
of information through the medium of television. This information could be share<br />
prices on the stock market or the latest football results; the possibilities are almost<br />
endless.<br />
<strong>Teletext</strong> information is transmitted from <strong>BBC</strong> and IBA television transmitters and can<br />
be received on a commercial television receiver suitably equipped with a <strong>Teletext</strong><br />
Adapter unit. <strong>The</strong> transmitted signal however, unlike a normal television signal, is in<br />
digital form which makes it additionally suitable for use with the <strong>BBC</strong> <strong>Microcomputer</strong>.<br />
<strong>The</strong> total amount of <strong>Teletext</strong> information is too large to be displayed on a television<br />
screen at any one instant and for this reason it is transmitted in `pages' rather like the<br />
pages of a book. Only one page at a time can be displayed on a television screen.<br />
A page of information may contain text, symbols or a mixture of both; it depends on<br />
the type of information and how the broadcasters decide to present it.<br />
Because of the amount and variety of information available, transmitted <strong>Teletext</strong> pages<br />
are organised and numbered in such a manner so as to enable you quickly and easily to<br />
locate and display specific items of information.
3 What does the<br />
<strong>BBC</strong> <strong>Microcomputer</strong><br />
<strong>Teletext</strong> <strong>System</strong> do?<br />
3.1 Introduction<br />
<strong>The</strong> <strong>BBC</strong> <strong>Microcomputer</strong> <strong>Teletext</strong> <strong>System</strong> gives you most of the facilities of an<br />
ordinary <strong>Teletext</strong> receiver and, in addition, the service known as Telesoftware.<br />
Telesoftware is a service similar to <strong>Teletext</strong> and is transmitted in the same<br />
manner, that is, in pages. However, these pages contain computer programs. A<br />
program will consist of one or more pages, depending on the program length,<br />
and each program has its own file name by which it is identified. <strong>The</strong>se<br />
programs, once received, are decoded by the <strong>Teletext</strong> Adapter and thereafter<br />
are available to the computer for display, storage on disc/tape or immediate<br />
execution.<br />
It is emphasised that your television set does not require a <strong>Teletext</strong> decoder.<br />
This function amongst others is performed by the <strong>Teletext</strong> Adapter.<br />
<strong>The</strong>re are three main ways in which you can use the system: in Terminal mode,<br />
in Telesoft mode or at assembler level. <strong>The</strong> following is a brief description of<br />
the facilities offered by each.<br />
3.2 Terminal mode<br />
`Terminal mode' is a program which Acorn has supplied to give you easy<br />
access to <strong>Teletext</strong> pages. It also lets you use some more sophisticated features<br />
which only an 'intelligent' receiver can offer. <strong>The</strong>se features include asking for<br />
pages in advance, having pages stored by the system before you ask for them (<br />
see the section on linked pages), and being able to save pages onto any<br />
available filing system for later examination.<br />
You can also use Terminal mode as an easy way of finding and loading `<br />
Telesoftware' computer programs.<br />
You cannot write programs whilst in Terminal mode. In addition, if you are<br />
using a television receiver, you cannot display <strong>Teletext</strong> pages and television<br />
programmes simultaneously.
4 What does the <strong>BBC</strong> <strong>Microcomputer</strong> <strong>Teletext</strong> <strong>System</strong> do?<br />
3.3 Telesoft mode<br />
An important feature of <strong>Teletext</strong> transmissions is the ability to send programs, or '<br />
software', with the <strong>Teletext</strong> service. In keeping with the philosophy of <strong>BBC</strong><br />
<strong>Microcomputer</strong> products, Acorn has produced a filing system interface as the means of<br />
accessing Telesoftware files.<br />
IT IS IMPORTANT that you appreciate that Telesoft is a filing system, and not an<br />
applications program such as Terminal mode. With Telesoft selected you will not be<br />
able to save programs as the system thinks you are trying to save data to the television<br />
channel!<br />
You may think of Telesoft as a 'read-only' tape; it is quite a good analogy.<br />
In addition to Telesoftware, you can also display and store <strong>Teletext</strong> pages. However the<br />
full range of Terminal mode commands is not available and it is therefore probably<br />
more convenient to return to Terminal mode should you wish to handle <strong>Teletext</strong> pages.<br />
You can write and run your own programs whilst in Telesoft mode, but to store these<br />
programs you should select the appropriate filing system, ie disc or tape. See section 8.<br />
3.4 Assembler level<br />
Assembly code level allows you to control the <strong>Teletext</strong> system using programs written<br />
in Assembly Language. You can enter these into the computer from the keyboard or<br />
from file. <strong>The</strong>re are two main areas of control: one is concerned with the filing system,<br />
and the other with the <strong>Teletext</strong> Adapter.<br />
<strong>The</strong> filing system function allows the storage and retrieval of Telesoftware files. You<br />
can control this by the standard interfaces to the Machine Operating <strong>System</strong>, which are<br />
independent of the filing system.<br />
<strong>The</strong> <strong>Teletext</strong> Adapter functions, which control the conditions under which a file is<br />
stored and executed, can be accessed via the general purpose Machine Operating<br />
<strong>System</strong> calls.
4 Getting started<br />
Before proceeding further, check that you have the following items:<br />
– A Model B <strong>BBC</strong> <strong>Microcomputer</strong> fitted with a BASIC ROM.<br />
– A <strong>Teletext</strong> Adapter with the following items attached:<br />
A power cable with a 13A 3-pin plug fitted to it.<br />
A 'ribbon' cable terminating in a 34-way plug.<br />
– A coax cable fitted with a phono plug and a UHF plug as supplied with the<br />
<strong>BBC</strong> <strong>Microcomputer</strong> (if you're using a normal television receiver), or a<br />
coax cable fitted with the appropriate connectors (if you're using a video<br />
monitor).<br />
– A <strong>Teletext</strong> ROM (TELEROM).<br />
You will not need a new aerial lead, as the existing television aerial lead can<br />
be used.<br />
If any of the above are missing, contact your local supplier quoting the order<br />
number which was given to you when you first placed your order. This number<br />
also appears on the dispatch label on the outside of the packing case.<br />
4.1 Connecting up the units<br />
<strong>The</strong> first thing to do is to make sure that the ROMs are correctly positioned on<br />
the microcomputer circuit board and then to fit the TELEROM. <strong>The</strong><br />
instructions for doing this are in Appendix 1, however if you do not feel<br />
sufficiently confident, take your microcomputer and TELEROM to an<br />
authorised dealer who will do it for you.<br />
Next, refer to Fig 4.1 which shows the microcomputer and <strong>Teletext</strong> Adapter<br />
connected together and connect up the system as follows:<br />
1. Connect the 34-way socket on the <strong>Teletext</strong> Adapter 'ribbon' cable to the<br />
plug labelled 1 MHz BUS on the computer.<br />
Caution: This socket may fit both ways round–the correct way is with the<br />
arrow at one end of the socket aligned with the arrow next to the '1 MHz BUS'<br />
label. IF THE SOCKET WILL NOT GO RIGHT IN EXAMINE THE PLUG<br />
AND SOCKET FOR DAMAGE AND OBSTRUCTIONS. DO NOT USE<br />
EXCESSIVE FORCE.
6 Getting started<br />
2. Disconnect the aerial lead from the back of your television set and<br />
reconnect it to the standard television aerial socket on the back of the <strong>Teletext</strong><br />
Adapter.<br />
Note: An aerial which stands on top of your television set does not generally<br />
provide a strong enough signal. You will in all probability need a loft or<br />
externally mounted aerial. If you think your aerial may not be good enough<br />
refer to Appendix 2 which may assist you, or consult your dealer.<br />
3. Connect up whatever storage units you are using (ie disc or cassette) to the<br />
computer.<br />
4. Connect the computer UHF OUTPUT socket to the aerial socket on your<br />
television set using the phono plug/UHF plug cable, or connect the computer<br />
VIDEO OUT or RGB OUT socket to the input socket on the video monitor.<br />
5. Connect the television, storage unit, microcomputer and <strong>Teletext</strong> Adapter to<br />
the mains supply, if possible using adjacent sockets for <strong>Teletext</strong> Adapter and<br />
computer.<br />
6. Switch on television/video monitor, <strong>Teletext</strong> Adapter unit, microcomputer<br />
and storage device (disc or cassette) if fitted. IT IS IMPORTANT THAT<br />
THE TELETEXT ADAPTER IS SWITCHED ON BEFORE THE<br />
MICROCOMPUTER. Your television screen should now display the<br />
following message:<br />
<strong>BBC</strong> Computer 32K<br />
Acorn TFS<br />
BASIC<br />
>_<br />
<strong>The</strong> current filing system is Telesoft (TFS).<br />
Note 1: If Acorn TFS no power appears, check that you have connected the<br />
adapter correctly and that it is switched on at the rear. Press BREAK before<br />
continuing. If this still fails to produce the start-up message, check the<br />
position of the ROMs on the microcomputer circuit board (see Appendix 1).<br />
Note 2: <strong>The</strong> <strong>Teletext</strong> software incorporates a 'power-down' mode so that if,<br />
when you switch on the microcomputer, the <strong>Teletext</strong> Adapter is switched
Getting started 7<br />
off, the message Acorn TFS no power will be displayed. This means that the<br />
<strong>Teletext</strong> software is inactive and therefore the memory space it would normally<br />
occupy is free to be used for running large programs.<br />
If you switch on the <strong>Teletext</strong> Adapter after the microcomputer, the <strong>Teletext</strong><br />
software is not automatically activated; you must press the BREAK key first.<br />
If you switch off the <strong>Teletext</strong> Adapter whilst the microcomputer is 'on', the<br />
<strong>Teletext</strong> software is not automatically de-activated; you must press the BREAK<br />
key first.<br />
Note 3: If the positioning of the ROMs is such that Telesoft is not the default<br />
filing system, press the T key, hold it down and press BREAK , then release<br />
BREAK then T This will cause the correct start-up message to be displayed<br />
without re-positioning the ROMs as detailed in Appendix 1.<br />
Once the correct start-up message is displayed you can now go ahead and tune<br />
the <strong>Teletext</strong> Adapter.<br />
Fig 4.1 Connecting the <strong>Teletext</strong> Adapter
8 Getting started<br />
4.2 General information on the format of commands<br />
Note 1: Most of the commands are put into the computer by pressing one of<br />
the ten red keys labelled f0 to f9, either on its own or together with the SHIFT<br />
key. In the latter case it is important that you press the keys in the following<br />
manner otherwise the command will never go into the computer:<br />
— Press the SHIFT key, keep it held down and press the red function key.<br />
— Release the f key, then release the SHIFT key.<br />
If you do attempt to input a faulty command the computer will usually tell<br />
you, with a message on the screen, what to do and how to get back to a normal<br />
situation.<br />
Note 2: Throughout the guide there are many instructions on how to type in<br />
commands to the computer and what the correct response is. <strong>The</strong> following<br />
applies to these instructions:<br />
— Where you see a word in brackets thus, , this is describing what<br />
you have to type in, eg means you have to type in the name of<br />
a file. Do not type in the brackets.<br />
— Where you see a word 'reversed out' this means you have to press a<br />
specific key, eg TAB means press the TAB key.<br />
— Where the text is an actual message displayed on your monitor screen it is<br />
shown in computer typeface, eg the message ***Waiting is displayed.<br />
Likewise in a command the characters in computer typeface are to be<br />
typed in exactly as shown, eg type in *EXEC.<br />
4.3 Tuning in the <strong>Teletext</strong> Adapter<br />
<strong>The</strong>re are four channels built into the <strong>Teletext</strong> Adapter and assigned numbers<br />
1 to 4. We recommend that you allocate these channels as follows:<br />
Channel 1 — <strong>BBC</strong>1<br />
Channel 2 — <strong>BBC</strong> 2<br />
Channel 3 — ITV1<br />
Channel 4 — ITV2<br />
<strong>The</strong> procedure for tuning in the system to receive each channel is as follows:
1. Type in *TELETEXT then press the RETURN key.<br />
<strong>The</strong> message ***Waiting for page is displayed.<br />
2. Press the f4 key.<br />
<strong>The</strong> prompt Channel should now appear on the screen.<br />
3. Type in 1 (to select channel 1), then press the RETURN key.<br />
<strong>The</strong> message ***Waiting for page is again displayed.<br />
Getting started 9<br />
4. Press the SHIFT and f4 keys together.<br />
Your screen will display a station tuning scale (see Fig 4.3). On top of the<br />
tuning scale sits a tuning bar which indicates the strength of received<br />
<strong>Teletext</strong>. Maximum signal strength is when the tuning bar is as long as the<br />
scale (100<br />
5. Turn the number 1 tuning control on the rear of the Adapter (Fig 4.2) to<br />
one end of its travel (this is indicated by a 'clicking' as you turn the control).<br />
Now very slowly turn the control over its full travel. You will see the tuning<br />
bar suddenly increase in length as you tune in to a <strong>BBC</strong> or ITV <strong>Teletext</strong><br />
channel. This is accompanied by the channel and page numbers at the top of<br />
the screen. When you have found the longest tuning bar together with the<br />
messages CEEFAX and CH1 you are correctly tuned in to channel 1.<br />
REMEMBER YOU CAN RECEIVE ALL FOUR TELETEXT CHANNELS<br />
ON EACH TUNING CONTROL SO MAKE SURE YOU GET THE RIGHT<br />
CHANNEL.<br />
6. Press the SPACE BAR on your keyboard and repeat steps 2 to 5 for<br />
channels 2, 3 and 4. <strong>The</strong> only differences are:<br />
— In step 3, type in the appropriate channel number (2, 3 or 4).<br />
— In step 5, rotate the appropriate control number (2, 3 or 4).<br />
7. When you have tuned in all four channels press the SPACE BAR . This<br />
will remove the tuning scale and a <strong>Teletext</strong> index page will be automatically<br />
displayed. This is the default page and is discussed in section 5.2.<br />
Now that your system is working we suggest that you have a go at running<br />
one of the Telesoftware programs being transmitted, the procedure for which<br />
is given in the next section (4.4). You will need to use only a few Terminal<br />
mode commands and it should give you confidence to use the full range of<br />
features which are explained later in the guide.
10 Getting started<br />
Fig 4.2 Rear view of the <strong>Teletext</strong> Adapter<br />
Fig 4.3 Tuning picture format
Getting started 11<br />
4.4 A first attempt at Telesoftware<br />
Assuming that you're carrying on from the previous section your screen<br />
should be displaying an index page. If on the other hand you've just switched<br />
on the equipment then you must enter <strong>Teletext</strong> by typing in *TELETEXT then<br />
pressing the RETURN key. <strong>The</strong> CEEFAX channel 1 index page will be<br />
displayed.<br />
Next select a channel (any channel) by first pressing the f4 key. This results in<br />
the message Channel being displayed. <strong>The</strong>n type in the channel number (1,<br />
2, 3 or 4) and finally press RETURN . <strong>The</strong> message ***Waiting for page<br />
will be displayed until it is replaced by the index page for the channel you've<br />
selected.<br />
Do this a few times to get the idea, then try selecting a page.<br />
You can select a page by pressing the f0 key, then typing in the page number<br />
you want (three digits) then pressing RETURN . You may have to wait a<br />
short while before the page you have selected appears. Again we suggest you<br />
try this a few times to get the idea.<br />
When you feel confident, select channel 1 then page 700. This will display a<br />
list of the currently transmitted Telesoftware programs and the page on which<br />
each can be found. Decide which program you want, then select the page it is<br />
stored on.<br />
<strong>The</strong> next thing to do is to download the program, that is, load it into the<br />
computer ready to be run. To download the program, press the SHIFT and f9<br />
keys together. What happens next may not make a great deal of sense and so<br />
deserves some explanation.<br />
As you are probably aware programs can be structured in two very different<br />
ways and this affects what happens when they are downloaded.<br />
Programs structured in numbered lines can be loaded in any order since the<br />
computer will organise the lines into the correct numerical sequence prior to<br />
running the program. A program structured in such a way is said to be a<br />
disordered file.<br />
A program structured as merely a series of statements (with no numbered<br />
lines) must be loaded into the computer starting at the first statement and<br />
exactly in the order in which it has been written. This is because there are no<br />
numbered lines for the computer to organise as there are for disordered files.<br />
Such a program is said to be an ordered file.
12 Getting started<br />
Another point to bear in mind is that whilst programs are listed as being on<br />
consecutively numbered pages, almost always a program will be longer than<br />
one page. For example there are currently several programs being transmitted<br />
on page 702 onwards, however they are all longer than one page.<br />
Let's assume that the program listed under page 704 is in fact 12 pages long.<br />
This means that it will take 12 transmissions of page 704 to get the entire<br />
program into the computer and this can take quite a long time. It follows<br />
therefore that the earlier in the transmission sequence you try to download the<br />
program, the longer it takes to get round to page one again and this can<br />
significantly affect how long you have to wait before an ordered program is<br />
loaded (see below).<br />
What happens during downloading depends on whether the program is<br />
ordered or disordered and is explained in the following:<br />
Downloading a disordered program<br />
As soon as the SHIFT and f9 keys have been pressed, the message<br />
Searching is displayed. This tells you that the system is looking for a page in<br />
the program.<br />
Immediately a page (any page) in the program is received, the message<br />
disappears and the contents of the page 'scroll' up the screen as they are loaded<br />
into computer memory.<br />
When the page has been completely loaded, the message Searching is again<br />
displayed until another page in the program is found.<br />
This process continues until the program is completely loaded, whereupon the<br />
message Loaded is displayed and an audible 'bleep' sounds.<br />
During downloading the normal transmitted <strong>Teletext</strong> page headers are<br />
displayed to indicate (during waiting) that your <strong>Teletext</strong> Adapter is still<br />
functioning.<br />
When the decoder is loading Telesoftware, it checks the validity of data on<br />
each page it receives. If this check shows up an error, you will see the<br />
message Bad data. Retrying. . .<br />
This usually means you will have to wait until this page comes round again in<br />
the transmission cycle, but you may be lucky if the bad page was one you<br />
have already received or if it was a title page with no software on it. If you<br />
wait long enough you will always be able to load a Telesoftware program,<br />
unless your reception is particularly bad.
5 Using the system in<br />
Terminal mode<br />
5.1 Introduction<br />
We recommend that you spend a few minutes using the select a page and<br />
select a channel commands, before going on to the rest of the commands.<br />
You may find it a good idea to read first section 9.1 which explains in some<br />
detail how <strong>Teletext</strong> pages are numbered and how the entire <strong>Teletext</strong><br />
transmission is structured. This may help you to understand the various<br />
commands you are about to use.<br />
5.2 Terminal mode commands<br />
First enter Terminal mode by typing in *TELETEXT and pressing the<br />
RETURN key. A default channel, <strong>BBC</strong>1 CEEFAX, is selected and a default<br />
index page is displayed. In addition to news and information, the following<br />
standard items are usually displayed on your screen:<br />
– Channel title and page number (header), eg CEEFAX XXX, at the top left.<br />
– <strong>The</strong> page number you have selected at the top far left.<br />
– <strong>The</strong> changing page number at the left of centre.<br />
– <strong>The</strong> date and time at the far right.<br />
Selecting a channel<br />
Press the f4 key.<br />
<strong>The</strong> prompt Channel is displayed.<br />
Type in 1, 2, 3 or 4.<br />
This number appears after Channel.<br />
Press RETURN (to select the channel).<br />
<strong>The</strong> only thing which happens immediately on the screen is that the channel<br />
title and changing page header now correspond to the newly-selected channel.<br />
A default index page for the new channel is displayed as soon as it is received.
Fine tune<br />
Using the system in Terminal mode 15<br />
This is the same function you used when tuning the <strong>Teletext</strong> Adapter (see 4.3).<br />
You can use it anytime to display the tuning scale if the quality of the<br />
displayed <strong>Teletext</strong> page deteriorates.<br />
Press the f4 and SHIFT keys together.<br />
When you have finished tuning, press the SPACE BAR to inhibit the tuning<br />
routine and display the page.<br />
Select a page<br />
To display a transmitted page:<br />
Press the f0 key.<br />
Type in the page number which can be three digits or seven digits (see section<br />
9.1 on page numbering).<br />
Press the RETURN key.<br />
Note: Make sure you have selected a page which is being transmitted.<br />
Until the selected page is reached, the previous page and the message<br />
***Waiting for page is displayed.<br />
Keep a page<br />
This function allows you to store the displayed page in computer memory.<br />
<strong>The</strong>reafter, every time this particular page is received, it updates the stored<br />
page. In this manner, a 'kept' page is continuously updated and can be<br />
displayed immediately by using the normal 'select a page' command. You can '<br />
keep' a page before it has actually arrived and select another page while you<br />
are waiting. In this way you can ask for more than one page at a time. To keep<br />
a page:<br />
Press the f3 key.<br />
<strong>The</strong> message Page kept is displayed at the bottom of the screen.<br />
Note: When you attempt this command, the message Buffer full — please<br />
release a page may appear. This means that all available memory for<br />
keeping pages is used up and you must first release a page, before trying to<br />
keep a page. <strong>The</strong> following explains how to release a kept page.
16 Using the system in Terminal mode<br />
Release a kept page<br />
This function causes the displayed page to be lost provided it is a kept page.<br />
To release the kept page:<br />
Press the SHIFT and f3 keys.<br />
<strong>The</strong> message Page released is displayed.<br />
Select the last explicit page<br />
If you are displaying linked pages (see 5.3) you can quickly return to the last<br />
page which was displayed by the explicit typing in of its number. This is<br />
usually the first page in the linked structure.<br />
Press the f1 key.<br />
<strong>The</strong> last explicitly selected page is displayed.<br />
Select index page<br />
You can return to the default index page which was automatically displayed<br />
when you first entered the current channel.<br />
Press the f1 and SHIFT keys together.<br />
Note: If no default index page number is being transmitted on your current<br />
channel, then page #00 will be selected instead (see 'Select wild card').<br />
Reveal and conceal<br />
Some pages are transmitted with certain text 'hidden', ie concealed as spaces.<br />
For example, the answers to a quiz. Any page with hidden data will display a<br />
message something like Press the REVEAL key. To reveal this hidden text:<br />
Press the f2 key.<br />
<strong>The</strong> hidden text appears, and the page itself is 'held' so that it cannot be<br />
updated by subsequent transmitted pages.<br />
To conceal the text and cancel the 'hold' state: Press<br />
the SPACE BAR .<br />
To conceal the text but retain the page 'hold' state: Press<br />
the SHIFT and f2 keys together.
Save a page to file<br />
Using the system in Terminal mode 17<br />
This function allows you to store the displayed page under any file name onto<br />
the currently selected filing system, such as cassette or disc.<br />
Press the f7 key.<br />
<strong>The</strong> message Save file is displayed.<br />
Type in and press RETURN .<br />
<strong>The</strong> page is stored in a file. When storage is complete, the page is displayed<br />
with the file name under which you have just stored it, together with the<br />
message Press space to continue.<br />
When you press the SPACE BAR , the same page continues to be displayed,<br />
but the file name is removed, and the changing headers are again displayed.<br />
If you attempt this with Telesoft as your currently selected filing system, the<br />
message Illegal operation will be displayed. (This is due to the fact that<br />
Telesoft is a 'read only' filing system, therefore you cannot save anything to<br />
this filing system.)<br />
To recover from this situation, press the ESCAPE key. Now select another<br />
filing system such as disc or tape by using the Enter * command facility<br />
described below. You can now save the data to this filing system as described<br />
immediately above ('Save a page to file').<br />
Load a page from file<br />
This function allows you to display any page which is currently stored under<br />
a file name.<br />
Press the f6 key.<br />
<strong>The</strong> message Load file is displayed.<br />
Type the file name of the page for display, then press RETURN .<br />
<strong>The</strong> page is then displayed, together with its file name.<br />
Note that the page headers stop changing and the message Press space to<br />
continue is displayed.<br />
When you press the SPACE BAR , the file name disappears and the page<br />
headers again start to change.
18 Using the system in Terminal mode<br />
Hold page<br />
This function holds any displayed page and prevents it from changing. This is<br />
a useful function to have if you are saving or loading rolling pages or wild<br />
card pages (which are likely to change very quickly). To hold a page:<br />
Press the f8 key.<br />
<strong>The</strong> displayed page is held in its current state.<br />
To cancel the 'hold' state:<br />
Press the SPACE BAR .<br />
<strong>The</strong> page is now free to be updated.<br />
Enter * command<br />
This allows you to remain in Terminal mode and at the same time use those *<br />
commands which relate to the operating system. <strong>The</strong>se commands are shown<br />
on page 416 of the <strong>BBC</strong> <strong>Microcomputer</strong> <strong>System</strong> <strong>User</strong> <strong>Guide</strong>. In addition, you<br />
have available for use all commands associated with the particular ROMs<br />
fitted to your microcomputer, eg the disc filing system.To enter a command:<br />
Press key f5<br />
<strong>The</strong> prompt * is displayed at the bottom of your screen.<br />
Type in the appropriate command and press RETURN .<br />
<strong>The</strong> message Press space to continue is displayed.<br />
if you wish to enter other * commands, ignore the Press space to<br />
continue message and repeat as above.<br />
To return to the last displayed page press the SPACE BAR .<br />
Exit to previous language<br />
Press the f9 key.<br />
<strong>The</strong> start-up message for the language previously selected (from which<br />
<strong>Teletext</strong> was entered) is displayed and the system is now controlled by this<br />
language ROM.
Using the system in Terminal mode 19<br />
Note: If you have pressed the BREAK key whilst in Terminal mode, your<br />
previous language will be <strong>Teletext</strong> Terminal mode and the f9 key will cause<br />
this to be re-entered.<br />
Exit to Telesoft mode<br />
If you select a page containing a Telesoftware program, this function puts the<br />
system automatically into Telesoft mode and causes the program to be loaded<br />
into computer memory page by page. You can then go ahead and run the<br />
program. To exit to the Telesoft filing system and execute a program:<br />
Press the SHIFT and f9 keys together.<br />
<strong>The</strong> program will start to load into computer memory as soon as the first page<br />
is received. If you start this function say halfway through the program<br />
transmission then it may be a few minutes before the program starts to load (<br />
see section on ordered/disordered loading).<br />
Select wild card<br />
This enables you to select specified sequences of numbered pages for display (<br />
including their sub-pages, if any). We know that each page has a three-digit<br />
number. <strong>The</strong> function allows you to specify any combination of one or two of<br />
these three digits as part of a page number to be displayed. <strong>The</strong> unspecified<br />
digit(s) can be any number, ie completely `wild'. For example, if you specified<br />
34#, all page numbers whose first digit is 3 and whose second digit is 4 will be<br />
displayed. <strong>The</strong>oretically this would be 340, 341, 342 etc to 349. But bear in<br />
mind that not all pages are transmitted.<br />
To select a wild card press the f0 key (as you would do when normally<br />
selecting a page) then type in three characters (which may be any combination<br />
of digits and #s), then press RETURN .<br />
<strong>The</strong> specified wild card pages will be displayed as and when they are received,<br />
with a small built-in delay between consecutive pages to give you time to hold<br />
a page.
20 Using the system in Terminal mode<br />
5.3 Accessing linked pages<br />
Now that you know how to display any transmitted page of <strong>Teletext</strong>, we will<br />
explain how you can display pages which, because of their information<br />
content, are related to each other. <strong>The</strong>se are known as linked pages.<br />
A <strong>Teletext</strong> page displays 24 rows of text or graphic information. However<br />
more rows may be transmitted which are not displayed on the screen but<br />
which contain information for the <strong>Teletext</strong> decoder. In particular, row 27<br />
contains information in the form of numbers which point to related (linked)<br />
pages. <strong>The</strong>se numbers are called links.<br />
Take a look at Fig 5.1. <strong>The</strong> headlines page has four links, each pointing to a<br />
lead page. In this case row 27 of the headlines page would contain four link<br />
numbers, link 1 pointing to lead page 1 and so on. You will see also that each<br />
lead page has links, each of which points to page 1 of a related story. For<br />
example, lead 3 has three links pointing to page 1 of stories 3A, 3B and 3C, so<br />
row 27 of lead 3 would contain link numbers 1, 2 and 3. This system of links<br />
extends to the last page in each story then back round to the first page as is<br />
shown by stories 3A and 1.<br />
<strong>The</strong> microcomputer looks at row 27 of the page, detects the link numbers and<br />
loads as many of the linked pages as it can fit into memory. Although you<br />
cannot see these pages, they are being continuously updated. If for example<br />
you selected the headlines page on Fig 5.1, the microcomputer would load the<br />
four linked lead pages into its memory and these would then be available for<br />
display.<br />
Let's suppose you are currently displaying the headlines page which can be<br />
done using the 'select a page' method previously discussed. <strong>The</strong> headlines<br />
page will show four links. To select one of the linked pages, type in the link<br />
number (1, 2, 3 or 4). <strong>The</strong> message Link n (where n is the number you typed)<br />
will be displayed. Now press the RETURN key. <strong>The</strong> message Waiting for<br />
link n will be displayed until it is replaced by the selected linked page.<br />
Suppose you select lead 3 for display. This has three links pointing to three<br />
story pages, and again you can select any one.<br />
Only link numbers 0-23 are valid and the system will reject an invalid number<br />
by sounding a 'bleep'. If you select a link number which, although valid, is not<br />
shown on the current page, the message No such link will be displayed<br />
when you press the RETURN key. If the current page has no links, the<br />
message No links present will be displayed.
Fig 5.1 Linked pages<br />
Using the system in Terminal mode 21
22 Using the system in Terminal mode<br />
Let's assume that by using the links you have arrived at a page with only one<br />
link. This could be lead 1 or page 1 of story 3A. You can now use the key<br />
marked v to 'step' forwards through the story, page by page. You can also step<br />
back one level by using the ^ key, but to return to the top-level index page<br />
you need to use the 'last explicit page' key f1.<br />
If we look again at Fig 5.1 there are routes marked *. <strong>The</strong>se connect together<br />
adjacent pages at the same level in the structure. You can easily display an<br />
adjacent page at the same level by pressing the keys (whichever is<br />
appropriate). For example if you are currently displaying lead 3 and you wish<br />
to display lead 2, simply press the
6 Using the system in<br />
Telesoft mode<br />
6.1 Introduction<br />
This mode provides a series of commands for dealing specifically with<br />
Telesoftware as distinct from <strong>Teletext</strong>. Some of the commands, eg `select a<br />
page', are much the same as in <strong>Teletext</strong> mode, however commands are not<br />
available in this mode for specifically dealing with normal <strong>Teletext</strong> pages,<br />
such as the 'reveal' command and the commands to save pages to another<br />
filing system and select linked pages. You can if you wish view normal<br />
<strong>Teletext</strong> pages in this mode but it is more convenient to do so in the Terminal<br />
mode. You should only enter Telesoft mode when you wish to deal with<br />
Telesoftware files.<br />
You will recall that in chapter 4 we suggested that as a first step, you try to run<br />
one of the Telesoft programs before going on to use the full range of Terminal<br />
mode commands. We suggest that you now do something similar before going<br />
on to use the full range of Telesoftware commands.<br />
What follows is a simple procedure which tells you how to get a Telesoftware<br />
program running using some of the Telesoft commands. To the home<br />
computer user it is quite often unclear just why certain commands are<br />
necessary at certain times and what they do. In the following simple procedure<br />
we have attempted to go at least some way to correcting this problem by<br />
putting in explanations as and where we felt it would help you.<br />
<strong>The</strong> first thing to do is get into Telesoft mode. You can do this by typing in:<br />
*TELESOFT and pressing RETURN .<br />
<strong>The</strong> prompt >_ is displayed.<br />
<strong>The</strong> Telesoft mode is now the current filing system until another is entered (<br />
see chapter 8: Changing the filing system).<br />
While in Telesoft mode, the computer will understand and respond to the<br />
commands discussed in this chapter. Apart from these commands, the<br />
computer will behave in the same way as before entering Telesoft mode: thus<br />
you can still write programs while in Telesoft mode.<br />
Now select <strong>BBC</strong> 1 channel by typing in:
24 Using the system in Telesoft mode<br />
*<strong>BBC</strong>1 and pressing RETURN .<br />
As before the prompt >_ will be displayed.<br />
Once you have selected the channel you want, you can then go on to select the<br />
page you want, 700 in this case, by typing in:<br />
*PAGE 700 and pressing RETURN .<br />
After typing this command, page 700 will become the currently selected page<br />
and will be subject to all subsequent commands until a new page is selected (<br />
page 700 is currently the Telesoftware index page).<br />
<strong>The</strong> next step is to get the page you've just selected into memory. Until this is<br />
done you can't display it. However, you first need to make sure that you do not<br />
overwrite a program already in memory. <strong>The</strong> command you will use to put the<br />
page in memory is TRANSFER. You will cause the page selected to be loaded<br />
in an area of 960 bytes immediately before HIMEM (HIMEM defines the start<br />
of screen memory). Page 414 of the <strong>BBC</strong> <strong>Microcomputer</strong> <strong>User</strong> <strong>Guide</strong> explains<br />
how RAM is allocated and 415 shows where spare memory is located. To find<br />
the address in memory at which you can start loading the page, type in:<br />
HIMEM = HIMEM - 960 and press RETURN . <strong>The</strong>n type in PRINT<br />
~HIMEM and press RETURN (where ~ indicates a hexadecimal value).<br />
<strong>The</strong> address displayed (which is in hexadecimal) is the one you will need to<br />
use in the TRANSFER command (next).<br />
Next, transfer the page into memory by typing in:<br />
*TRANSFER and press RETURN .<br />
When the prompt >_ appears, the page has been captured and stored in<br />
memory at the address specified.<br />
Now display the page, by typing:<br />
*DISPLAY and pressing RETURN<br />
where is the one used in the *TRANSFER command.<br />
<strong>The</strong> page will be immediately displayed, listing the file name of each<br />
Telesoftware program being transmitted, together with the page number on<br />
which each can be found. When you have decided which program you want to<br />
run, select the page using the *PAGE command described previously, then<br />
type in:<br />
*EXEC and press RETURN .
Using the system in Telesoft mode 25<br />
Refer to 4.4 of this manual which explains what happens when you download<br />
a program. Having downloaded the program, you can now run it by typing in:<br />
RUN and pressing RETURN .<br />
<strong>The</strong> program will now run.<br />
This completes the introductory procedure. <strong>The</strong> full range of Telesoft<br />
commands is in the next section.<br />
6.2 Telesoft mode commands<br />
<strong>The</strong> Telesoft filing system provides a number of commands which allow you<br />
to control the <strong>Teletext</strong> Adapter and manipulate the captured program.<br />
All the commands can be typed in from the keyboard or included in a BASIC<br />
program. Each command is described separately under the following headings:<br />
Description What the command does in functional terms.<br />
Syntax <strong>The</strong> actual command words and the order in which<br />
commands and data are arranged.<br />
Example An example of a string of commands including the one<br />
described.<br />
Note: As with any other <strong>BBC</strong> <strong>Microcomputer</strong> filing system, Telesoft allows<br />
you to type abbreviations for its commands, such as *TE. for *TELETEXT, or<br />
*TELES. for *TELESOFT.<br />
*<strong>BBC</strong>1<br />
*<strong>BBC</strong>2<br />
Description<br />
<strong>The</strong>se commands are used to select channels 1 and 2 for <strong>Teletext</strong> reception.<br />
Syntax<br />
*<strong>BBC</strong>1<br />
*<strong>BBC</strong>2<br />
Example<br />
*TELESOFT<br />
*<strong>BBC</strong>2
26 Using the system in Tele soft mode<br />
This will cause channel 2 to be selected. <strong>The</strong> appearance of >_ confirms<br />
the selection.<br />
Notes<br />
It is up to the user to ensure that channel 1 is tuned to <strong>BBC</strong> 1 and channel 2 is<br />
tuned to <strong>BBC</strong>2 for this command to produce the expected results.<br />
*CH1<br />
*CH2<br />
*CH3<br />
*CH4<br />
Description<br />
<strong>The</strong>se commands are used to select one of the four available channels for<br />
<strong>Teletext</strong> reception.<br />
Syntax<br />
*CH1<br />
*CH2<br />
*CH3<br />
*CH4<br />
Example<br />
*TELE SOFT<br />
*CH3<br />
This will cause channel 3 to be selected.<br />
Notes<br />
<strong>The</strong>se commands are alternatives to the *<strong>BBC</strong> and *ITV commands and<br />
should be used where the channels are not tuned to the recommended stations,<br />
ie channel 1 to <strong>BBC</strong>1 etc.
*DATE<br />
Using the system in Telesoft mode 27<br />
Description<br />
This command causes the date, as transmitted by the television service data<br />
packet (see 9.5), to be displayed.<br />
Syntax<br />
*DATE<br />
Example<br />
*TELE SOFT<br />
*<strong>BBC</strong>1<br />
*DATE<br />
Notes<br />
Date information is extracted from the television service data packet (TSDP).<br />
If the TSDP is not transmitted or the data is corrupt on reception an error<br />
message is displayed.<br />
*DISPLAY<br />
Description<br />
This command is used to display any <strong>Teletext</strong> page which has previously<br />
been transferred into memory with a *TRANSFER command.<br />
Syntax<br />
*DISPLAY <br />
where is the hexadecimal address used in the *TRANSFER<br />
command.<br />
Example<br />
*TELE SOFT<br />
*<strong>BBC</strong>2<br />
*PAGE 200<br />
*TRANSFER 7000<br />
*DISPLAY 7000<br />
This will cause <strong>BBC</strong>2 CEEFAX page 200 to be displayed on the screen.
28 Using the system in Telesoft mode<br />
Notes<br />
<strong>The</strong> address specified must be in hexadecimal and should correspond exactly<br />
to an address used for a previous *TRANSFER command. Several pages may<br />
be transferred to separate memory locations before display.<br />
*EXEC<br />
Description<br />
This command is used to execute a stream of ASCII characters from a<br />
Telesoftware file as though they have been entered from the keyboard. <strong>The</strong>se<br />
ASCII characters may be a BASIC program or keyboard commands.<br />
Syntax<br />
*EXEC <br />
*EXEC ""<br />
Example<br />
*TELE SOFT<br />
*<strong>BBC</strong>1<br />
*PAGE 704<br />
*EXEC "WELCOME"<br />
This will cause the Telesoftware program WELCOME on <strong>BBC</strong>1 CEEFAX<br />
page 704 to be executed.<br />
Notes<br />
If the file name is given as a null string then the first program found on the<br />
selected page will be executed.<br />
Beware: If you have specified a non-existent file name the system will wait for<br />
ever trying to find it.
*HELP<br />
Using the system in Telesoft mode 29<br />
Description<br />
This command is used to display useful information about Telesoft mode,<br />
Terminal mode or the computer system in general.<br />
Syntax<br />
*HELP (For general computer system information) *HELP<br />
TELETEXT (For Terminal mode information) *HELP TELESOFT (<br />
For Telesoft mode information) *HELP OPT (For information about<br />
user-definable options)<br />
Example<br />
*HELP TELETEXT<br />
This will display a list of all Terminal mode commands, together with a short<br />
description of each and the function keys used to call up the command.<br />
Notes<br />
If the <strong>Teletext</strong> Adapter is not switched on, help on the <strong>Teletext</strong> system will not<br />
be available.<br />
*ITV1<br />
*ITV2<br />
Description<br />
<strong>The</strong>se commands are used to select channels 3 and 4 for <strong>Teletext</strong> reception.<br />
Syntax<br />
*ITV1<br />
*ITV2<br />
Example<br />
*TELE SOFT<br />
*ITV2<br />
*PAGE 400
30 Using the system in Telesoft mode<br />
This will cause page 400 of channel 4 to become the currently selected page.<br />
Notes<br />
It is up to the user to ensure that channel 3 is tuned to ITV and channel 4 to<br />
CHANNEL 4 for this command to have the expected results.<br />
*OPT0<br />
Description<br />
This command sets all options to their default values.<br />
Syntax<br />
*OPT0<br />
Example<br />
*TELESOFT<br />
*<strong>BBC</strong>2<br />
*PAGE 220<br />
*OPT0<br />
*EXEC "PROG"<br />
Notes<br />
<strong>The</strong> default settings are:<br />
*OPT1,128<br />
*OPT2,1<br />
*OPT3,0<br />
*OPT1<br />
Description<br />
Telesoftware files can include information which is displayed whilst the file is<br />
being loaded. This displayed information, as well as 'searching' messages, can<br />
be controlled with the *OPT1 command as follows:
Using the system in Telesoft mode 31<br />
*OPT1,0 No messages displayed<br />
1,1 Title displayed<br />
1,2 Language and title displayed<br />
1,3 Computer type and all above items displayed<br />
1,4 Date of file publication and all above items displayed<br />
1,5 Source or author of file and all above items displayed 1,128<br />
'Searching' messages and all above items displayed<br />
Syntax *OPT1,<br />
<br />
Example<br />
*TELESOFT<br />
*<strong>BBC</strong>1<br />
*PAGE 703<br />
*OPT1,2<br />
*EXEC""<br />
This will cause a load of the first program transmitted on <strong>BBC</strong>1 CEEFAX<br />
page 703 to be executed, and the program language and title to be displayed.<br />
Notes<br />
<strong>The</strong> default setting is *OPT1,128, ie all messages are displayed.<br />
<strong>The</strong> title is a concise description of what the file contains. This is not<br />
necessarily the same as the file name which is merely a label to identify the<br />
file.<br />
*OPT2<br />
Description<br />
This command controls the steps taken when the system encounters an error<br />
whilst reading a Telesoftware file. *OPT2,0 causes the system to ignore<br />
errors, *OPT2,1 causes the system to retry for a page until it has been<br />
received correctly and *OPT2,2 causes the system to abort the downloading if<br />
an error is detected.<br />
Syntax *OPT2,<br />
32 Lasing the system in Telesoft mode<br />
Example<br />
*TELESOFT<br />
*<strong>BBC</strong>1<br />
*PAGE 708<br />
*OPT2,1<br />
*EXEC ""<br />
This causes the first Telesoftware file found on page 708 of <strong>BBC</strong>1 CEEFAX<br />
to be executed, and in the case of a reception error for the page to be reloaded.<br />
Notes<br />
Errors may be encountered in the checkbytes (see section 9.2) of the page<br />
header, data parity or page CRC checks. In the first instance single bit errors<br />
are automatically corrected by the system. Parity or CRC errors can not be<br />
corrected and the system will retry for the page if *OPT2,1 is set. Pressing<br />
ESCAPE will cause the retries to abort.<br />
*OPT3<br />
Description<br />
When a Telesoftware load is started all previously redefined protocol bytes are<br />
reset to their original values, but this feature may be suppressed so that a<br />
format may be learned from loading one program, then re-used for loading a<br />
second. *OPT3,1 disables this reset feature and *OPT3,0 re-enables it.<br />
Syntax<br />
* OPT3,<br />
Example<br />
*TELESOFT<br />
*<strong>BBC</strong>1<br />
*PAGE 707<br />
*EXEC "PROG1"<br />
*OPT3,1<br />
*EXEC "PROG2"
34 Using the system in Telesoft mode<br />
*TIME<br />
Description<br />
This command causes the time of day, as transmitted by the television<br />
service data packet (see 9.5), to be displayed.<br />
Syntax<br />
*TIME<br />
Example<br />
*TELESOFT<br />
*<strong>BBC</strong>1<br />
*TIME<br />
Notes<br />
Time information is extracted from the television service data packet (TSDP).<br />
If the TSDP is not transmitted or the data is corrupt on reception, an<br />
appropriate error message is displayed.<br />
*TRANSFER<br />
Description<br />
This command transfers the current page to a given memory location.<br />
Syntax<br />
*TRANSFER <br />
Example<br />
*TELE SOFT<br />
*<strong>BBC</strong>1<br />
*PAGE 100<br />
*TRANSFER 6800<br />
This transfers <strong>BBC</strong>1 CEEFAX page 100 to memory starting at location &6800.<br />
Notes<br />
<strong>The</strong> page must have been selected with the *PAGE command before issuing<br />
this command.
*TUNE<br />
Using the system in Telesoft mode 35<br />
Description<br />
This command invokes the fine tuning routine for the currently selected<br />
channel.<br />
Syntax<br />
*TUNE<br />
Example<br />
*TELESOFT<br />
*ITV1<br />
*TUNE<br />
This will invoke the fine tuning routine for channel 3.<br />
Notes<br />
<strong>The</strong> fine tuning routine is the same as that entered by SHIFT and f4 in<br />
Terminal mode, as described in section 4.3.
7 Using the <strong>Teletext</strong><br />
system at assembly<br />
level<br />
7.1 <strong>Teletext</strong> assembly level interface<br />
This section describes the calls available at assembly level which give the<br />
advanced programmer more control over the <strong>Teletext</strong> Adapter than is possible<br />
in Terminal mode. <strong>The</strong>se calls are available from both Assembly Language<br />
and BASIC.<br />
<strong>The</strong> <strong>Teletext</strong> system is accessed through the general purpose routine ''<br />
OSWORD' whose entry point is address &FFF1 in the <strong>BBC</strong> <strong>Microcomputer</strong><br />
Machine Operating <strong>System</strong>.<br />
OSWORD calls in which register A contains the value 122 (&7A) are<br />
<strong>Teletext</strong>-specific calls – they are obeyed only when the Telesoft filing system<br />
is selected. A typical example of such a call (first in BASIC then in Assembly<br />
Language) is given below. This is the call to select the TV channel from which<br />
<strong>Teletext</strong> is received, which in this example is <strong>BBC</strong>1.<br />
<strong>The</strong> description in the manual is a cryptic '[&8B, channel]'. This means that<br />
the parameter to OSWORD is a control block containing the two 1-byte values<br />
'&8B' and 'channel' respectively. <strong>The</strong> values of the registers on the call to<br />
OSWORD have a fixed significance:<br />
– A is always the '<strong>Teletext</strong> OSWORD number', ie &7A.<br />
– X and Y are always treated as a concatenated value containing the 16-bit<br />
address of the control block in which the actual parameters are stored. (X<br />
is the low byte and Y is the high byte.)<br />
– P is irrelevant (except that the processor should not be in decimal mode).<br />
Control blocks have various formats – the only fixed slot being the first byte<br />
which serves a dual purpose:<br />
– To identify the specific <strong>Teletext</strong> command wanted.<br />
– To return the status of the operation (as a success/failure code, typically 0<br />
meaning OK, or 17 meaning escape).<br />
To allow for future enhancements of the <strong>Teletext</strong> system, control blocks<br />
should be declared as being exactly 16 bytes long.
Please note that the error codes are command dependent.<br />
Using the <strong>Teletext</strong> system at assembly level 37<br />
Example 1: Calling the <strong>Teletext</strong> system from BASIC<br />
OSWORD = &FFF1<br />
DIM parameter 15<br />
parameter?0 = &8B<br />
parameter?1 = 0 :REM 0 —> <strong>BBC</strong>1, 1 —> <strong>BBC</strong>2 etc.<br />
A% = &7A<br />
X% = parameter MOD 256<br />
Y% = parameter DIV 256<br />
PYXA% = USR (OSWORD)<br />
Example 2: Calling the <strong>Teletext</strong> system from Assembly<br />
Language<br />
DIM CodeSpace 100<br />
OSWORD = &FFF1<br />
FOR Pass = 0 TO 2 Step 2<br />
P% = CodeSpace [OPT Pass<br />
.Select<strong>BBC</strong>1<br />
Lda #&8B<br />
Sta parameter<br />
Ida #0 \Select<strong>BBC</strong>1<br />
Sta parameter + 1<br />
Lda #&7A<br />
Ldx #parameter MOD 256<br />
Ldy #parameter DIV 256<br />
Jsr OSWORD<br />
Rts<br />
.parameter NOP:NOP<br />
NEXT Pass<br />
CALL Select<strong>BBC</strong>1<br />
<strong>The</strong> section below on <strong>Teletext</strong> OSWORD calls describes the calls available to<br />
you. Some entry points are used for internal <strong>Teletext</strong> filing-system operations<br />
and should not be called. Others are 'reserved for future expansion . . .'.<br />
Further information will be made available by Acorn in the form of a<br />
software applications note.
38 Using the <strong>Teletext</strong> system at assembly level<br />
7.2 <strong>Teletext</strong> OSWORD calls<br />
RELOAD PAGE [&80]<br />
<strong>The</strong> last page received must be re-fetched.<br />
FETCH PAGE [&85,p100,p10,p1,s1000,s100,s10,s1]<br />
Request the page specified by the seven-digit page number given as the<br />
parameter. <strong>The</strong> sub-code is the time-code which is used for selecting a<br />
particular rolling page in a series of rolling pages. If any rolling page is<br />
acceptable, the sub-code digits should be set to &FF to denote that they are '<br />
wild'. Page digits may also be set 'wild', and the page digits can be specified in<br />
either binary or ASCII hex. This call returns immediately. See TRANSFER for<br />
details of how to load a page into memory.<br />
CHAINED PAGE [&86]<br />
Fetch the next page in the chain of pages of which the current page is part. <strong>The</strong><br />
Telesoftware decoder uses this call to mean 'Get me the next block in the<br />
encoded Telesoftware file which I am loading sequentially'. If the current page<br />
is not part of a chain, the next rolling page to arrive is fetched instead.<br />
HEAD OF CHAIN [&88]<br />
Follow the chain round until you find the page which is marked as being the<br />
head of the chain. <strong>The</strong> Telesoftware decoder uses this call to mean `Find me a<br />
page in which I can start looking for some encoded Telesoftware to decode'<br />
and also 'Get me the next block in the encoded Telesoftware file which I am<br />
loading in random order'. As with CHAINED PAGE, if the current page is not<br />
part of a chain, the next rolling page to arrive is fetched instead.<br />
TEST ARRIVED [&89, result]<br />
Test to see if the last page requested has arrived.<br />
Test succeeds: result = &FF<br />
Test fails: result = 0<br />
<strong>The</strong> page in question is LOCKED against further update if the test was<br />
successful.<br />
UNLOCK PAGE [&8A]<br />
If the TEST ARRIVED command has shown that a page has been captured by<br />
the decoder, the page will have been locked against further
Using the <strong>Teletext</strong> system at assembly level 39<br />
update. To secure updated versions of the page (or following pages in a<br />
series of rolling pages), the page must be UNLOCKED.<br />
Note that reading data from a page using BGET on channel 15 also causes<br />
the page to be LOCKED.<br />
SELECT CHANNEL [&8B, channel]<br />
Select channel 'channel' in the decoder hardware. Channel numbers should<br />
be given in the range 0 to 3 (binary or ASCII).<br />
Note: This is different from Terminal mode, where the range 1 to 4 was<br />
chosen for the benefit of first-time users.<br />
READ TSDP [&8D, 16-bit address]<br />
<strong>The</strong> readable part of the television service data packet (TSDP) is written to<br />
the area of store defined by the 16-bit address. As usual for the 6502, the<br />
address is passed in low, high' order. <strong>The</strong>re is no interlock on this operation,<br />
as the packet is intended for direct display.<br />
HAMMING DECODE [&8E, encoded byte]<br />
<strong>The</strong> 8-bit hamming-encoded byte is decoded, and the result returned in its<br />
place. A result of &FF means that an uncorrectable (more than 1 bit) error<br />
has occurred.<br />
TRANSFER [&8F, 32-bit address]<br />
<strong>The</strong> current page is transferred to the address given. <strong>The</strong> address is 32 bits<br />
wide in order to allow data to be transferred to a site in the parasite processor.<br />
<strong>The</strong> 32-bit address is stored in the form low, high, higher, highest'. <strong>The</strong><br />
transfer waits if necessary until the page has been received. If this is not what<br />
you want, use the TEST ARRIVED call which lets you perform other<br />
operations while you are waiting. (This is the mechanism used by Terminal<br />
mode to poll for pages received.) TRANSFER automatically UNLOCKS a<br />
page after the data has been transferred.<br />
HEADERS [&92, 16-bit address]<br />
<strong>The</strong> readable portion of all the headers being received will in future be<br />
written to the address given. This call is expected to be used for positioning<br />
the headers within the MODE 7 display.
40 Using the <strong>Teletext</strong> system at assembly level<br />
WHAT CHANNEL [&93, channel]<br />
This call READS the currently selected channel number which it returns in the<br />
slot provided. As with SELECT CHANNEL, the result is in the range 0 to 3 (<br />
binary).
8 Changing the filing<br />
system<br />
Your computer can have several filing systems available other than the<br />
<strong>Teletext</strong> system. <strong>The</strong> following commands are all used to exit from the current<br />
filing system into the one named.<br />
*TAPE 3 300 baud cassette<br />
*TAPE 12 1200 baud cassette<br />
*TAPE 1200 baud cassette<br />
*NET Econet filing system<br />
*TELE SOFT <strong>The</strong> Telesoft mode of the <strong>Teletext</strong> system<br />
*ROM <strong>The</strong> cartridge ROM system<br />
*DISC <strong>The</strong> disc filing system<br />
*DISK Alternative spelling for above<br />
Typing the command to enter the system you are already in has no effect. If<br />
you type the command to enter a filing system for which your computer is not<br />
equipped (ie you do not have the relevant filing system ROM) then the<br />
computer will respond with Bad command since it does not recognise the<br />
command.
9 Technical<br />
information<br />
This is mainly for interest and is not essential to using the <strong>Teletext</strong> Adapter.<br />
However, some of the material may prove useful if you wish to make full use<br />
of the <strong>Teletext</strong> system at assembler level. <strong>The</strong> information in this section<br />
covers the <strong>Teletext</strong> signals in general and the specific Tele software signals.<br />
9.1 <strong>The</strong> structure and numbering of <strong>Teletext</strong> pages<br />
A page can stand alone or be linked to another page to form a chain. Also, a<br />
number of stand-alone pages and/or chains can be accessed at a common level<br />
known as a branch. In this way a 'family tree' of pages can be formed with<br />
branching occurring at many levels. An example of this tree structure is given<br />
in Fig 5.1 which shows one way in which the contents of a newspaper could be<br />
transmitted. <strong>The</strong> first page contains the headlines and could be the index page<br />
with branching occurring at level 1 to four lead pages.<br />
Lead 1 is the title page of a story covering four pages whilst lead 2 and lead 4<br />
are stand-alone single page items. Lead 3 could be a sub-index with branching<br />
occurring at level 2 to three separate stories.<br />
<strong>The</strong> reason why <strong>Teletext</strong> uses such a structure is to enable you, by using<br />
simple commands, to find your way through the index/sub-index pages,<br />
branches and linked pages to the information item you wish to see.<br />
Pages are numbered in groups of 100, called magazines, and a total of eight<br />
magazines are currently available for each broadcast channel although not<br />
every magazine and every page is necessarily transmitted. Each page is<br />
numbered with three digits, the first of which identifies the magazine it<br />
belongs to, and the second two the page number within that magazine. In<br />
addition, a further four digits are available for sub-page numbering, thus<br />
4070006 would be sub-page 0006 of page 07 in magazine 4.<br />
Each magazine may have an index page which displays the magazine contents.<br />
This is usually the first page and is numbered 100, 200, 300 etc depending on<br />
the magazine.
Technical information 43<br />
Page numbers are not normally reserved for specific items of information, so<br />
you must first display the index page to locate the correct page or sub-page<br />
number which can then be displayed.<br />
If you select page 206, and page 210 is being transmitted at that instant, some<br />
time may elapse before the transmission sequence cycles back round to page<br />
206.<br />
Index pages are, in fact, often transmitted at a faster rate than other data<br />
pages. This is to minimise the time you must wait before the selected index<br />
page is displayed. Another point which deserves mentioning is that not all<br />
pages are necessarily used. For example, it may be that in magazine 4, only<br />
pages 420 to 450 are transmitted.<br />
Finally, there are rolling pages. <strong>The</strong>se are pages which contain different<br />
information but are numbered the same as sub-pages, eg 0001, 0002 etc. A<br />
different rolling page is transmitted each time, which allows a great deal of<br />
information to be sent without changing the page number. For example, the<br />
<strong>BBC</strong> Newsreel is transmitted on page 199 but on every transmission a<br />
different rolling page is sent which contains different information (1990001,<br />
1990002, 1990003 etc). Suppose the rolling page was changed five times.<br />
This would give a series of five rolling pages numbered 1990001, 1990002,<br />
1990003, 1990004, 1990005.<br />
As mentioned previously, <strong>Teletext</strong> pages are numbered by up to seven digits,<br />
made up as follows:<br />
A one-digit magazine number in the range 0 to 7. A<br />
two-digit page number in the range 00 to 99.<br />
A four-digit page sub-code in the range 0000 to 3979.<br />
<strong>The</strong> magazine number is sent in the form of a single 3-bit binary number.<br />
<strong>The</strong> full range possible is thus 0 to 7 as used by the <strong>Teletext</strong> system.<br />
<strong>The</strong> page number is sent in the form of two 4-bit binary numbers. This allows<br />
a range of 0 to 255, or 00 to FF hexadecimal, but at present the <strong>Teletext</strong><br />
system only uses the range 0 to 99—the numbers being in binary coded<br />
decimal (BCD). Page numbers outside this range may be used for other<br />
purposes, as yet undefined.<br />
<strong>The</strong> page sub-code is sent in the form of four binary numbers, whose lengths<br />
are given below:
44 Technical information<br />
Most significant digit — 2-bit binary number<br />
Next digit — 4-bit binary number<br />
Next digit — 3-bit binary number<br />
Least significant digit — 4-bit binary number<br />
<strong>The</strong>se binary numbers give a possible range of 8192 pages (0000 to 3F7F<br />
hexadecimal). At present, the <strong>Teletext</strong> system only uses sub-codes which have<br />
their 4-bit binary numbers lying in the range 0 to 9, and thus with the sub-code<br />
in the range 0000 to 3979. <strong>The</strong> use of 2- and 3-bit binary numbers explains the<br />
strange limits to the first and third digits.<br />
<strong>The</strong> 2- and 3-bit binary numbers are a result of the fact that the last four digits<br />
were originally developed as a 'time code' and hence the full 0 to 9 range was<br />
not needed for these digits.<br />
<strong>The</strong> <strong>Teletext</strong> specification does allow for hexadecimal page numbering with<br />
the full range of 0000000 to 7FF3F7F, but this is not used for conventional<br />
pages.<br />
9.2 <strong>Teletext</strong> signals<br />
A conventional <strong>Teletext</strong> decoder displays pages made up of 24 rows of 40<br />
characters per row (except for the first row — see below). <strong>The</strong> <strong>BBC</strong><br />
<strong>Microcomputer</strong> <strong>Teletext</strong> <strong>System</strong> generates a 25th row for displaying system<br />
information, prompts etc. This 25th row displayed on the screen has nothing to<br />
do with the <strong>Teletext</strong> signals sent by the transmitter. <strong>The</strong> rest of this section<br />
deals with the general <strong>Teletext</strong> signals and the presence of this 25th row on the<br />
screen is ignored.<br />
<strong>Teletext</strong> data is sent as a stream of digital bits forming 8-bit bytes. Each row<br />
consists of 45 bytes. All rows carry a row address or number in the range 0 to<br />
31. Rows 0 are the first row on any page and some of its 45 bytes are used to<br />
identify the page and to carry control information. This leaves 32 bytes for<br />
character codes. Rows 1 to 23 are the remaining 23 rows of 40 characters<br />
which, with row 0, make up the complete page. Rows 24 to 31 are often not<br />
transmitted. <strong>The</strong>y are available to carry special information to the decoder.<br />
<strong>The</strong> rows of 45 bytes are transmitted on the spare space between television<br />
picture fields. Four rows are currently sent between each picture field and a<br />
maximum of 16 is possible. <strong>The</strong> structure of the rows of bytes is discussed<br />
below.
Rows 1 to 23<br />
<strong>The</strong>se 23 rows have a structure as shown in Fig 9.1.<br />
Fig 9.1 Byte structure of <strong>Teletext</strong> rows 1 to 23<br />
Technical information 45<br />
<strong>The</strong> first three bytes, the clock run-in (2 bytes) and framing code (1 byte) are<br />
used by the decoder for synchronising the row so that it can tell where one<br />
character byte ends and the next begins. <strong>The</strong> next two bytes, the magazine and<br />
row address bytes, give the magazine number (3 bits) and the row number or<br />
address (5 bits) arranged in such a way with the eight other bits to provide a<br />
means of error detection and correction. A discussion of the error protection is<br />
beyond the scope of this guide – it is dealt with in the reference given in<br />
section 9.4. <strong>The</strong> remaining 40 bytes are codes for the 40 characters which are<br />
to be displayed on corresponding rows on the television screen when the page<br />
is assembled. <strong>The</strong> codes are given in table 9.1.<br />
Row<br />
Rows with address or row number zero have a special status as page-headers.<br />
<strong>The</strong>y are made up of 45 bytes like any other row, but only 32 bytes are<br />
available for character codes. <strong>The</strong> first 13 bytes are information bytes. <strong>The</strong><br />
first five bytes carry the same information as for any other row, that is, the<br />
clock run-in, framing code, and magazine and row addresses. Bytes 6 and 7<br />
give the page number, units and tens respectively. Bytes 8 to 11 carry the subcode,<br />
the four least significant digits of the page number. Bytes 12 and 13 are<br />
a series of control bits to give information and instructions to the decoder<br />
about the page. <strong>The</strong> remaining 32 bytes are the character codes for display on<br />
row 0. All of the first 13 bytes are error protected as for the first five bytes of<br />
other rows.<br />
When the <strong>Teletext</strong> decoder finds that it is receiving a row zero (by means of<br />
the information bytes at the start of the row) it interprets this as meaning that<br />
the previous row it received was the last one for the
46 Technical information<br />
preceding page and that the current row it is receiving is the start of a new page<br />
for that magazine. Each row zero is thus used to determine the start and finish<br />
of the pages within a magazine. <strong>The</strong> rows sent between row zeros can be sent<br />
in any order (for example, row 1, row 15, row 9 ...) since they each have a row<br />
number or address amongst the first five bytes (see Fig 9.1). Several magazines<br />
may be transmitted simultaneously in unrelated order of rows. Blank rows need<br />
not be sent. If the decoder detects the completion of a page (by receiving the<br />
next page-header, row zero) it assumes that any row numbers not received for<br />
the previous page are blank rows.<br />
To select a given page, the decoder examines the incoming rows of data until it<br />
finds a page-header with the correct page and magazine numbers. It then stores<br />
this row in its memory. <strong>The</strong> decoder continues to store each following row in<br />
the selected magazine until it receives the next page-header. It now has a<br />
complete page (bar blank rows) in memory and can decode the character codes<br />
to display the characters on the screen in the right places by making use of the<br />
row addresses.<br />
Rows 24 to 31<br />
<strong>The</strong>se are often not transmitted but are available for sending special<br />
information to the decoder. In particular, row 27 is used to tell the decoder<br />
whether or not a page has any branch or chain linked pages connected with it.<br />
Rows 24 and 25 have the same structure as rows 1 to 23 and may be used so<br />
that a page can contain 1K or 1024 bytes of information. A normal page can<br />
only contain 32 + (23*40) = 952 bytes. <strong>The</strong> extra two rows provide another 80<br />
bytes which is sufficient to bring the total up to 1024 bytes without having to<br />
use all the 32 row zero bytes. In fact, eight of the row zero bytes are left free<br />
and these are currently used for the time information.<br />
Page check word (row 27)<br />
Row 27 includes a 16-bit cyclic redundancy check (CRC) on the first 24<br />
character bytes of row 0 and the 40 character bytes of rows 1-25 inclusive (a<br />
total of 1K bytes). For the purposes of this check word calculation any row not<br />
transmitted is assumed to carry 40 'space' bytes (hex 20).
Table 9.1 <strong>Teletext</strong> character codes<br />
Technical information 47
48 Technical information<br />
9.3 Character codes<br />
Table 9.1 shows the available characters, their codes and also the control<br />
codes. <strong>The</strong>se are the same characters which are available in mode 7 of the <strong>BBC</strong><br />
<strong>Microcomputer</strong> — see chapter 28 of the <strong>User</strong> <strong>Guide</strong> for more details. <strong>The</strong><br />
control codes can be sent in place of any character code anywhere in a row.<br />
<strong>The</strong> control codes are normally displayed as spaces (but see the section below<br />
on the hold graphics control). <strong>The</strong> fact that they can be used within a row<br />
enables one to change some aspect of the display part way through a row (for<br />
example, the display colour).<br />
Display modes<br />
<strong>The</strong>re are three modes of display on the <strong>Teletext</strong> system — one alphanumeric<br />
mode and two graphics modes. <strong>The</strong> two graphics modes are called contiguous<br />
and separated. <strong>The</strong> difference is best shown by illustration, as in Fig 9.2.<br />
Fig 9.2 Contiguous and separated graphics modes<br />
Colour<br />
Seven different display colours are provided (white, yellow, cyan, magenta,<br />
red, green and blue). Fourteen control codes are available to select<br />
alphanumerics or graphics and the required colour simultaneously. This<br />
enables a change of colour and mode in one step.<br />
<strong>The</strong> background colour can be any of the seven colours listed above, or black.<br />
Coloured background is selected by using the 'new background' control code.<br />
After this code appears, the new background colour will be the display colour<br />
in use when the 'new background' control was used.
Flashing and concealed characters<br />
Technical information 49<br />
Two modes are provided in which the display characters appear as spaces<br />
some of the time. In flashing mode, a character appears alternately as a space<br />
and as the character at a rate determined by a clock in the computer. In<br />
conceal mode, the character appears as a space until revealed. <strong>The</strong> character is<br />
revealed by entering reveal mode which is done when the user issues the<br />
required command — such as the key f2 command in the Terminal mode of<br />
the <strong>BBC</strong> <strong>Microcomputer</strong> <strong>Teletext</strong> <strong>System</strong>.<br />
Double height<br />
Characters may be displayed at double height, in which case they take two<br />
rows. Thus the information sent in row n also applies to row n+1 in this mode.<br />
<strong>The</strong> decoder ignores row n+1 if it is sent.<br />
Hold graphics control<br />
<strong>The</strong> hold graphics control code allows a limited number of abrupt display<br />
colour changes. A control code is normally displayed as a space which thus<br />
causes a break in the display. In hold graphics mode, the character rectangle<br />
occupied by the control code is filled with a held graphics character. This can<br />
be used with any control code issued in the graphics mode. <strong>The</strong> held graphics<br />
character will be the most recent character with bit 6=1 in its code, provided<br />
that there has been no intervening change in either the alphanumeric/graphics<br />
modes or the normal/double height modes. In the absence of a suitable<br />
character, a space is displayed.<br />
9.4 Reference<br />
Broadcast <strong>Teletext</strong> Specification, Sept 1976<br />
published jointly by<br />
British Broadcasting Corporation<br />
Independent Broadcasting Authority<br />
British Radio Equipment Manufacturers' Association<br />
9.5 <strong>The</strong> television service data packet<br />
In addition to the above <strong>Teletext</strong> pages, a television service data packet is<br />
sometimes transmitted. If it is sent, it arrives once per second and carries the<br />
following information:
50 Technical information<br />
1. An initial page address which a terminal should select at start-up without<br />
further user action. This will be the page selected by the <strong>BBC</strong> <strong>Microcomputer</strong><br />
<strong>Teletext</strong> <strong>System</strong> at start-up. (In the absence of a television service data packet,<br />
page #00 is selected by default.) <strong>The</strong> contents of this page are controlled by<br />
the sender.<br />
2. A program or network label.<br />
3. An absolute time reference giving the time and date in a machine usable<br />
form.<br />
4. A 20-character block of <strong>Teletext</strong> coded characters which are intended for<br />
direct display if the user requests a status report.<br />
Byte structure of the television service data packet<br />
<strong>The</strong> television service data packet (TSDP) is made up of 45 8-bit bytes. <strong>The</strong><br />
first six bytes are for control, identification and synchronisation. <strong>The</strong> next 19<br />
bytes carry information in machine usable form. <strong>The</strong> last 20 bytes carry<br />
information for direct display when a status display is requested by the <strong>Teletext</strong><br />
system.<br />
In more detail, the 45 bytes are used as follows:<br />
Bytes Content<br />
1- 2 Clock run-in<br />
3 Framing code<br />
4- 6 TSDP identification code<br />
7-12 Default <strong>Teletext</strong> page<br />
13-14 Channel identification<br />
15 Time offset<br />
16-18 Modified Julian date<br />
19-21 Coordinated universal time (UTC)<br />
22-25 Television program label<br />
26-45 Status display message<br />
Bytes 1 to 6 - decoder information<br />
<strong>The</strong>se six bytes provide information to enable the decoder to identify the TSDP<br />
as such and to synchronise the following bytes so that it can tell where one byte<br />
ends and the next begins.
Technical information 51<br />
Bytes 7 to 12<br />
<strong>The</strong>se six bytes provide the <strong>Teletext</strong> decoder with the page number which it is<br />
to use to select a default page. <strong>The</strong>se bytes are in machine readable form.<br />
Bytes 13 and 14 - channel identification<br />
<strong>The</strong>se two bytes can be read by the machine to determine which channel is<br />
being received.<br />
Byte 15 - time offset<br />
This byte gives the offset in hours between the local clock time and the<br />
coordinated universal time (UTC). <strong>The</strong> first bit is always 1, the second bit gives<br />
the polarity of the offset. <strong>The</strong> last bit is also always 1. <strong>The</strong> other five bits are<br />
the offset. For example, the following offsets may be encountered in the UK:<br />
During winter (GMT): 10000001 – no offset<br />
During summer (BST): 10000101 – add one hour to UTC to get clock time<br />
<strong>The</strong> five offset bits have the following weights: 8,4,2,1,1/2.<br />
Bytes 16 to 18 - modified Julian date<br />
<strong>The</strong>se three bytes carry the modified Julian date which increments at UTC<br />
midnight. <strong>The</strong> first half byte is always 0101. <strong>The</strong> remaining two and a half<br />
bytes carry the date. Each 4-bit binary-coded-decimal number (half byte) is<br />
incremented by one before transmission. For example the three bytes may be:<br />
55 5A 81<br />
which would decode to 44970 or 1 January 1982.<br />
<strong>The</strong> following notes should enable one to decode the modified Julian date to<br />
the standard format. <strong>BBC</strong> BASIC operators have been used.<br />
Symbols: JD – Julian date<br />
Y – year from 1900<br />
M – month (January = 1)<br />
D – day of month<br />
W – day of week (Sunday = 0, Monday = 1 etc)
52 Technical information<br />
To find calendar date (in range 1/3/1900 to 28/2/2100):<br />
Y1 = (100*(JD – 15078.2)) DIV 36525<br />
M1 = INT((JD – 14956.1 – INT(365.25*Y))/30.6001)<br />
D = JD – 14956 – INT(365.25*Y1) – INT(30.6*M1)<br />
M = M1 – 1 – 12*K<br />
Y = Y1 + K<br />
where K = INT(0.7 + (1/(17 – M1))) ie IF M1
Technical information 53<br />
distinct names by means of their classification into two types of names: lonenames<br />
and escaped-names. <strong>The</strong> two types of name are told apart by the<br />
preceding byte sent. If the preceding byte is the name of the escape operator,<br />
then the name is an escaped-name. If the preceding byte is not the name of the<br />
escape operator then the name is a lone-name. For example, if the name of the<br />
escape operator is &1B, and a string of names received is:<br />
&56 &89 &1B &89 &67 . . .<br />
the first two bytes are lone-names, the third byte is the name of the escape<br />
operator and so the fourth byte is an escaped-name. <strong>The</strong> fifth byte is a lonename.<br />
When the Telesoftware decoder is first started up, it carries out an initialisation<br />
routine during which it sets up a table of names and their meanings in memory.<br />
<strong>The</strong> table set up contains the default meanings of the names. Entries in the<br />
table may be modified from time to time by incoming commands. <strong>The</strong> default<br />
table is given in table 9.2, the general Telesoftware table. <strong>The</strong> table set up by<br />
the <strong>BBC</strong> <strong>Microcomputer</strong> <strong>Teletext</strong> <strong>System</strong> will be somewhat different.<br />
When the Telesoftware decoder is receiving Telesoftware, it looks up the<br />
names in the table and uses this to decode the Telesoftware.
54 Technical information<br />
Table 9.2 (i) Name tables - default entries (&00 to &3F)<br />
Value ASCII Meanings Value ASCII Meanings<br />
(hex) char Lone Escaped (hex) char Lone Escaped<br />
00 NUL 00 20 SP 20 <br />
01 SOH 01 21 ! 21 <br />
02 STX 02 22 " 22 <br />
03 ETX 03 23 £ 23 <br />
04 EOT 04 24 $ 24 <br />
05 ENQ 05 25 % 25 <br />
06 ACK 06 26 & 26 <br />
07 BEL 07 27 ' 27 <br />
08 BS 08 28 ( 28 <br />
09 HT 09 29 ) 29 <br />
0A LF 0A 2A * 2A <br />
0B VT OB 2B + 2B <br />
0C FF OC 2C , 2C <br />
0D CR 0D 2D - 2D <br />
0E SO 0E 2E . 2E <br />
0F SI OF 2F / 2F <br />
10 DLE 10 30 0 30 <br />
11 DC1 11 31 1 31 <br />
12 DC2 12 32 2 32 <br />
13 DC3 13 33 3 33 <br />
14 DC4 14 34 4 34 <br />
15 NAK 15 35 5 35 <br />
16 SYN 16 36 6 36 <br />
17 ETB 17 37 7 37 <br />
18 CAN 18 38 8 38 <br />
19 EM 19 39 9 39 <br />
1A SUB 1A 3A : 3A <br />
1B ESC 1B 3B ; 3B <br />
1C FS 1C 3C < 3C <br />
1D GS 1D 3D = 3D <br />
1E RS 1E 3E > 3E <br />
1F US 1F 3F ? 3F
Technical information 55<br />
Table 9.2 (ii) Name tables - default entries (&40 to &7F)<br />
Value ASCII Meaning Value ASCII Meaning<br />
(hex) char Lone Escaped (hex) char Lone Escaped<br />
40 @ 40 60 - 60 <br />
41 A 41 61 a 61 <br />
42 B 42 62 b 62 <br />
43 C 43 63 c 63 <br />
44 D 44 64 d 64 <br />
45 E 45 65 e 65 <br />
46 F 46 66 f 66 <br />
47 G 47 67 g 67 <br />
48 H 48 68 h 68 <br />
49 I 49 69 i 69 <br />
4A J 4A 6A j 6A <br />
4B K 4B 6B k 6B <br />
4C L 4C 6C 1 6C <br />
4D M 4D 6D m 6D <br />
4E N 4E 6E n 6E <br />
4F 0 4F 6F o 6F <br />
50 P 50 70 p 70 <br />
51 Q 51 71 q 71 <br />
52 R 52 72 r 72 <br />
53 S 53 73 s 73 <br />
54 T 54 74 t 74 <br />
55 U 55 75 u 75 <br />
56 V 56 76 v 76 <br />
57 W 57 77 w 77 <br />
58 X 58 78 x 78 <br />
59 Y 59 79 y 79 <br />
5A Z 5A 7A z 7A <br />
5B [ 5B 7B { 7B <br />
5C \ 5C 7C | 7C<br />
5D ] 5D 7D } 7D <br />
5E ^ 5E 7E ~ 7E <br />
5F _ 5F 7F DEL 7F
56 Technical information<br />
Table 9.2 (iii) Name tables - default entries (&80 to &BF)<br />
Value ASCII Meaning Value ASCII Meaning<br />
(hex) char Lone Escaped (hex) char Lone Escaped<br />
80 NUL 80 A0 SP A0 <br />
81 SOH 81 Al ! Al <br />
82 STX 82 A2 " A2 <br />
83 ETX 83 A3 £ A3 <br />
84 EOT 84 A4 $ A4 <br />
85 ENQ 85 A5 % A5 <br />
86 ACK 86 A6 & A6 <br />
87 BEL 87 A7 ' A7 <br />
88 BS 88 A8 ( A8 <br />
89 HT 89 A9 ) A9 <br />
8A LF 8A AA * AA <br />
8B VT 8B AB + AB <br />
8C FF 8C AC , AC <br />
8D CR 8D AD - AD <br />
8E SO 8E AE . AE <br />
8F SI 8F AF / AF <br />
90 DLE 90 B0 0 B0 <br />
91 DC1 91 B1 1 B1 <br />
92 DC2 92 B2 2 B2 <br />
93 DC3 93 B3 3 B3 <br />
94 DC4 94 B4 4 B4 <br />
95 NAK 95 B5 5 B5 <br />
96 SYN 96 B6 6 B6 <br />
97 ETB 97 B7 7 B7 <br />
98 CAN 98 B8 8 B8 <br />
99 EM 99 B9 9 B9 <br />
9A SUB 9A BA : BA <br />
9B ESC 9B BB ; BB <br />
9C FS 9C BC < BC <br />
9D GS 9D BD = BD <br />
9E RS 9E BE > BE <br />
9F US 9F BF ? BF
Technical information 57<br />
Table 9.2 (iv) Name tables — default entries (&CO to &FF)<br />
Value ASCII Meaning Value ASCII Meaning<br />
(hex) char Lone Escaped (hex) char Lone Escaped<br />
C0 51 C0 E0 - E0 <br />
C1 A C1 E1 a E1 <br />
C2 B C2 E2 h E2 <br />
C3 C C3 E3 c El <br />
C4 D C4 E4 d E4 <br />
C5 F C5 E5 e E5 <br />
C6 F C6 E6 f E6 <br />
C7 G C7 E7 g E7 <br />
C8 H C8 E8 h E8 <br />
C9 I C9 E9 i E9 <br />
CA J CA EA j EA <br />
CB K CB EB k EB <br />
CC L CC EC 1 EC <br />
CD M CD ED m ED <br />
CE N CE EE n EE <br />
CF 0 CF EF o EF <br />
D0 P D0 F0 p F0 <br />
D1 Q D1 F1 q F1 <br />
D2 R D2 F2 r F2 <br />
D3 S D3 F3 s F3 <br />
D4 T D4 F4 t F4 <br />
D5 U D5 F5 u F5 <br />
D6 V D6 F6 v F6 <br />
D7 W D7 F7 w F7 <br />
D8 X D8 F8 x F8 <br />
D9 Y D9 F9 y F9 <br />
DA Z DA FA z FA <br />
DB [ DB FB { FB <br />
DC \ DC FC | FC<br />
DD ] DD FD } FD <br />
DE ^ DE FE ~ FE <br />
DC _ DF FF DEL FF <br />
Command subroutines<br />
Looking at table 9.2, in the escaped-name meanings column you can see some as yet<br />
unexplained terms, eg escaped-name &41 corresponds to . <strong>The</strong>se strings<br />
enclosed in angled brackets are names of command subroutines. <strong>The</strong> subroutines<br />
required by the <strong>Teletext</strong> Telesoftware decoder (as in the <strong>BBC</strong> <strong>Microcomputer</strong> decoder)<br />
are contained in the <strong>Teletext</strong> filing system ROM. Each command subroutine has a<br />
three-character code (eg ). An instruction to the decoder appears in the form of<br />
the name of the relevant command subroutine to be executed, followed by the names of<br />
any operands required along with the number and size of the operands if this is not<br />
implied by the command subroutine.
58 Technical information<br />
Each command subroutine has either a fixed (implied) number of operands or<br />
a variable number of operands. Each operand consists of either a fixed (<br />
implied) number of decoded bytes or a variable number of decoded bytes. Any<br />
variable quantity (either number of operands or number of bytes in an<br />
operand) is preceded by a number giving its value on this occasion. For the<br />
<strong>Teletext</strong> system, this number is either a single decoded ASCII hexadecimal<br />
digit (' 0' to '9' and 'A' to 'F') or the decoded ASCII character 'X' followed by<br />
two decoded ASCII hexadecimal digits (most significant first). <strong>The</strong> general<br />
structure of a command before naming is:<br />
<br />
<br />
<br />
<br />
<br />
<br />
. . . and so on.<br />
Many of the commands appearing in table 9.2 are not relevant to the <strong>Teletext</strong><br />
system but are used by other systems making use of the general Telesoftware<br />
format. In general, there are three modes of obeying the commands — those<br />
which lie outside a block, those obeyed on the first pass and those obeyed on<br />
the second pass through the data. Any bytes received outside a block are<br />
ignored unless they are the names of the start block command and its<br />
operands, or a description of the medium being used. For the purposes of the<br />
first and second pass through the data, the block runs from after the start block<br />
command. Some commands are obeyed on the first pass through the block. If<br />
an end of block command is encountered, then the second pass stops at the<br />
name before this command. <strong>The</strong> rest of the commands are obeyed on the<br />
second pass through the block.<br />
In the <strong>Teletext</strong> system, only one pass is made through the data, all the<br />
commands being obeyed on this pass.<br />
A complete list of the commands relevant to the <strong>Teletext</strong> system along with a<br />
brief description is given in table 9.3. However, it should be noted that the<br />
table does not show all the commands listed in the name tables as not all of<br />
these are relevant to <strong>Teletext</strong>.
Table 9.3 <strong>The</strong> command subroutines<br />
Code Command subroutine<br />
Comment<br />
Define data type<br />
End block<br />
Change escaped-name's meaning (command)<br />
Revert to default format<br />
Change escaped-name's meaning (decoded string)<br />
End of file<br />
Ignore<br />
Inhibit run<br />
Load address (absolute)<br />
Change lone-name's meaning (command)<br />
Load address (relative)<br />
Change lone-name's meaning (decoded string)<br />
No reversion to default format before next file<br />
Start block<br />
Title of file<br />
Execution address (absolute)<br />
Execution address (relative)<br />
<strong>The</strong> escape operator<br />
<strong>Teletext</strong><br />
Error in transmission<br />
Eight-bit byte adjustment (lower)<br />
Eight-bit byte adjustment (raise)<br />
<strong>The</strong>se commands relevant to the <strong>Teletext</strong> system are discussed below.<br />
Start block and medium description commands<br />
Start block <br />
Operands: 0, 1 or 2; each variable in length.<br />
Technical information 59<br />
marks the start of the block of data. <strong>The</strong> first operand is the number of<br />
this block. <strong>The</strong> second operand (which only needs to be present for one of the<br />
blocks of a file) is the number of blocks in the file. <strong>The</strong> blocks need not be<br />
numbered if the end of file command is used.<br />
Example: '1"2' '1' '0'<br />
(This is the 16th block of the file.)
60 Technical information<br />
<strong>Teletext</strong> <br />
Operands: 0, 1 or 2; each of variable length.<br />
makes the changes to the name table necessary for data with odd<br />
parity, streamlines the tables for <strong>Teletext</strong> and then executes the <br />
subroutine to mark the start of the block.<br />
Thus, any Telesoftware file for the <strong>BBC</strong> <strong>Microcomputer</strong> decoder received<br />
from CEEFAX will start with the name of this command.<br />
<strong>The</strong> changes from the general format which are brought about are:<br />
In the name tables, all names that would be a parity error if received are set<br />
to be names of the , error in transmission, subroutine. If they are<br />
received, the subroutine will alert the decoder that there has been a<br />
transmission error. All lone-names with correct parity are set to decode to<br />
themselves after a logical AND with &7F.<br />
<strong>The</strong> command subroutine is given the lone-name &E0 and the<br />
command subroutine is given the lone-name &FE. <strong>The</strong> escapednames<br />
&E0 and &FE are set to decode to themselves. <strong>The</strong> command<br />
subroutine is given the escaped-name &42.<br />
<strong>The</strong> decoder is set to expect numerical information (numbers describing<br />
variable operands, load addresses etc) to be given in ASCII hexadecimal<br />
digits.<br />
Example: '2"1"1"1"4'<br />
(<strong>Teletext</strong>: This is the first block of four.)<br />
End block <br />
Operands: none<br />
marks the end of a block of data. If the end of the block is marked by<br />
the end of a <strong>Teletext</strong> page then the command is optional.<br />
File and segment information commands<br />
End of file <br />
Operands: none<br />
indicates that this block is the last block in a file. It can be omitted if<br />
the end of file is indicated by other means.
Title of file <br />
Operands: 1, 2 or 3; each of variable length.<br />
Technical information 61<br />
<strong>The</strong> operands of a command describe the title of the Telesoftware file<br />
(first operand), its version number (optional second operand) and its date of<br />
issue (optional third operand). <strong>The</strong> date should be given as the modified Julian<br />
date (see section 9.5).<br />
Files whose blocks may only be received in order are arranged on CEEFAX as<br />
a chain. <strong>The</strong> first block is marked as the chain-header and should contain a<br />
command giving details of the file. Other blocks need not. Files whose<br />
blocks may be received out of order are also arranged on CEEFAX as a chain.<br />
However, each block is marked as a chain-header and should contain a <br />
command.<br />
Example: '2"7"P"r"o"g"r"a"m"1"5'<br />
(File title is 'Program'; version number 5.)<br />
Comment <br />
Operands: variable number; each of variable length.<br />
Comments are indicated by the command, and may be displayed by<br />
the decoder whilst Telesoftware is decoded (the display is controlled in the<br />
<strong>BBC</strong> <strong>Microcomputer</strong> <strong>Teletext</strong> <strong>System</strong> by the Telesoft mode command *OPT1).<br />
<strong>The</strong> recommended layout is:<br />
1st operand – name of program<br />
2nd operand – language<br />
3rd operand – type of computer used<br />
4th operand – date of publication<br />
5th operand – source of program<br />
6th operand – other comments<br />
Example: '1"9"A" "p"r"o"g"r"a"m'<br />
(<strong>The</strong> name of the program is 'A program'.)<br />
Ignore <br />
Operands: variable number; each of variable length.<br />
<strong>The</strong> decoder will ignore the operands of a command.
62 Technical information<br />
Load address (absolute) <br />
Operands: 1 of variable length.<br />
<strong>The</strong> operand of a command is the first absolute address in memory<br />
that the decoded Telesoftware should be stored at (unless overruled when<br />
issuing the *LOAD command — see chapter 6 on the Telesoft mode).<br />
<strong>The</strong> first decoded byte of the operand represents the most significant byte of<br />
the address.<br />
Example: '4"2"0' '0' '0'<br />
(Store the Telesoftware starting at address &2000.)<br />
Load address (relative) <br />
Operands: 0 or 1; of variable length.<br />
<strong>The</strong> operand of a command represents the offset from the first address<br />
that decoded Telesoftware is being stored at. Decoded Telesoftware should<br />
now be stored from this offset onwards.<br />
<strong>The</strong> command allows blocks to be received and decoded out of order.<br />
If there is no operand, then the data should not be stored in a contiguous block<br />
of memory, but should be passed to a command line interpreter in whatever<br />
order the blocks are received and decoded. BASIC programs are loaded in this<br />
way after using the Telesoft mode command *EXEC.<br />
Example: '1"3"1' '0' '0'<br />
(Store any further Telesoftware in memory starting at &2100— assuming that<br />
the base address is &2000).<br />
Execution address (absolute) <br />
Operands: 1 of variable length.<br />
<strong>The</strong> operand of a command gives the execution address of the file of<br />
Tele software.<br />
Example: '4"2"0' 'F' '0'<br />
(<strong>The</strong> execution address is &20F0.)<br />
Execution address (relative) <br />
Operands: 1 of variable length.
Technical information 63<br />
<strong>The</strong> operand of a command gives the execution address relative to the<br />
load address of the file.<br />
Example: '2"F"0'<br />
(<strong>The</strong> execution address is &20F0 — assuming that the base address is &2000.)<br />
Inhibit run <br />
Operands: none<br />
<strong>The</strong> DIR command inhibits execution of the program immediately after its<br />
reception.<br />
Define data type <br />
Operands: 1 or 2; of variable length.<br />
<strong>The</strong> command defines the type of data in the file and the hardware at<br />
which it is directed. <strong>The</strong> data type applies until superseded by a different<br />
command.<br />
Example: '2"4"B"B"B"C"3"1"6"K'<br />
(<strong>The</strong> following program is in <strong>BBC</strong> BASIC for a 16K machine.)<br />
Format redefinition commands<br />
Change escaped-name's meaning (decoded string) <br />
Operands: 2; first of length 1 decoded byte, second of variable length.<br />
<strong>The</strong> command changes the entry in the name tables for the escapedname<br />
given (first operand) to decode to the string given (second operand).<br />
Example: 00 '4"w"o"r"d'<br />
(<strong>The</strong> escaped-name 00 will decode to 'word')<br />
Change escaped-name's meaning (command) <br />
Operands: 2; first of length 1 decoded byte, second of length 3 decoded bytes.<br />
<strong>The</strong> command changes the entry in the name tables for the escapedname<br />
given (first operand) to represent the command subroutine given (second<br />
operand).<br />
Example: FF 'U"E"R'
64 Technical information<br />
(Reception of the escaped-name &FF indicates that there has been a<br />
transmission error – the command subroutine is executed.)<br />
Change lone-name's meaning (decoded string) <br />
Operands: 2; first of length 1 decoded byte, second of variable length.<br />
<strong>The</strong> command changes the entry in the name tables for the lone-name<br />
given (first operand) to decode to the string of bytes given (second operand).<br />
Example: 00 '4"W"0"R"D'<br />
(<strong>The</strong> lone-name 00 will decode to 'WORD')<br />
Change lone-name's meaning (command) <br />
Operands: 2; first of length 1 decoded byte, second of length 3 decoded bytes.<br />
<strong>The</strong> command changes the entry in the name tables for the lone-name<br />
given (first operand) to represent the command subroutine given (second<br />
operand).<br />
Example: FF 'E"S"C'<br />
(<strong>The</strong> lone-name &FF becomes a name of the escape operator.)<br />
No reversion to default format before the next file <br />
Operands: none<br />
<strong>The</strong> command stops the decoder resetting its name tables to their<br />
default values prior to decoding the next file (see also the Telesoft mode call<br />
*OPT3).<br />
Revert to default format <br />
resets the name tables to their default values (see also the Telesoft<br />
mode call *OPT3).<br />
<strong>The</strong> escape operator <br />
<strong>The</strong> function of the escape operator () is to indicate that an escapedname<br />
follows, rather than a lone-name. Thus it permits 512 distinct names<br />
rather than 256. <strong>The</strong> escape operator must have at least one lone-name and<br />
may have escaped-names.
Eight-bit byte adjustment<br />
Technical information 65<br />
For the <strong>Teletext</strong> system which only sends odd parity bytes, there are only<br />
effectively seven bits to the byte. <strong>The</strong> and commands are<br />
available to 'add' an eighth bit.<br />
Eight-bit byte adjustment (lower) <br />
Operands: 1 of decoded length 1 byte.<br />
indicates subtract &58 from the next decoded byte (to give a value in<br />
the range &C8 to &FF or &00 to &27, if only bytes in the range &20 to &7F<br />
can be transmitted).<br />
Example: 20<br />
(Decodes to &C8.)<br />
Eight-bit byte adjustment (raise) <br />
Operands: 1 of decoded length 1 byte.<br />
indicates add &58 to the next decoded byte (to give a value in the<br />
range &78 to &D7).<br />
Example: 20<br />
(Decodes to &78.)<br />
Error in transmission <br />
indicates that there has been an error in transmission.
Appendix 1<br />
Installing the<br />
TELEROM into the<br />
<strong>BBC</strong> <strong>Microcomputer</strong><br />
CAUTION<br />
STATIC SENSITIVE DEVICES — DO NOT HANDLE<br />
UNTIL YOU HAVE READ THESE INSTRUCTIONS<br />
Please read these instructions carefully before attempting this conversion. If<br />
you are not completely confident of your ability to carry out this conversion<br />
yourself it will be in your own interests to take your unit to an authorised <strong>BBC</strong><br />
<strong>Microcomputer</strong> dealer for him to carry out this upgrade.<br />
First find out whether or not your computer has a series 1 operating system<br />
installed, by typing in *FX0 RETURN . If a number greater than 1.00 is<br />
displayed, you have a series 1 system.<br />
1. Ensure that the computer is not connected to a mains power socket.<br />
WARNING<br />
DO NOT REMOVE THE LID OF THE COMPUTER<br />
WHILST IT IS CONNECTED TO THE MAINS<br />
2. Unscrew the two large-headed screws on the rear panel of the computer and<br />
the two large-headed screws on the underside of the computer (near the front).<br />
Carefully remove the lid.<br />
3. Unscrew the two (three on some computers) bolts securing the keyboard<br />
assembly to the lower case and carefully unplug the 17-way ribbon cable<br />
connecting the keyboard assembly to the main printed circuit board (PCB) by<br />
pulling the socket away from PL13 on the main PCB.<br />
4. Move the keyboard away from the main PCB until the loudspeaker plug (<br />
PL15) is accessible. Unplug the loudspeaker by carefully removing the socket<br />
from PL15. Place the keyboard assembly to one side on a flat surface.
5. If your computer already contains a 'series 1' operating system then<br />
proceed to instruction 8.<br />
Appendix 1 67<br />
6. <strong>The</strong> current Machine Operating <strong>System</strong> (MOS) is situated in the bottom<br />
right-hand corner of the main PCB in one of two configurations which are:<br />
(i) One integrated circuit (IC) in socket IC51 identified by the legend 'B02'<br />
printed on the top. If you have this format carefully remove the MOS IC from<br />
IC51 using an IC extractor (a small screwdriver used with extreme care will<br />
do). Identify the BASIC language IC by the legend `B01' or 'B05' printed on<br />
it, and if it is not already in socket IC 101 then remove it as before and<br />
replace it in socket IC101 as described in '7' below.<br />
(ii) Four ICs in sockets IC52, IC88, IC100 and IC101 (these sockets are all<br />
next to each other despite the numbering) identified with the legends 'C', 'D', '<br />
E' and 'F' respectively printed on the top. If this is the case the BASIC<br />
language IC (identifiable by the legend 'B01' printed on the top and all four<br />
MOS ICs should be removed as described in (i) above. Replace the BASIC<br />
IC in socket IC 101 as described in '7' below.<br />
7. <strong>The</strong> new MOS is supplied in a single IC identified by the legend 'B04'<br />
printed on the top. Insert the ROM carefully into the socket IC51 ensuring<br />
that all the 'legs' locate properly into the holes and are not 'bent under' upon<br />
insertion. <strong>The</strong> IC should be orientated so that the semicircular cutout in the<br />
top of the IC is at the top, ie away from the keyboard. Avoid touching the IC<br />
legs with your fingers wherever possible.<br />
Now set the following links:<br />
S18 North<br />
S19 East<br />
S20 North<br />
S21 Two off east/west<br />
S22 North<br />
S32 West<br />
S33 West<br />
NB north is the edge of the PCB nearest to the back of the case and south is<br />
the edge nearest to the keyboard. East and west follow logically from these.
68 Appendix 1<br />
8. Insert the TELEROM IC (identifiable by the legend 'TFS') into any free<br />
socket (IC88, IC100 or IC52) as described in '7' above.<br />
Note: This <strong>User</strong> <strong>Guide</strong> assumes that the <strong>Teletext</strong> ROM is in the far right<br />
position of the filing system ICs (nearest the edge of the circuit board). If this<br />
is the case, then, when the microcomputer is powered up, the Telesoft filing<br />
system is automatically selected.<br />
If the <strong>Teletext</strong> ROM is not in the far right position then the Telesoft filing<br />
system is not automatically selected on powering up. You can select Telesoft<br />
either by typing in<br />
*TELESOFT RETURN<br />
or by pressing the T and BREAK keys together.<br />
9. Reassemble the <strong>BBC</strong> <strong>Microcomputer</strong> by reversing instructions 1 to 4 above.<br />
Your computer is now ready for use.
Appendix 2<br />
<strong>Teletext</strong> reception<br />
<strong>Teletext</strong> information is conveyed from the UHF TV transmitter to UHF<br />
domestic TV aerials as part of the complete 625 line UHF channel<br />
transmitted wave form. <strong>The</strong> pages of <strong>Teletext</strong> information are contained in a<br />
digitally coded form on unused blank lines which occur during the frame<br />
fly-back period and these pages of information are continually refreshed and<br />
updated. Thus a basic requirement for 'good' <strong>Teletext</strong> reception is 'good' TV<br />
reception, ie a 'clean' TV signal of adequate level.<br />
Generally speaking 'good' <strong>Teletext</strong> reception should be possible in <strong>BBC</strong>/IBA<br />
defined UHF TV service areas with the usual 'line of sight' qualification, but<br />
may be difficult under fringe conditions.<br />
A starting point is the reception of good quality, low noise (imperceptible<br />
snow), colour TV reception, but this alone will not guarantee error-free<br />
pages of <strong>Teletext</strong> information. Very close reflections of the received signal (<br />
ghosting) can be almost imperceptible on a good colour picture but can still<br />
result in <strong>Teletext</strong> reception errors. This effect can vary between the four TV<br />
channels in use because the channels are of different frequencies and the<br />
reflections are usually frequency-dependent.<br />
If problems are experienced a number of questions should be answered<br />
before condemning the equipment as faulty, or writing to the <strong>BBC</strong>/IBA<br />
and/or the equipment manufacturers etc:<br />
1. Is the aerial of the correct group? (UHF bands are split into different<br />
groups throughout the country.) Reputable aerial manufacturers conform to<br />
specific technical standards which are essential for the best possible <strong>Teletext</strong>,<br />
and colour television, reception. <strong>The</strong> final display of <strong>Teletext</strong> information<br />
depends in the first instance on the aerial signal —this must be right before<br />
proceeding any further.<br />
2. Was the aerial system properly installed externally with good quality UHF<br />
cable, avoiding kinks or sharp bends in the cable, and terminated in a good<br />
quality coaxial plug correctly fitted and soldered?<br />
Note: Indoor aerials are not recommended for television or <strong>Teletext</strong><br />
reception.
70 Appendix 2<br />
3. Is the aerial of the correct polarisation (horizontal and vertical systems are<br />
employed in different regions of the UK) and is it directed towards the<br />
transmitter intended to serve the area? Out of area reception is often employed<br />
for a number of reasons, including ignorance of the correct transmitter for the<br />
area.<br />
4. Will the aerial signals provide a good quality, low noise, colour television<br />
picture free from all reflections? (<strong>The</strong> new electronic test card is a valuable<br />
aid in detecting close reflections.)<br />
If all of the above criteria are met it may be necessary to adjust the position of<br />
the aerial especially if <strong>Teletext</strong> character error rates vary between channels, or<br />
between pages of information.<br />
<strong>The</strong> aerial should be tried in all positions, including variation of height,<br />
preferably by the use of the 'cranked arm' type of mast. If a satisfactory result<br />
is not possible by this means, moving the aerial to a different location is<br />
occasionally the only answer.<br />
If the TV aerial signal is fed through amplifiers and/or signal splitting devices<br />
to feed more than one outlet, it may, in cases of <strong>Teletext</strong> reception difficulties,<br />
be necessary to feed the signal direct to the <strong>Teletext</strong> unit in the first instance.<br />
This will help to reduce any problems caused by the signal distribution<br />
system. If the <strong>Teletext</strong> unit is fed from a larger MATV (master aerial TV)<br />
system further professional advice should be sought from a reputable<br />
contractor.<br />
Every effort should be made to ensure the best possible level and quality of<br />
signal so that the end result will not vary with time, weather conditions etc.<br />
Expenditure on good quality aerial installations at the outset will prove to be<br />
an investment in the long term.
Appendix 3<br />
Summary of Terminal<br />
mode commands<br />
<strong>The</strong> following is a quick reference list of all the Terminal mode commands<br />
together with the relevant keys, and the order in which they appear:<br />
Description of command Keys used<br />
Select a channel f4<br />
Fine tune a channel f4 and SHIFT<br />
Select a page f0<br />
Select last explicit page f1<br />
Select index page f1 and SHIFT<br />
Keep a page f3<br />
Release a kept page f3 and SHIFT<br />
Reveal page f2<br />
Conceal page f2 and SHIFT<br />
Enter an operating system (*) command f5<br />
Save a page to file f7<br />
Load a page from file f6<br />
Hold page f8<br />
Exit to previous filing system f9<br />
Exit to Telesoft and execute f9 and SHIFT


