
Overview
This guide will help you to setup the Softaculous Auto Install plugin in Clientexec to auto-install scripts after a user account is created. Setting this up is very easy. This guide assumes that you have already installed Softaculous on your server.
Note: This plugin works with Webuzo, cPanel and DirectAdmin at the moment.
List of Scripts
All the scripts in Softaculous can be Auto Installed. Following is the popular list of scripts :
WordPress, b2evolution, StatusNet, Drupal, Mambo, phpBB, SMF, AEF, Coppermine, Gallery, Jcow, OpenClassifieds, openX, WebCalendar, Shadows Rising, phpList, SquirrelMail, LimeSurvey, Piwik, SugarCRM, PHProjekt, osCommerce, Magento, phpBook, HESK, osTicket, kPlaylist, VidiScript, Gregarius, CodeIgniter, Moodle, Elgg.
Download and Upload
The plugin is shipped by default with Clientexec. However, if you do not find it you can download the plugin here.
Unzip it and upload, it to your /path/to/clientexec/plugins/snapin/ directory.
In order to make sure you uploaded the files to the correct path please ensure that the following file exists :
clientexec/plugins/snapin/softaculousautoinstall/PluginSoftaculousautoinstall.php
Create Custom Fields
Go to Clientexec admin panel and navigate to Settings -> Products -> Custom Fields
1. Create a Drop Down custom field which will contain the list of scripts you’d like to offer. For example: WordPress — You’ll want to select ‘Include in Signup’ & ensure ‘All Product Groups’ is deselected
2. Create a Text custom field for the admin username (For example: Admin Username)
3. Create a Text custom field for the admin password (For example: Admin Password)
Note down the custom field names you have created above which will be used in later steps

Enable the Fields for Product Groups
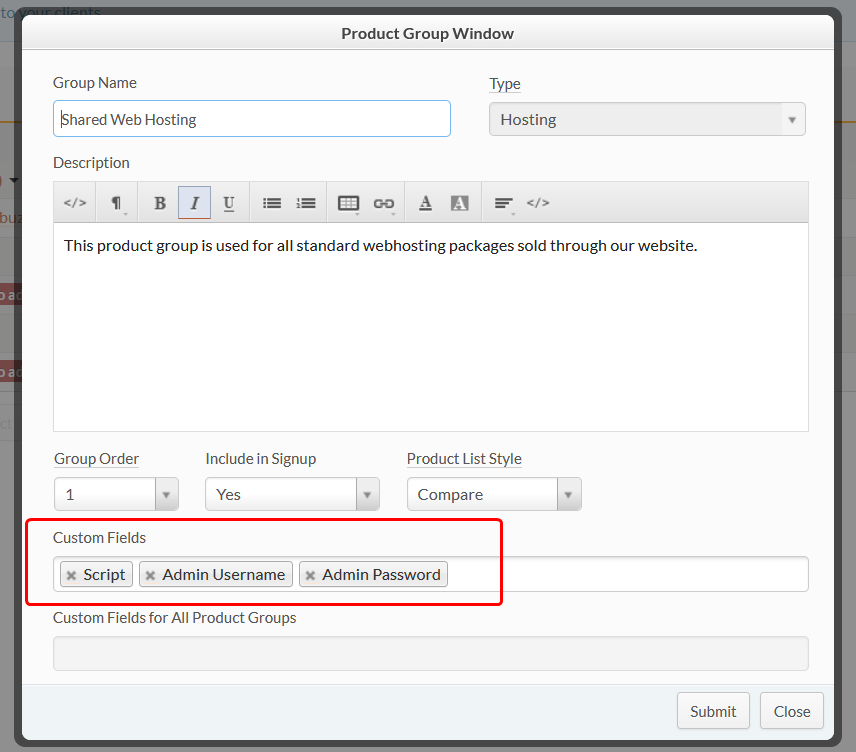
Now that you have created the Custom Fields you need to enable these fields for the Product Groups where you want to use the Auto Install functionality.
Go to Clientexec admin panel and navigate to Settings -> Products -> Products
1. Click on the name of the product group you’d like to have the automatic installer on and then click Edit Group
2. Select all of the custom fields you created in the above step (Note: You can leave out the username & password field and if they are blank, an automatic username & password will be generated)
3. Once ready, click Submit.
Enable the Softaculous Plugin
The final step is to run the automatic installer.
1. In your Clientexec admin area, navigate to: Settings -> Plugins -> Snapping
2. Select the Yes radio button for Enabled setting
3. From the drop down menu, select ‘Softaculous Auto Installer‘
4. For the Script Custom Field Name, Username Custom Field Name, and Password Custom Field Name – Enter the name of the fields you just created
5. When ready, click Update Settings

That’s it! You have successfully configured the Clientexec Auto Install Module. Your users will now see the option to select app on their order from.
Testing the Setup
You can test the setup by making a DUMMY Order and activating that order. When the order is activated and the control panel account is created the Softaculous Auto Install plugin will install the script as well.
Troubleshooting
There could be several reasons for the plugin Not to work :
- A firewall is blocking requests
- You put the incorrect Field Names
- cURL is disabled in PHP
Support
If you need any assistance then please contact Softaculous Support. Please send us a screenshot of the Custom Fields, Product Group Settings and Plugins > Snapping pages.