Table of Contents
Advertisement
Advertisement
Table of Contents

Related Manuals for Sega Virtua Striker 4


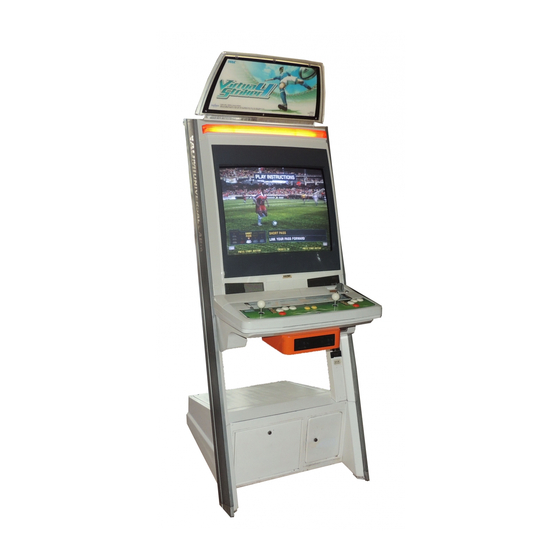
Summary of Contents for Sega Virtua Striker 4
- Page 1 ● Before using this product, read this MANUAL carefully to understand the contents herein stated. STOP ● After reading this manual, be sure to keep it available nearby the product or elsewhere convenient for referring to it anytime IMPORTANT when necessary.
-
Page 2: Table Of Contents
TABLE OF CONTENTS BEFORE USING THE PRODUCT, BE SURE TO READ THE FOLLOWING: TABLE OF CONTENTS INTRODUCTION 1.HANDLING PRECAUTIONS ................. 1 2.SPECIFICATIONS ..................3 3.TURNING THE POWER ON ................. 4 4.GAME DESCRIPTION ................... 7 4−1 GAME OVERVIEW ................7 4−2 DESCRIPTION OF EACH OF THE ICONS ON THE GAME SCREEN ............... 8 4−3 GAME FLOW ................... 9 4−4 VS4 PLAYER'S CARD (VS4 IC CARD) .......... 23 5.TEST MODE ....................25 A. SYSTEM MENU ..................25 B. GAME TEST MODE .................. 27 a. INPUT TEST .................. - Page 3 Use of this product is unlikely to cause physical injuries or damage to property. However, points that require special attention are indicated by thick underlining, the word "IMPORTANT" and the symbol below. Indicates important information that, if ignored, may result in the mishandling of the product and cause faulty operation or damage to the product.
-
Page 4: 1.Handling Precautions
1. HANDLING PRECAUTIONS ● Be sure to disconnect the cabinet power when assembling or removing the IC board as there is a risk of an electrical shock and of damaging the IC board. ● If any foreign matter gets onto the IC board or any dust builds up on the IC board, there is a risk that this will short the circuit causing the IC board to heat up and catch fire. Keep the top of the IC board clean at all times. ● Use the TRIFORCE in a cabinet that supports JVS. If the TRIFORCE is used in a cabinet that does not support JVS, there is a risk of overheating and fire. ● Ensure that the connection between board and connectors is complete. The IC board may be damaged if it is not fully inserted. ● Use a logic tester to inspect the IC board circuit. Do not use a standard tester as there is a risk of damaging the IC board. ● When installing the IC board inside the cabinet or connecting the wire harness connector to board, take care not to shock the IC board with static electricity. ● When soldering buttons, etc. to the wire harness, remove the wire harness from the IC board to avoid heating the IC board. ● If the TRIFORCE is used without the shield case, electrical interference may be produced. Use the TRIFORCE with the shield case provided. ● The monitor frequencies compatible with the TRIFORCE are 15 kHz and 31 kHz. Cabinets using monitors and projectors not compatible with 15/31 kHz cannot be used. ● The IC board's electronic components can be damaged by static charges transferred by human contact. Before performing operations involving the IC board, be sure to take adequate measures to discharge any static buildup in your body, such as touching a properly- grounded metal surface. - Page 5 DURING OPERATION (PAYING ATTENTION TO CUSTOMERS) "Virtua Striker 4" can be played using the "VS4 PLAYER's CARD" (hereafter called the card). For this reason, bear in mind the following points when operating this game with card use enabled. Card use To play using the card, insert the card as indicated below into the card reader/writer insertion slot. Saving to the card will not be possible and other problems may result if the procedure is incorrect. Make sure that individuals involved in operation are familiar with how to use the card, so that they are able to guide players so as not to make mistakes, and are able to cope with any problems that may occur. - Put in the coins and press the Start Button before inserting the card into the card insertion slot. - The card has "IN" and a triangular mark on one end. Insert the card with that end forward into the insertion slot. - Insert the card firmly. - Do not insert more than two cards simultaneously. - Do not use cards with seals or other items affixed. - Do not use cards other than the "VS4 PLAYER's CARD". Cautions during card lock During use, the card is locked by the card reader/writer. Even while the card is locked, it is possible to remove the card by force. However, if it removed during saving the data may be damaged, and the card may become unusable. For this reason, never remove the card when it is locked. Instruct the players likewise. − 2 −...
- Page 6 2. SPECIFICATIONS ① ON-SCREEN DISPLAY Monitor P osition: Horizontal S ynchronous F requency: HORIZONTAL 15/31 kHz ② CONTROL PANEL TACTICS (U) LONG PASS SHOOT TACTICS (M) START SHORT PASS ANALOG LEVER TACTICS (D) DASH ③ REQUIRED OPERATING ENVIRONMENT ・ TRIFORCE Firmware: MAIN BOOT Ver. 2.17 or higher ・ DIMM Memory Capacity: 512MB or more You can find the current TRIFORCE operating environment using SYSTEM INFORMATION in TEST Mode. This game checks the firmware (MAIN BOOT) when starting up, and if the version is unsupported a warning message is displayed and there is an option to upgrade to the required firmware. − 3 −...
-
Page 7: 3.Turning The Power On
3. TURNING THE POWER ON Do not disconnect the power during the firmware upgrade. If the power is cut, the TRIFORCE may be damaged. ① Turn the power on. If the firmware needs to be upgraded, proceed to step (2) below, and if the upgrade is not needed, proceed to step (7). ② If the TRIFORCE firmware needs to be upgraded, the following warning message is displayed. WARNING BOOT/FIRM VERSION DOES NOT FULFILL THE GAME SPEC. PLEASE ENTER GAME TEST AND UPDATE. ③ Enter GAME TEST Mode. (Select ENTER GAME TEST on the SYSTEM MENU.) VIRTUA STRIKER 4 TEST MENU INPUT TEST GAME ASSIGNMENTS CALIBRATION CARD TEST CLOSE SETTING SYSTEM UPDATE BOOKKEEPING BACKUP DATA CLEAR -> EXIT SELECT WITH SERVICE BUTTON AND PRESS TEST BUTTON − 4 −... - Page 8 ④ Select SYSTEM UPDATE, and the MAIN BOOT upgrade screen is displayed. SYSTEM UPDATE MENU UPDATE BOOT PROGRAM CURRENT VERSION: 1.03 LATEST VERSION: 2.17 PRESS TEST BUTTON TO START ⑤ Press the TEST Button and the MAIN BOOT upgrade begins. Do not turn the power off during the upgrade under any circumstances. Doing so may damage the TRIFORCE. SYSTEM UPDATE MENU UPDATE BOOT PROGRAM... CURRENT VERSION: 1.03 LATEST VERSION: 2.17 PROGRESS: 68% DO NOT TURN OFF THE POWER ⑥ Once the following screen appears, turn the cabinet power off momentarily then turn the power back on. If the upgrade could not be finished correctly, "FAILED" is displayed. Turn the power off momentarily, then try the upgrade again starting from turning the power on for the first time. SYSTEM UPDATE MENU COMPLETE PLEASE REBOOT − 5 −...
- Page 9 ⑦ If the analog lever needs to be calibrated, the following settings screen appears. If calibration is not needed, the ADVERTISE screen is displayed. Move both the P1 and P2 analog levers on the control panel as far as they can move around 360 degrees through the up, down, left and right directions. Be sure to perform the P2 side calibration the same way as the P1 side. Take care because if the calibration adjustment is not performed correctly, the levers will not function c orrectly. Press the START Button when the configuration is finished and the ADVERTISE screen is displayed. CALIBRATION P1 P2 UP 87 90 DOWN 88 91 LEFT 83 7F RIGHT 83 80 Please carry out adjustment of levers. Make sure that you set up CALIBRATION on a lever for both "PLAYER 2" and "PLAYER 1". Please press Start Button, if adjustment finishes. − 6 −...
-
Page 10: 4.Game Description
4. GAME DESCRIPTION 4−1 GAME OVERVIEW This product is a soccer game. This game can be broadly divided into 2 modes. (1) 1 Player Play (Single Play) (COM Matches) The player's goal is to win the INTERNATIONAL CUP. The player advances through the following matches each time they win a match. ・ 1st Match: Final Regional Qualifying Match ・ 2nd Match: 1st Round in the Competition ・ 3rd Match: 2nd Round in the Competition ・ 4th Match: Competition S emi-Final ・ 5th Match: Competition F inal The game ending appears when the player wins all of the above 5 matches. (2) 2 Player Versus Play This is 2-player competitive play where the players play against each other. The winning player remains in the competition and advances to the next round. The game is over for the losing player. If the match is a draw, it is game over for both players. * If the EVENT MODE setting in Test Mode is set to ON, both players get GAME OVER at the end of the first match regardless of who wins and loses. -
Page 11: 4−2 Description Of Each Of The Icons On The Game Screen
4−2 DESCRIPTION OF EACH OF THE ICONS ON THE GAME SCREEN You can check the status of the card reader/writer in the cabinet using the icons. P2 Card Icon P1 Card Icon <Card Icons> a. The state where cards can be inserted. (This is displayed in gray.) b. The state once a card is inserted and locked. (This is displayed in red for P1 and blue for P2.) c. The state where cards cannot be used. A diagonal line is drawn through the card icon in the following situations: ・ The card reader/writer has been set to OUT OF SERVICE using Test Mode. ・ The finishing time for accepting cards has passed. ・ Cards are not accepted if the card reader/writer cannot be initialized. ・ The cabinet has not been configured for the card reader/writer itself. * If the card usage setting is set to OFF using Test Mode, the card icons are not displayed at all. In this case, cards cannot be used. −... -
Page 12: 4−3 Game Flow
4−3 GAME FLOW (1) ADVERTISE Screen When neither P1 nor P2 are playing a game, various information is displayed on the screen. ・PLAY INSTRUCTIONS: Explains the controls for the game. ・SCORE RANKING: Rankings based on goals fore and against. ・WINNING STREAK RANKING: Rankings based on the number of continuous wins. ・WEEKLY SEGA WORLD RANKING: The win percentage rankings for each country. Rankings are updated on Monday each week. ・TODAY'S BEST GOAL: Plays a replay of the best goal recorded that day on that c abinet. [PLAY INSTRUCTIONS] [SCORE RANKING] [WININNG STREAK RANKING] [WEEKLY SEGA WORLD RANKING] [TODAY'S BEST GOAL] − 9 −... - Page 13 (2) SELECT TEAM Screen This screen selects the team (country) to control. If the player is using a card, the "VS4 PLAYER's CARD" needs to be inserted before selecting a country. When a card is inserted, the team registered on the card is automatically selected. Card Information Team Information ・Card Information - NO CARD: Play without using a card. - CARD CONTENTS: Play using a card. - NAME: Displays the user name that was entered when the card was first created. - DIVISION: The DIVISION that the team is associated with. - PLAYER STATUS: This is an evaluation of how the team is playing. The evaluation goes up and down. - NUM. OF CUP: Displays the number of championship cups won. - CARD LIMIT: The remaining number of times the card can be used. The card cannot be used when this drops to "0". ・Team Information (FORMATION, TACTICS) - MAIN FORMATION: The team's MAIN FORMATION. - TACTICS (U): Defaults to the SUB FORMATION of the team. - TACTICS (M): Defaults to OFFENSIVE. - TACTICS (D): Defaults to DEFENSIVE. * The FORMATION and TACTICS that have been assigned to a TACTICS BUTTON can be used during a match.
- Page 14 (3) REGISTER NAME Screen This screen is used to register the user's name when a card is created for the first time. The user name entered is saved on the card. * Other players cannot join the game while entering the user name. OPERATING INSTRUCTIONS SWITCHING BETWEEN LETTERS AND SYMBOLS <Method for Entering the User Name> a. Entering l etters: a-1) Move the lever up, down, left or right to move the cursor. a-2) Press any one of the three white buttons to select the letters. The maximum number of letters that can be entered is 9 letters. b. Switching between entering letters and symbols: b-1) Move the lever up, down, left or right to move the cursor. b-2) Select the characters to enter, from the categories on the left side of the entry frame. b-3) Press any one of the three white buttons to select the type of characters. c. Entering a space: c-1) Select "□" at the bottom of the entry frame to enter a space. d. Erasing letters and symbols that you have already entered: d-1) Either press the red DASH BUTTON or select "<<BS" at the bottom of the entry frame, to backspace and erase one character at a time. e. Finishing the name entry: Either press the START BUTTON or select "END" at the bottom of the entry frame to finish entering the user name. The user name is then saved onto the card.
- Page 15 (4) TEAM MANAGEMENT Screen If the player is playing using a card, the team settings can be changed using the TEAM MANAGEMENT screen. The settings that are changed using this screen are saved onto the card, and are then automatically loaded when the player plays a game. If the player is not using a card, the team settings cannot be changed using this screen. When the player is using a card, the TEAM MANAGEMENT screen appears once just before the first game in single play mode, and before every match in versus play mode. * Other players cannot join the game while a player is changing settings on the TEAM MANAGEMENT screen. FORMATION (TACTICS/HOME STADIUM) SUBSTITUTION OPERATING INSTRUCTIONS <Two Types of Setting Modes> The TEAM MANAGEMENT settings can be broadly divided into two types. (A) SUBSTITUTION ・The player can select the team's STARTERS (11 players) and SUBSTITUTES (5 players). (B) FORMATION (TACTICS/HOME STADIUM) ・The player can change the team's MAIN FORMATION setting. ・The player can change the team's TACTICS BUTTON (U)/(M)/(D) settings. ・The player can select the team's HOME STADIUM. <Switching Between Setting Modes> Move the lever right to change from (A) SUBSTITUTION→(B) FORMATION (TACTICS/ HOME STADIUM) mode or move the lever left to change from (B) FORMATION (TACTICS/HOME STADIUM)→(A) SUBSTITUTION mode. −...
- Page 16 (4)-(A) TEAM MANAGEMENT - SUBSTITUTION In SUBSTITUTION mode, the player can change the STARTERS and SUBSTITUTES, and select player positions. Players can be freely substituted. SCROLL BAR PLAYER LIST OPERATING INSTRUCTIONS FORMATION DIAGRAM <Player List> ・STARTERS (BLUE in the player list): 11 players ・SUBSTITUTE (YELLOW in the player list): 5 players (* Put on the bench during a match.) ・NON-LISTED (RED in the player list): Cannot appear in the match. Players that are not registered as either STARTERS (11 players) or SUBSTITUTES (5 players) become NON-LISTED and cannot play in a match. If a player that you want to put in a match is in the NON-LISTED group, switch that player with one of the players in the STARTERS or SUBSTITUTES group. <Hidden Players> If you use the card to play and a set of fixed conditions are met, a hidden player appears in addition to the 16 initial players. The hidden player is added to the NON-LISTED frame, so you can check for a hidden player by scrolling to the bottom of the player list. The "NEW" icon is displayed next to the newly acquired player. <Operating Method> a. To exchange players: a-1) Move the lever up or down to move the cursor. a-2) Press any one of the three white buttons to select the player. * You can cancel the player selected using the red DASH BUTTON. * You can also register suspended players as members of the STARTERS group.
- Page 17 c. Returning the team settings to the default values: You can restore the player positions, MAIN FORMATION settings, TACTICS settings and HOME STADIUM setting of the team to the default values by pressing any one of the three TACTICS BUTTONS. A confirmation window is displayed, and the process of restoring the default will be completed if you select "YES". If you select "NO", the operation is cancelled. * Note that even if you restore the default values, this will not erase the players, tactics and stadiums that you have acquired up to now. d. Exiting TEAM MANAGEMENT: Use the Start Button to exit from TEAM MANAGEMENT. − 14 −...
- Page 18 (4)-(B) TEAM MANAGEMENT - FORMATION (TACTICS/HOME STADIUM) This mode lets you change the team's MAIN FORMATION, TACTICS BUTTON (U)/(M)/(D) and HOME STADIUM settings. You can switch to FORMATION (TACTICS/HOME STADIUM) mode by moving the lever right while in SUBSTITUTION mode. HOME STADIUM SELECTION WINDOW SETTING CATEGORY/DESCRIPTION OPERATING INSTRUCTIONS <Operating Method> a. Selecting the setting category: Move the lever up or down to move the cursor over one of the five setting categories of MAIN FORMATION, TACTICS BUTTON (U)/(M)/(D) or HOME STADIUM, then press any one of the three white buttons to select the category. b. Selecting items within the window: A window opens when you select the category in step (a) above, and you can then move the lever up or down to move the cursor and then press any one of the three white buttons to select the item. * The windows are divided into several tiers, and the setting won't be changed unless the items are selected all the way to the deepest window. (Example) MAIN FORMATION →...
- Page 19 <Changing the MAIN FORMATION> ① Select MAIN FORMATION from the setting categories. (When you do this, a new window opens and you will then select items from within the window.) ② Select the number of defenders. [3BACKS/4BACKS/5BACKS] ③ Select one of the FORMATIONS that have the number of defenders selected in step (2) above. ④ Finally, select the DEFENCE TYPE. [LINE/SWEEPER/FREE] The formation is not changed until you select the DEFENCE TYPE in the deepest window. You can return to the previous window level by pressing the red DASH BUTTON. You can check the details of the SUB FORMATION and DF TYPE in the stadium information map and description frames. <Changing TACTICS BUTTONS> ① Select the TACTICS BUTTON to change from the settings categories. [TACTICS BUTTON (U)/ TACTICS BUTTON (M)/ TACTICS BUTTON (D)] (When you do this, a new window opens and you will then select items from within the window.) ② Select the type of setting to assign to the TACTICS BUTTON: ・3BACKS/4BACKS/5BACKS: SUB FORMATION ・OFENSIVE TACTICS/DEFENSIVE TACTICS: TACTICS ③ Select the item to actually assign to the TACTICS BUTTON. The TACTICS BUTTON setting is not changed until you select the item in the deepest window. You can return to the previous window level by pressing the red DASH BUTTON. The SUB FORMATION that is allocated to a TACTICS BUTTON can be used to change formations during a match. Once a set of predetermined conditions are met, additional categories are added to the items you can select. The "NEW" icon is attached to the newly added TACTICS. You can assign the same TACTICS or SUB FORMATION to the TACTICS BUTTONS (U)/ (M)/(D). You can check the details of the FORMATION and DF TYPE in the stadium information map and description frames. <Changing the HOME STADIUM> The HOME STADIUM is the stadium that forms the team's base.
- Page 20 (5) QUALIFYING DECIDER Screen This is the first match against the COM. The first round of the tournament from previous versions has been replaced with the regional final qualifying match. You can advance to the actual tournament (second match against the COM) by winning this game. QUALIFYING MATCH NAME OPPOSITION COUNTRY ・This is the other country playing for qualification. ・The qualifying match name (The final regional qualifier = QUALIFY FOR or a playoff = PLAY OFF). * Although the final regional qualifiers are matches that determine which country will represent each continent, depending on the conditions this may be a playoff between teams from different continents. (6) TOURNAMENT Screen Starting from the second match against the COM, this shows the tournament draw for the International ...
- Page 21 (7) VERSUS Screen This is the screen when playing a versus game. If the other player is also a card player, you can see the opponent's information. CARD INFORMATION MATCH NAME TEAM INFORMATION MATCH RECORD INFORMATION ・Match Name Display - Match Name: Title of the match (DIVISION MATCH, SPECIAL MATCH, etc.) ・Card Information - NAME: For card players, this shows the user name. - DIVISION: The DIVISION the team is associated with. - PLAYER STATUS: This is an evaluation of how the team is playing. The evaluation goes up and down. - NUM. OF CUP: Displays the number of championship cups won. ・Match History Information Display - MATCH RECORDS: Total number of matches GAME(S) / number of wins W(S) / number of draws D(S) / number of losses L(S) - WINNING %: Win ratio - POINT(S): Number of WINNING POINTS accumulated (goals) ・Team Information (FORMATION, TACTICS) - MAIN FORMATION: The team's MAIN FORMATION - TACTICS (U): Defaults to the SUB FORMATION of the team. - TACTICS (M): Defaults to OFFENSIVE - TACTICS (D): Defaults to DEFENSIVE * FORMATIONS and TACTICS that have been assigned to TACTICS BUTTONS can be used during the game.
- Page 22 (8) SUSPENSION Screen for Suspended Players If any of the players in the STARTERS group are unable to play because they have accumulated too many yellow cars or red cards, the players are forced into the SUSPENSION screen before the match. LIST OF PLAYERS TEAM FORMATION DIAGRAM <Method for Switching Players> ① Select a suspended player: ①-1 Use the lever to move the cursor up and down. ①-2 Press any one of the three white buttons to select the player. ② Decide which player will appear as a substitute: ②-1 Use the lever to move the cursor up and down. ②-2 Press any one of the three white buttons to select the player. ③ Exit using the Start Button. You can cancel a selection using the red button. If you do not finish selecting players before the time runs out, the players will be selected automatically. ・Player List Display - Position / Jersey Number / Player Name - Player Skill Level / Stamina Bar / Strong Foot - Accumulated Warning Card Information * Any warning cards received during a game are accumulated at the end of the match. Any players who have accumulated more than a fixed number of warning cards will be subject to suspension for 1 or 2 matches.
- Page 23 (9) PLAYER INFORMATION Screen This displays the STARTERS lists from both of the teams that will appear in the match. (10) MATCH Screen This is the game screen that appears during the match. NATIONAL FLAG AND SCORE DISPLAY NUMBER OF CONTINUOUS WINS DISPLAY CARD INFORMATION MATCH TIME DISPLAY RADAR CURSOR/STAMINA BAR TEAM INFORMATION POSITION/PLAYER NAME ・National Flag/Score Display ・Card Information Display: User Name/DIVISION/PLAYER STATUS/Number of Cups (P2 is displayed on the left side) ・Match Time Display: The actual time (in seconds). ・Number of Continuous Wins Display: Displays the number of consecutive matches won in versus mode. ・FORMATION/TACTICS Display ・Position/Player N ame ・Controlling Character Cursor/Player Stamina Gauge/State of Warning Cards ・Radar − 20 −...
- Page 24 (11) HALFTIME Screen After the first half is over, you can press the Start Button while the member change instructions are displayed on the HALFTIME screen to substitute players in and out. During versus play, the display switches to the SUBSTITUTION screen if P1 or P2 presses the Start Button. * You can skip to the start of the second half by pressing any button other than the Start Button. MEMBER CHANGE INSTRUCTIONS (12) SUBSTITUTION Screen ON-FIELD PLAYERS PLAYERS ON THE BENCH <Substitution Method> (You can substitute a maximum of 3 players per team) ① Select the player to substitute off (select from the on-field players) ①-1 Use the lever to move the cursor up and down ①-2 Press any one of the three white buttons to select the player ② Select the player to appear as the substitute (select from the player on the bench) ②-1 Use the lever to move the cursor up and down ②-2 Press any one of the three white buttons to select the player ③ Exit using the Start Button. * You can cancel a selection using the red button. * You cannot select players that were sent off during the first half or players that are under suspension.
- Page 25 (13) HIGHLIGHTS Screen This screen shows replays of the match highlights. MATCH RESULT ・Match Result Display ・Versus Record/WINNING POINT Display ・Information about acquired TACTICS, STADIUMS and HIDDEN PLAYERS (14) MATCH RESULT Screen This screen displays the results of who won and lost the match. This screen also displays DIVISION promotion and relegation information and changes to PLAYER STATUS. ・DIVISION promotion/relegation ceremony (When promoted or relegated from a DIVISION) ・SPECIAL MATCH cup award ceremony (There is no ceremony when the SPECIAL MATCH is a draw) ・PLAYER STATUS increase/decrease display ・Information about the Ranking Awarded − 22 −...
-
Page 26: 4−4 Vs4 Player's Card (Vs4 Ic Card)
4−4 VS4 PLAYER'S CARD (VS4 IC CARD) This product can be played using a "VS4 PLAYER's CARD". (Of course, it is also possible to play without a card.) "Game Play Data" and "Team Customization Data" are accumulated and saved on the card. This data can then be checked on the game screens. <Description of Data> ・Team Customization Data (Information such as player positions, formation, TACTICS, HOME STADIUM, etc.) ・Game Play Data (Information such as match record, DIVISION, PLAYER STATUS, WINNING POINT, NUM. OF CUP, etc.) <Procedure for Creating a New Card> ① Purchase a "VS4 PLAYER's CARD". ② Insert enough coins for one credit into the cabinet, then press the Start Button to begin. ③ On the SELECT TEAM screen, insert the new card into the card reader/writer. The card will automatically lock, so make sure that you push the card firmly all the way into the c ard r eader/writer. * If the card is only half-inserted into the card reader/writer, the machine won't detect the card and the game will continue as if a card is not being used. - Page 27 ● The country that you select and the user name that you enter when creating a new card cannot be changed. ● WHEN USING A "VS4 PLAYER's CARD", THE JAPAN NATIONAL TEAM IS NOT AVAILABLE. <Limit on the Number of Times a Card can be Used> The card has a limit on the number of times it can be used. The card cannot be used after the number of usages has run out. When this happens, it is possible to transfer the data onto a new card by performing a card renewal. When the renewal is finished, the card that was the source of the renewal can no longer be used. A detailed procedure is described in the following <Card Renewal Procedure>. <Card Renewal Procedure> ① Insert enough coins for one credit, then press the Start Button to start the game. ② When the SELECT TEAM screen is displayed, insert both, the card that has been used up (or a card that you are still using) and the new card on top at the same time. ③ The game then detects that there are two cards, and automatically performs the renewal procedure. * Card renewal can be performed even for cards that have not been fully used up. <About Card Accept Times> Cards stop being accepted 15 minutes before the shop closing time that is configured in Test Mode (Close Setting).
-
Page 28: 5.Test Mode
5. TEST MODE A. SYSTEM MENU ● The details of changes to Test Mode settings are saved when you exit from Test Mode by selecting EXIT from the SYSTEM MENU. Be careful because if the power is turned off before that point, changes to the settings will be lost. ● If you make changes to NETWORK SETTING settings, turn the power off and on after you exit from Test Mode. Be careful because if you do not turn the power off and on, the changes to the settings will not be applied. ● You may not enter Game Test Mode while the unit is reading from or checking the GD-ROM. If error messages are displayed when exiting Test Mode, you should power the unit off and on again. Change the following setting items as specified to use this product. SYSTEM MENU RAM TEST MEDIA BOARD TEST SYSTEM INFORMATION JVS TEST SOUND TEST C.R.T. TEST ......a) COIN ASSIGNMENTS ....... b) CLOCK SETTING ......c) NETWORK SETTING ......d) ENTER GAME TEST [*******************] →EXIT SELECT WITH SERVICE BUTTON AND PRESS TEST BUTTON a) C.R.T. TEST... - Page 29 b) COIN ASSIGNMENTS ● COIN CHUTE TYPE Set this to match the cabinet as appropriate. ● COIN TO CREDIT RATE Set this as you see fit. ● GAME COST SETTING You can configure the number of credits needed to start/continue the game. Set this as you see fit. c) CLOCK SETTING Set this correctly to the current time. d) NETWORK SETTING ● NETWORK TYPE Set this to NONE. Use the SERVICE Button to move the cursor to the desired test item. Press the TEST Button to enter the selected item. Press the TEST Button when ENTER GAME TEST is selected to change to the Test Menu specific to this game. Refer to the next and subsequent pages. After the test is complete, move the cursor to EXIT and press the TEST Button to return to the Game Advertisement Screen. Refer to the service manual supplied with the TRIFORCE for details on System Test Mode. − 26 −...
-
Page 30: Game Test Mode
B. GAME TEST MODE On the SYSTEM TEST MENU screen, move the cursor over ENTER GAME TEST and press the TEST Button to display the Test Menu specific to this game. VIRTUA STRIKER 4 TEST MENU INPUT TEST GAME ASSIGNMENTS CALIBRATION CARD TEST CLOSE SETTING SYSTEM UPDATE BOOKKEEPING BACKUP DATA CLEAR -> EXIT SELECT WITH SERVICE BUTTON AND PRESS TEST BUTTON Use the SERVICE Button to move the cursor to the desired test item. Press the TEST Button to enter the selected item. After selecting an item, read the explanations below regarding operation. After the test is complete, move the cursor to EXIT and press the TEST Button to return to the System Menu Screen. − 27 −... -
Page 31: Input Test
a. INPUT TEST Select INPUT TEST to display the following screen and check the status of input devices. This test should be used periodically to check that each input device is functioning correctly. INPUT TEST P1 P2 ANALOG X 80 80 ANALOG Y 80 80 DASH OFF OFF SHORT PASS OFF OFF LONG PASS OFF OFF SHOOT OFF OFF TACTICS(U) OFF OFF TACTICS(M) OFF OFF TACTICS(D) OFF OFF START OFF OFF SERVICE OFF TEST OFF PRESS TEST AND SERVICE BUTTON TO EXIT As you tile the analog levers, the numerical values change through the range of 00 to FF (hexadecimal). If the other input devices switch from "OFF" to "ON" when operated, they are functioning normally. Press the SERVICE and TEST Buttons simultaneously to return to the Game Test Menu Screen. − 28 −... -
Page 32: Game Assignments
b. GAME ASSIGNMENTS Select GAME ASSIGNMENTS to display the current game settings and make changes. GAME ASSIGNMENTS (1/2) ADVERTISE SOUND ON EVENT MODE OFF ★VOICE ENGLISH CARD R/W P1 USE ON CARD R/W P2 USE ON -> NEXT Please disregard option screen for “CARD R/W USE” setup if the Machine has NO CARD R/W device. SELECT WITH SERVICE BUTTON AND PRESS TEST BUTTON ★ VOICE It is possible to switch the language setting of the voice used during the game between ENGLISH and ITALIAN. (The default setting is ENGLISH.) Press the SERVICE Button and move the cursor to the setting you wish to change. Press the TEST Button to cycle the parameters on the left of the item through its various settings. Move the cursor to NEXT then press the TEST Button to advance to page 2. ● ADVERTISE SOUND You can switch the sound ON/OFF during advertising. (The default setting is ON.) ● EVENT MODE Set this to ON when there is a competition or other event. Setting this to ON switches the game to "ONE MATCH MODE", where GAME OVER appears after each match. (The default setting is OFF.) ● CARD R/W P1 (P2) USE This sets the operating mode (whether it can be used) of the P1 (P2) card reader/writer. (The default setting is ON.) - ON: The card reader can be used. - OUT OF SERVICE: The card reader cannot be used (use this setting when the reader is malfunctioning, e tc.). A "/" is drawn through the card icon at the bottom part of the screen to inform the user that the card reader cannot be used. - Page 33 GAME ASSIGNMENTS (2/2) GAME DIFFICULTY NORMAL VIRTUAL TIME REAL TIME SET(COM) 1'30" TIME SET(VS) 1'30" G-GOAL TIME(COM) OFF G-GOAL TIME(VS) OFF PK SYSTEM (COM) OFF PK SYSTEM (VS) OFF SET DEFAULT -> EXIT SELECT WITH SERVICE BUTTON AND PRESS TEST BUTTON Press the SERVICE Button and move the cursor to the setting you wish to change. Press the TEST Button to cycle the parameters on the left of the item through its various settings. After changing the settings, select EXIT and press the TEST Button to return to the Game Test Menu Screen. Changes to settings are not enabled until Test Mode is exited. After changing settings, be sure to exit Test Mode. ● GAME DIFFICULTY The difficulty level of the game can be set to one of the 5 levels of VERY EASY / EASY / NORMAL / HARD / HARDEST. (The default setting is NORMAL.) ● VIRTUAL TIME This sets the cycle of time (day, evening, night) in the game. (The default setting is REAL.) - REAL : Time passes through the real 24-hour cycle (day → evening → night) using the TRIFORCE internal clock. - 2HOUR: Time passes through a 2-hour cycle (day → evening → night) using the TRIFORCE internal clock. - 4HOUR: Time passes through a 4-hour cycle (day → evening → night) using the TRIFORCE internal clock. ● TIME SET (COM) This sets the first half (second half) playing time when playing against the COM (1-Player Play). (The default is 1'30".) - 1'30"...
- Page 34 ● TIME SET (VS) This sets the first half (second half) playing time when playing a versus game (2-Player Play). (The default is 1'30".) - 1'30" → 1'45"→ 2'00"→ 2'15" → 2'30" → 3'00"→ 4'00" → 5'00": The first half (second half) playing time setting. ● G-GOAL TIME (COM) This sets the G-GOAL (extended play) time for when the time runs out (second half finishes), when the scores are tied when playing against the COM (1-Player Play). (The default value is OFF.) - 0'15"→0'30"→0'45"→1'00"→1'30"→2'00"→3'00": The specified extension time. - OFF: No G-GOAL (extended play). ● G-GOAL TIME (VS) This sets the G-GOAL (extended play) time for when the time runs out (second half finishes), when the scores are tied when playing a versus game (2-Player Play). (The default value is OFF.) - 0'15"→0'30"→0'45"→1'00"→1'30"→2'00"→3'00": The specified extension time. - OFF: No G-GOAL (extended play). ● PK SYSTEM (COM) This selects whether to run a penalty kick competition if the scores are tied when the match finishes when playing against the COM (1-Player Play). (The default value is OFF.) - ON [MEMBER 3]→ON [MEMBER 4]→ON [MEMBER 5]: Only the specified number of players can play in the penalty kick. The result is a DRAW if this doesn't determine a winner. - ON [REAL PK]: A penalty kick competition is held with the first 5 players, and if this fails to determine a winner the penalty kick competition continues one player at a time until a winner is determined.
-
Page 35: Calibration
c. CALIBRATION Calibration is a program that corrects the differences between the lever input assemblies of different c abinets. Make sure that you run calibration from this screen whenever the control panel or game board (TRIFORCE) is replaced. CALIBRATION P1 P2 UP 40 40 DOWN C0 C0 LEFT 40 40 RIGHT C0 C0 Make sure that you set up CALIBRATION on a lever for both "PLAYER 2" and "PLAYER 1". PRESS TEST BUTTON TO EXIT Move the P1/P2 lever as far as it will move through 360 degrees around the up, down, left and right d irections. The values entered will be corrected and adjusted by the program, which will have an effect on lever o peration. ● UP: The maximum input value in the up direction ● DOWN: The maximum input value in the down direction ● LEFT: The maximum input value in the left direction ● RIGHT: The maximum input value in the right direction Press the TEST Button to return to the Game Test Menu Screen. − 32 −... -
Page 36: Card Test
d. CARD TEST This performs an operating check on the card reader/writer. * If the CARD R/W 1P (2P) USE setting on the GAME ASSIGNMENTS screen is set to "OUT OF SERVICE" or "OFF", the operation of the card reader/writer cannot be tested. CARD TEST CARD P1: SW OFF : LOCK OFF : INSERT CARD READ/WRITE TEST LOCK ON/OFF CARD P2: SW OFF : LOCK OFF : INSERT CARD READ/WRITE TEST LOCK ON/OFF -> EXIT... -
Page 37: Close Setting
e. CLOSE SETTING Select CLOSE SETTING to display the following screen. Change the setting for the time when the store closes. If you set the store closing time, cards will not be accepted 15 minutes before the specified time. After that, cards cannot be inserted from the SELECT TEAM screen. In addition, the message "Card registration is closing for today." is displayed on the ADVERTISE screen starting 30 minutes before the CLOSE SETTING. Even if a player is continually winning, the card will be forcefully ejected when the match finishes once the time has reached 15 minutes before the shop closing time setting. You can set SCHEDULE TYPE to OFF, EVERY DAY or WEEK. Press the TEST Button to select the item. (The unit is shipped with SCHEDULE TYPE set to OFF.) ● SCHEDULE TYPE: OFF Do not set any store closing times. CLOSE SETTING SCHEDULE TYPE OFF -> EXIT SELECT WITH SERVICE BUTTON AND PRESS TEST BUTTON − 34 −... - Page 38 ● SCHEDULE TYPE: EVERY DAY Set the daily store closing time. Use the SERVICE Button to select the time and the TEST Button to change the time. The time changes in units of 15 minutes, and can be set in the range of 19:00 to 29:00. CLOSE SETTING SCHEDULE TYPE EVERY DAY CLOSE 23:45 -> EXIT SELECT WITH SERVICE BUTTON AND PRESS TEST BUTTON ● SCHEDULE TYPE: WEEK Set a different store close time for each day of the week. Use the SERVICE Button to select the day of the week and the TEST Button to change the time. The time changes in units of 15 minutes, and can be set in the range of 19:00 to 29:00. CLOSE SETTING SCHEDULE TYPE WEEK CLOSE SUN 24:45 MON 23:45 TUE 23:45 WED 23:45 THU 23:45 FRI 24:45 SAT 24:45 -> EXIT SELECT WITH SERVICE BUTTON AND PRESS TEST BUTTON Move the cursor to EXIT and press the TEST Button to return to the Game Test Menu Screen. − 35 −...
-
Page 39: System Update
f. SYSTEM UPDATE Performs an update on the TRIFORCE firmware. If the TRIFORCE firmware version is not sufficient to run this product correctly, you can upgrade the firmware using this option. Refer to Section 3, "Turning the Power ON" for details. If the firmware version does not need to be upgraded, the following screen is displayed. SYSTEM UPDATE MENU ALL PROGRAMS ARE UP TO DATE PRESS TEST BUTTON TO EXIT Press the TEST Button to return to the Game Test Menu Screen. − 36 −... -
Page 40: Bookkeeping
g. BOOKKEEPING Select BOOKKEEPING to display the following five operating data screens. BOOKKEEPING (1/5) [ CREDIT DATA ] COIN 1 0 COIN 2 0 COIN 3 0 COIN 4 0 TOTAL COIN 0 COIN CREDIT 0 SERVICE CREDIT 0 TOTAL CREDIT 0 PRESS TEST BUTTON TO CONTINUE ● COIN 1/COIN 2/COIN 3/COIN 4 Each of these count the number of coins that have been inserted into each of the slots. ● TOTAL COIN Counts the total number of coins for COIN 1 to COIN 4. ● COIN CREDIT Counts the number of credits from inserting coins. ● SERVICE CREDIT Counts the number of credits from the SERVICE Button. ● TOTAL CREDIT Counts the total number of COIN CREDIT/SERVICE CREDIT. Pressing the TEST Button will bring up the following screen. − 37 −... - Page 41 BOOKKEEPING (2/5) [ GLOBAL DATA ] NUMBER OF GAMES 0 P1 ALL CARD PLAY 0 P2 ALL CARD PLAY 0 NEW CARD PLAY 0 PULLING CARD OUT 0 CARD PLAYER 0.0% TOTAL TIME 0d 0h 0m 0s TOTAL PLAY TIME 0d 0h 0m 0s 1P PLAY TIME 0d 0h 0m 0s VS PLAY TIME 0d 0h 0m 0s PLAY TIME RATE 0.0% 1P PLAY RATE 0.0% VS PLAY RATE 0.0% AVERAGE PLAY TIME 0d 0h 0m 0s LONGEST PLAY TIME 0d 0h 0m 0s SHORTEST PLAY TIME 0d 0h 0m 0s PRESS TEST BUTTON TO CONTINUE ● NUMBER OF GAMES Counts the total number of times the game has been played. ● P1 ALL CARD PLAY Counts the number of games that have been played using a card on the P1 side. ● P2 ALL CARD PLAY Counts the number of games that have been played using a card on the P2 side. ● NEW CARD PLAY Counts the number of times a new card has been created. ● PULLING CARD OUT Counts the number of times a card has been pulled out during the middle of a game, making the game switch to GAME OVER. ● CARD PLAYER The percentage of all games that have been played using a card (card player ratio). ● TOTAL TIME Counts the total time that the power has been turned on.
- Page 42 ● 1P PLAY RATE The percentage of playing against the COM (1-Player Play). ● VS PLAY RATE The percentage of versus play mode (2-Player Play). ● AVERAGE PLAY TIME Counts the average play length. ● LONGEST PLAY TIME Counts the longest play length. ● SHORTEST PLAY TIME Counts the shortest play length. Pressing the TEST Button will bring up the following screen. BOOKKEEPING (3/5) [ TIME HISTOGRAM ] 〜 3'59" 0 4'00"〜 4'59" 0 5'00"〜 5'59" 0 6'00"〜 6'59" 0 7'00"〜 7'59" 0 8'00"〜 8'59" 0 9'00"〜 9'59" 0 10'00"〜10'59" 0 11'00"〜11'59" 0 12'00"〜12'59" 0 13'00"〜13'59" 0 14'00"〜14'59" 0 15'00"〜15'59" 0 16'00"〜16'59" 0 17'00"〜17'59" 0 18'00"〜18'59" 0 19'00"〜19'59" 0 20'00"〜 0 PRESS TEST BUTTON TO CONTINUE ● TIME HISTOGRAM Counts the number of plays when each play is categorized by playing time. Pressing the TEST Button will bring up the following screen.
- Page 43 BOOKKEEPING (4/5) [ TOTAL GAME DATA ] TOTAL GAME COUNT 0 PLAYER1 GAME COUNT 0 PLAYER2 GAME COUNT 0 [COM GAME DATA] COM GAME COUNT 0 WIN 0 DRAW 0 LOSE 0 CONTINUE 0 [ TOURNAMENT REPORT ] QUALIFY FOR(PLAY-OFF) 0 FIRST ROUND 0 QUARTER FINALS 0 SEMI FINALS 0 FINAL 0 FINAL WINNER 0 PRESS TEST BUTTON TO CONTINUE ● TOTAL GAME COUNT Counts the total number of plays. ● PLAYER1 GAME COUNT Counts the number of games that have been played on the P1 side. ● PLAYER2 GAME COUNT Counts the number of games that have been played on the P2 side. ● COM GAME COUNT The total number of COM matches. ● WIN The number of wins against the COM. ● DRAW The number of draws against the COM. ● LOSE The number of losses against the COM. ●...
- Page 44 ● SEMI FINALS Counts the number of plays of the third match (tournament semi-finals) against the COM (1- Player Play). ● FINAL Counts the number of plays of the fourth match (tournament finals) against the COM (1- Player Play). ● FINAL WINNER Counts the number of tournament wins against the COM (1-Player Play). Pressing the TEST Button will bring up the following screen. BOOKKEEPING (5/5) [ VS GAME DATA ] VS GAME COUNT 0 WIN 0 DRAW 0 VS WINNING STREAK 0 VS SPECIAL COUNT 0 SPECIAL MATCH COUNT 0 AVERAGE 0.0% [ VS WINNING HISTOGRAM ] WINS COUNT WINS COUNT 1 0 10-14 0 2 0 15-19 0 3 0 20-24 0 4 0 25-29 0 5 0 30-39 0 6 0 40-49 0 7 0 50- 0 8 0 9 0 PRESS TEST BUTTON TO EXIT ● VS GAME COUNT Total number of versus plays. ● WIN Number of versus wins. ● DRAW Number of versus draws.
- Page 45 ● AVERAGE The percentage of SPECIAL MATCHES generated. ● VS WINNING HISTOGRAM Counts the number of winning streaks when each winning streak is categorized by the number of consecutive wins. Press the TEST Button to return to the Game Test Menu Screen. − 42 −...
-
Page 46: Backup Data Clear
h. BACKUP DATA CLEAR Select BACKUP DATA CLEAR to clear the contents of BOOKKEEPING Data. BACKUP DATA CLEAR YES(CLEAR) -> NO (CANCEL) SELECT WITH SERVICE BUTTON AND PRESS TEST BUTTON To clear data, use the SERVICE Button to move the cursor to YES (CLEAR) and then press the TEST Button. When the data has been cleared, the message "COMPLETED" will be displayed. Press the TEST Button again to return to the Game Test Menu Screen. Move the cursor to NO (CANCEL) and press the TEST Button to return to the Game Test Menu Screen without clearing the data. − 43 −... - Page 47 Floor, 5-37-1, Kamata, Ohta-ku, Tokyo 144-8721, Japan Phone: +81-3-5480-6582 Facsimile: +81-3-5480-6584 © SEGA CORPORATION, 2004 The use of real player names and images is authorised by FIFPro Foundation and its member associations. The typefaces included herein are solely developed by DynaComware.