Introduction
Using Xara 3D Maker 7
Pricing and Support
Conclusion
Introduction
Xara 3D Maker 7 is an application that lets you create 3D text and graphics such as headings, logos, titles, and buttons. You can also create 3D animations and export them to GIFs, AVIs, and simple Flash movie sequences, and screensavers for your desktop. With several ready-to-use 3D styles and animations, you can create 3D animations or images for your web pages, mailshots, movies, and presentations.
Xara 3D Maker 7 is from Xara, a company based in Gaddesden Place, UK. Other than 3D Maker, Xara also creates other graphic software such as Xara Web Designer, Xara Picture Editor, Xara Designer Pro, Xara Xtreme 5 Pro, etc. You can learn more about their products and download a 30 days trial version of Xara 3D Maker 7 from their site.
Xara 3D Maker 7 is the newest version of their product that includes some new animation types and more bevel styles. Here is the list of new features in Xara 3D Maker 7:
- Compatible with Windows 7.
- Rarely used fonts are hidden to unclutter the font list (optional).
- Access over 700 ready-made Xara 3D Maker samples instantly via a new Open Samples option in the File menu.
- Automatic save and restore of the current design on program exit and start-up, or on Windows shutdown.
- New View options panel added which gives additional advanced control over the X/Y position of an image against its background, and allows you to precisely change the angle of rotation and viewpoint. A new wireframe mode that can simplify the display and speed up animation viewing time has also been added.
- 7 bevel types added.
- Can export animations with a transparent background in a proprietary format called CFX which can be imported into MAGIX slideshow and movie editing software, Photostory on CD & DVD 9 and Movie Edit Pro 17. Create overlaid 3D captions for movies or slideshows produced in MAGIX software.
- A new scroll animation type added with which you can add scroll animation to text vertically, horizontally.
- A second new scroll in/out animation type added with control over how the text enters and leaves the screen.
My contact for this review was Nova Fisher. Thank you, Nova.
Back
Using Xara 3D Maker
Download the installer from the link given above, run the setup routine, and follow the instructions. You'll end up with a Xara 3D Maker 7 shortcut on the desktop.
Now follow these steps to use the Xara 3D Maker 7:
- To launch Xara 3D Maker 7, go to your Windows Start menu and choose All Programs | Xara | Xara 3D Maker 7 | Xara 3D Maker 7 or double click the Xara 3D Maker 7 shortcut on the desktop. Doing so opens the Xara 3D Maker 7 interface, as shown in Figure 1, below.
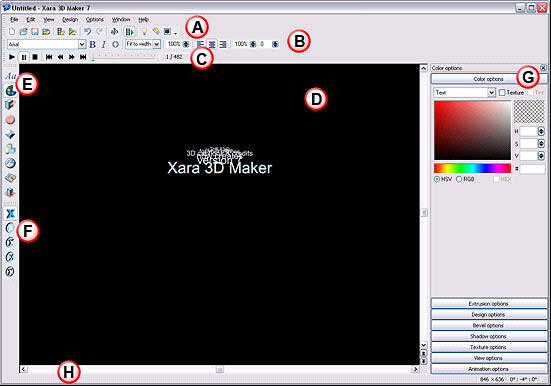
Figure 1: Xara 3D Maker 7 interface- The Xara 3D Maker interface options are explained below:
A. Standard toolbar
- Here you'll get common editing functions such as load, save, export, animation picker, style picker, etc.
B. Text toolbar
- Provides quick access to the main text editing options such as font and size. Note that if you are using Windows 7 and have previously hidden rarely-used fonts in your Control Panel, those fonts will not be displayed in the Xara 3D Maker text toolbar.
C. Time line
- Provides control over animations such as start, stop, pause, and step through animations. If the time line is not displayed by default, select Time line from the window menu.
D. Preview area
- Here you can see a preview of your graphic as you create it. You can even edit the graphic here by dragging on a shadow to move the shadow, or dragging on the graphic to change the extrude or bevel. Right-click anywhere in the preview area to bring up a menu with options relating to that item for example, right-clicking the background gives you the opportunity to change the background color and texture.
E. Options toolbar
- This toolbar provides shortcuts to the different options available which are:
- Text options
- Color options
- Extrusion options
- Design options
- Bevel options
- Shadow options
- Texture options
- View options
- Animation options
F. Design toolbar
- Provides shortcuts to the different design types such as text only, button, board, board with holes and border.
G. Option bars
- Here each bar contains settings for the options of listed above (in Option toolbar). These options can be accessed by clicking on the required bar or by clicking the required button on the options toolbar. You can move and dock the option bars, or remove them completely.
H. Status bar
- Provides feedback on available editing options and also shows you the current size and rotation angles of the 3D graphic.
- When the Xara 3D Maker 7 interface is opened for the first time, it already has some dummy text with animation playing. You can easily change both the text and the animation.
- To change the frame dimensions, choose Window | Frame size which opens the Frame size dialog box, as shown in Figure 2, below. Provide the frame dimensions.
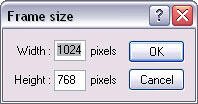
Figure 2: Frame size dialog box - Now to type your own text, choose Text options, as shown highlighted in red within Figure 3, below, from the Options toolbar.
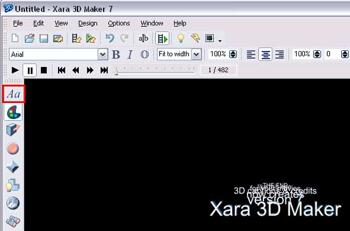
Figure 3: Text options in Options toolbar - This action opens the Text options dialog box, as shown in Figure 4, below.
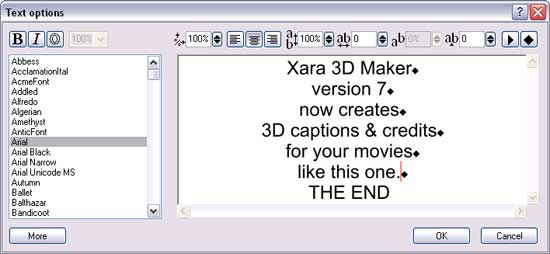
Figure 4: Text options dialog box - Select the entire text and delete it or start typing to enter the text you want. Select any font of your choice, or play around with other text options till you get the required result. Figure 5, below, shows default text has been deleted and new text is added.

Figure 5: Add your own text - Click the More button located at the bottom left of the Text options dialog box to add symbols, as shown in Figure 5, above. Click the OK button to insert the text in the Preview area, as shown in Figure 6, below.
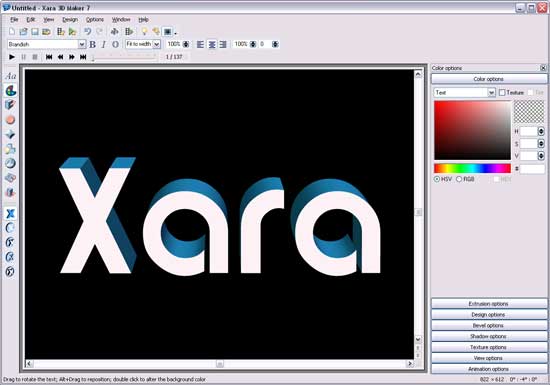
Figure 6: Text added within the Preview area - You will likely also want to customize more, which you can do by clicking any of the option bars on the right-hand side of the interface (the buttons on the options toolbar also open these). Any changes you make are reflected instantly within the Preview area. Change the bevel and extrude if you wish, or in the Preview area drag on the text to change the extrude or bevel, add a shadow and drag it to the required position, drag the text to get the angle you want, change the color of the text or background, etc.
- When done with making all the changes select Export from the File menu and save your work as: ANI (animated cursors), AVI (animations), BMP, CFX, CUR, GIF, ICO, JPG, PNG, SCR (Windows screen saver), or SWF (Flash—bitmap format, static or animations).
Back
Pricing and Support
Xara 3D Maker 7 costs US$39.99, and can be bought online through a secure server.
Support is through e-mail, an online knowledge base, and FAQs. Extensive online tutorials including demo movies are available.
Back
Conclusion
For this price point, Xara 3D Maker 7 does an admirable job, and it provides tons of customization options so that you can create an output that is different and stands apart.
Back


