


Building Rubik’s Mosaic is an amazing group activity but for it, you must have a large number of cubes of the same size. You need not have to know to solve the whole cube rather if you just know to solve one layer then also you can build a masterpiece out of it. Each cube gives us 9pixels so as you increase the number of cubes your picture becomes more detailed. Doesn’t that sound amazing! Here are a few easy steps that you can follow to create Rubik’s cube Mosaics. Let’s get started!
Step 1: Designing or Planning
To begin with, If you are new to creating cubic mosaics, there are a few prerequisites that you should know.
The most important part is to design the image in accordance with the availability of the cubes.
- The number of cubes required is up to you and it also depends on your image. If you have more cubes, the image would be more clear. If you want your image to be more detailed then the number of cubes required will be more.
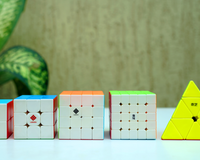
- The size of the cube should be small, these are called “Mini Mosaic cubes”. You can buy these sets of cubes from Cubelelo.com and they can also be customized to your needs.
Keep in mind that you just have 6 colors in your palette. And your image would be made accordingly.
- The next step is to convert your image into Rubik’s pixel form i.e in the actual mosaic form. It is done to ease things. You can do these with the help of different websites like http://www.twisttheweb.net/,
There you just have to upload the image and then select the number of cubes with the next button you get your required image.

Step 2: Solving the Cubes
If you have followed all the steps mentioned above, you would now have a draft image of the mosaic that you wish to create. This will essentially help you visualize your goal better. You can now start working on the mini-mosaic cubes. Keep in mind that you do not necessarily have to solve the cube completely. Instead, you only need to look at the created mosaic image and create the required pattern on one face of the cube. This is the most time-consuming task in the whole process but it’s also a great fun activity when done in a group. Sometimes it becomes difficult to make turns because of its small size but you just got to be patient when you are creating a masterpiece.

Do You Know?
Prithveesh K. Bhat has set a Guinness World record for making “Largest Dual sided Rubik’s cube Mosaic”, leading a team of 20 members. Know more
Step 3: Assembling
You're almost there! All you have to do now is to assemble the solved cubes on a standing board (same size as that of the image) or the floor. You can also drill an angle bar on your wall and assemble the cubes on it.
As the cubes covered the wall you can name it a Mosaic Wall in your office place and use it to display images on festivals or occasions.

Wrapping it Up!
Now you have finally got it. Rubik’s mosaics are amazing. There is no doubt that it would take your bit time to master it but you already know that cubes help you to relax from your stressful workload. Then why not include this activity to destress yourself. So, What are you waiting for! It's time to go on a mini mosaic cube shopping spree and create your mosaic masterpiece and share your experiences in the comments section below.
Happy Cubing!


4 comments
Jethmal Bokadia
For one face we can use twist the web
But for dual side mosaic ?
Is there any link ??
Tannu
How to purchase many accessories for example mat,shirt with my channel name cuber king printed on it
Tannu
Hello sir I am Tannu your customer
Sir can you please tell me how to purchase bundle of drift cube.
kunsh goyal
thanks
but I don’t have those many cubes