
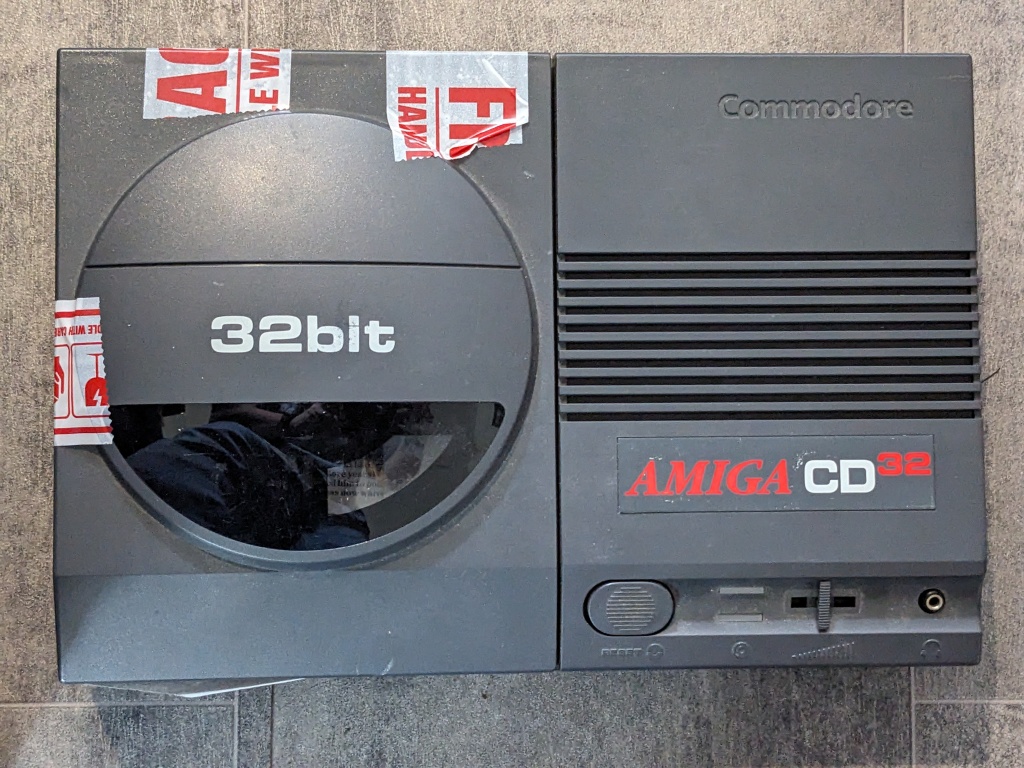
I recently acquired a CD32 which is pretty much in a destroyed state. This is going to be a lot of work to restore, so, let’s make a start.
The Machine
The CD32 is game console which is pretty much an Amiga 1200 inside with an extra chip called Akiko which handles chunky graphics and the CD drive. My one was received with the CD drive broken off the case (I do have the mechanism) and the capacitors removed, as well as the TV modulator. There was some clear leakage on the motherboard.


You can see some clear leakage on the bottom left of the motherboard. The white marks inside the case are where the CD drive mounts have been snapped off and gluing them back was attempted in the past.
Recap
Luckily, the leakage cleaned up quite easily and buzzing with a multimeter found no damage to any traces related to the capacitors. There are a lot of capacitors in an CD32 and this one didn’t have any onboard to use as a reference as I replaced. I therefore followed this Wikimedia photo to figure out which ones were fitted and which ones were not. I also used Amiga PCB Explorer to figure out what the values were. This also helped to figure out which capacitors were no longer needed due to the modulator removal. Whilst I was at it, I replaced the yellow tantalum capacitor, they fail short circuit and this one was not looking great, probably due to the surrounding leakage.
One thing to note with the CD32 is that the through-hole capacitors were often fitted the wrong way around at the factory. This caused them to fail quite early. It is easy to test which way around is correct, and the Wikimedia photo has them the correct way around.
The end result looked like this. Most of the new capacitors are Wurth, with some Panasonics and a Rubycon in there too.

Testing
At this point, I decided to test the motherboard, I don’t have an S-Video or full composite+audio cable handy (I’ll acquire those next), and these are the ways you would typically connect a CD32. I therefore used an audio cable to hook the composite video up.

I turned it on, and…

Success? Sort of? We definitely have a booting board and the boot animation works. But the video only has a blue and green signal, no red.
Seeing Red?
We can follow the schematics to see the path the red takes.

So, it comes out of the video DAC, through the 4066 switch and into the CXA1145 encoder, which merges the red, green, and blue to make the composite and s-video outputs.
The traces all seem to test fine, and the resistors are good. If I had to hazard a guess at this point, I would say that the 4066 is likely bad. But we can test this.
Next Steps
A couple of different things need to be done. First off, I need to figure out where the red is failing. I will do this using an oscilloscope to trace the signal.
In addition to repairing the motherboard, I am going to need a new top shell. I’m trying to source one of those, the only place I can find one so far is Analogic, and it is quite expensive from there. If you know where I can get hold of one, please let me know.

Leave a comment