Take a look at some of the images you most like to look through. They’re full of textures and detail. Texture photography uses detail and drama to compel the viewer. The texture is what brings your boring 2D snapshot to life, giving it a 3-dimensional feel that’s exciting to the viewer. If you’re ready to be one with your camera and create some unique photography that defines your style, let’s dive in.
The Uniqueness of Texture Photography
In photography, texture relates to the surface of an object, and the visual quality that’s conveyed in the image you capture. To create photography textures, you must learn to capture the variances in color depth, tone, and shape by choosing the right exposure.
Settings and Camera Tips for Photographing Texture
To create a sharp focus in images, you want a high f-number. Setting your aperture to f/6 or higher can help you achieve the texture you want. You can capture crystal clear texture by using a tripod and making sure to use the timer on your camera to eliminate any shaking when pressing the shutter button.

Finding Beautiful Texture Photography
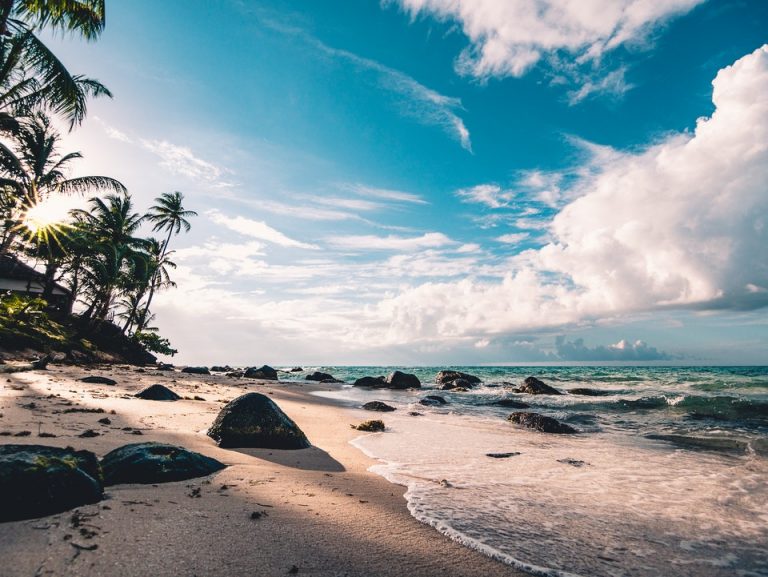
One way to find great textures for photography is to take a moment and look for objects in your immediate environment. Practice with simple objects you find around the house and outside. You will begin to notice the beautiful details as you take more and more photos of the things you use every day.
Using Your Imagination to Create Your Textures
The only thing you need to create your textures is your imagination. Texture photographers have to get creative when creating texture in their photos. One way to get started is by going out and collecting some similar objects such as river rocks, pebbles, or flowers.
You can even photograph running water, or use the timer on your camera to pour water over a ridged surface so that it creates contrast and depth in the image with lighting.
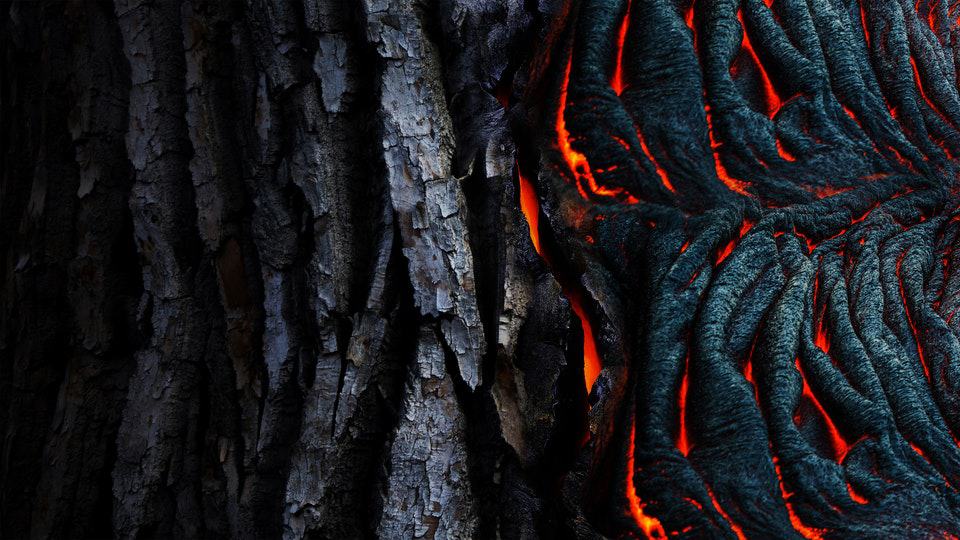
Using Light to Create Depth in Your Textures
If lighting has you stumped, remember that one way to create the detail you need for great textures to shine is by using side lighting. Side lighting helps create the right shadows in your image. Another way to get just the proper lighting you like is to use your camera to shoot photos during the “magic hour.”

Creating the Right Lighting Effects
Learning how to use your camera to create the right lighting effects will come in time and with experimentation. If you like to use light to develop new deeper textures, remember these tips.
Midday light or direct lighting can add more contrast than you need for your photos. Soft light found in the evenings can make pictures grainy. Texture changes throughout the day with lighting, so play around with using your camera to take photos in different lighting between these two times.
Learn How to Create Depth
As a photographer, you will use three factors to help create the right depth of field. You will use the correct aperture, the focal length of the lens, and the right distance between the subject and the camera. Combining these factors will help you create a specific sharpness within the photograph so that the subject appears in focus.
Adding Lines to Add Depth and Shading
You can enhance the textures in your photos by using lines. Adding lines and shading to an image can help the image appear to have more depth, which is how you create texture. You can do this by photographing lines or by adding them in with photoshop or your preferred photo editor.
Bringing Irregularities into Focus
Working with texture in photography is all about finding new techniques. Communicating texture is a technique that requires you to shoot a photo of the profile of an object so that it’s irregularities come into sharper focus. You can also experiment with long exposure to great texture, depth, and light in your images.
Harmonizing Elements
Texture photographers create harmony in images by combining visually stimulating elements of the same type in a single frame. One detail that you can’t forget when creating harmony in art is that it must have contrast.
You can imagine this by imagining many waterfalls, surrounded by fall leaves. Light reflects in the water, contrasting with multi-colored autumn leaves. Harmony in photos that doesn’t include contrast will leave the viewer uninspired.
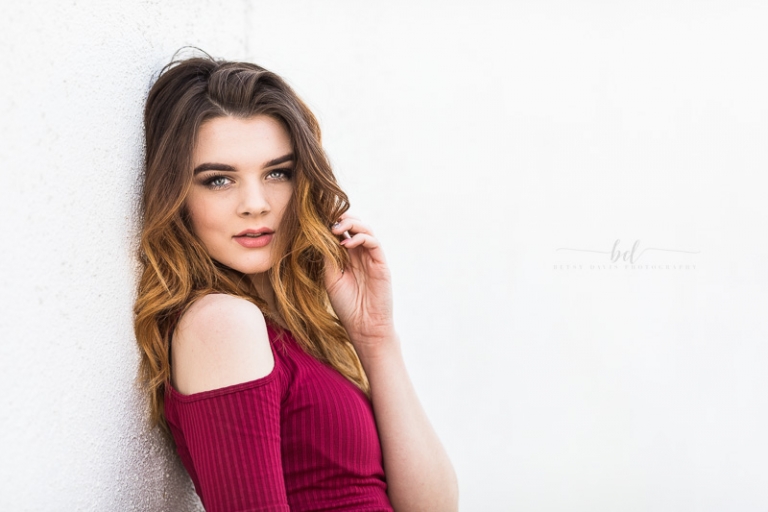
Creating Portraits in Texture Photography
You may not have guessed that you could add textures to portraits to enhance them, but it’s one of the many secrets of photographers. For example, you can add textures to bring a face to life, as the textures will create depth and contrast. Think about using hair or freckles to your advantage.
Use Simple Textures to Create Stunning Double Exposures
Double exposures are images that are created by merging two photos. One photo is typically a portrait or landscape, while the other is usually a silhouette.
Getting into the habit of taking a few texture photographs of nature and landscaping while you’re at any shoot will help you create a resource folder you can come back to later. Then, you’ll have images to choose from for double exposure projects down the road.
Selecting the Best Photos
Choosing the best photos doesn’t have to be complicated. Follow these tips to find the images you like best. As you’re flipping through your photos, look for the ones that feel most alive. The ones that have depth, contrast, and great detail.

Editing the Texture in Photography
In case you need your textures to stand out a little more, try these editing tools.
- Contrast – If your texture is dull, you try editing the contrast to enhance the image.
- Clarity – Try experimenting with this feature, so add detail to your photos.
- Shadows and Blacks – You’ll find these tools separately in most editing programs, shadows will have a more subtle effect on your images than blacks.
Using Techniques in Photoshop
If you want to brush up on how to create textures in Photoshop using the brush tool, you can find my tutorial here.

Take a Free Class to Learn More
If you want to learn more, make sure to follow this link to our free online photography classes. It’s as simple as filling in your name, email address, and a few required fields. The published required fields are marked, so you can’t miss them. All rights reserved.